Archive | recipes & kitchen tips RSS feed for this section

Simple Healthy Summer Meals

Photo Credit: Kirti Poddar

Note from Lindsay: My heart is full this week as I process all the intense images and knowledge I gained this past week in the Philippines. My body is also taking its precious time to adapt to the time change. Sleep has been avoiding me. I’m just trying to take it easy and pray for the Lord’s grace to just focus on my priorities this week. Going to launch right into our June theme where we will be sharing about cultivating simplicity and intentionality in the kitchen. Join us!

Post by Contributing Writer, Michele

Summer is usually a time of impromptu gatherings with friends, overnight visitors, and busy children’s activities in our family. On those hot summer days, standing in front of the oven is the last place I want to be, but everyone still needs to be fed.

To keep from resorting to ice cream for dinner (most of the time), I love having some frugal, simple-prep meals/ingredients on hand, using a combination of “once-a-month” meal preparations, a slow-cooker, and fresh produce.

Beans & Grains

Cook up a big batch of beans. You can put them in the slow cooker, if you just can’t bear to turn on the stove, and put it in your garage or shady porch to cook during the day.

I usually find black beans or chickpeas/garbanzo beans pretty versatile for summer meals. Store extras in freezer containers or baggies (stack bags flat in the freezer) for future meals. You can do the same with grains, such as millet or brown rice. (Cooked rice is perfect for making a fried rice to go along with a stir-fry!)

Some fun summer bean meals:

Photo Credit: roland

Blender Meals

On a hot day, a nutrient-rich smoothie can be a welcome side to a meal. You can make a Green Smoothie or a Fruit Smoothie, adding in plenty of whole milk yogurt or kefir. A chilled, blended soup can be refreshing on a hot evening, such as:

Eggs

When talking with fellow “real food” blogger friends last fall, most of us mentioned the favorite “busy day meal” trio of Popcorn, Smoothies, and Omelets (toss in some garden veggies!). Stuffed Deviled Eggs, Omelets, or even a “breakfast for dinner” of scrambled eggs & soaked waffles are simple, nourishing meals that won’t heat up the kitchen.

Photo Credit: sporkist

Batch Grilling

Not just for burgers; use the barbecue grill, and cook up a whole chicken, big batch of meats, or veggies while the coals are still hot! Leftover cold grilled chicken or beef is perfect for summer salads (such as Southwest Chicken Salad) or sandwiches. Grilled veggies or sausages are delicious in an omelet or soups, as well as Grilled Veggie Sandwiches.

Photo Credit: coanri

Fresh Produce

You may be gleaning produce items from your garden on an as-needed basis (such as lettuce, tomatoes, or carrots). But if you have a veggie drawer or fruit basket full, prep them into salads or veggie trays for quick snacks or appetizers (perfect for those drop-in guests!).

Use a melon baller to make quick work of a large melon, and toss together a fruit salad. A bowl of a nourishing homemade creamy dip is a great option to have on hand, too, with your veggie trays.

Cold salads can be made into meals, too! Stir in some shrimp or canned salmon, and serve in a wrap or stuffed into a bell pepper for a fun picnic meal.

You don’t have to do all your prep-cooking on one day.

Just make extra when you do cook a meal, and put it in the freezer- alongside the Strawberry Ice Cream! What are your favorite summer meals?

Comments { 14 }

Frugal Herbal Hospitality

Photo Credit: Steven Depolo

I love regularly heating up a pot of tea to serve guests. Many relationships have been built and hearts ministered to over a steaming, fragrant cup of tea in our home.

However, with the rise in grocery prices, the cost of purchasing boxes of tea bags at the grocery store can really add up; especially if you’re making big pots of tea to serve a crowd!

It has been much simpler and cost-effective to make my own tea blends from dried bulk herbs (such as from Mountain Rose Herbs) or from our own homegrown herbs. You can make your own tea bags, use a mesh tea ball infuser, or a French Press to keep all the leaves contained.

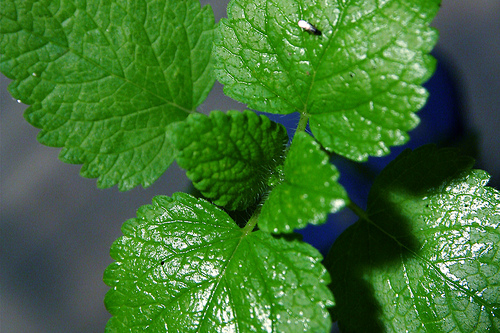
Mint is one easy-to-grow plant (in fact, it can quickly take over a flower bed, so you may want to plant it in a separate pot), and will abundantly supply many cups of tea!  Last spring, I planted mint right outside our front door, and it was a beautiful addition, as well as supplying a pleasant aroma to our entrance. (Plus, it was easy to reach outside to quickly pick a few springs, without even having to leave the front porch!)

A pitcher of iced tea, such as my sweet Rose-Mint Delight Tea, will be welcomed on a hot summer day, and a relaxing pot of hot tea is soothing on a chilly, rainy evening. One of my new favorites is a calming blend of Lemon Verbena and Peppermint (use organic herbs, if possible). Since there actually isn’t any “tea” in this blend, it’s really an “herbal tisane.”

Spring Meadow Tisane

(recipe courtesy of Hampton Creek Inn)

Per Cup, add:

1 1/2 tsp. dried Lemon Verbena
1/2 tsp. dried Peppermint

Steep in a cup of hot water for a few minutes, and sweeten if desired. Savor and enjoy!

What is your favorite beverage to serve up when guests arrive?

Comments { 11 }

Gluten Free/Dairy Free Blender Waffles or Pancakes

We had a lovely waffle dinner the other night with family and friends in our community group and it was fun to be able to meet the needs of some of our food sensitive friends with this scrumptious variety that is completely gluten and dairy free. They are mighty tasty! They turn out light and fluffy so you cannot even notice the difference. Even if you are not sensitive to these foods, its a nice recipe to have on hand if you run out of your other  grain choices. Plus, I am becoming more and more convinced that having a good variety in your diet is very beneficial!
This recipe is made with the simple use of your blender. No grain grinder is necessary. You can soak the batter overnight for increased benefits (as brown rice has a small amount of phytates, learn the benefits of soaking here), or simply skip that and proceed with the recipe. Soaking also helps to break down the grain so it is softer, otherwise it will add a bit more crunch to your waffles, which is yummy too. I often prepare this recipe for last minute pancakes if I forget to soak my standard whole grain blender recipe.

Ingredients:

1 1/2 cups coconut milk, rice milk or hemp milk, or coconut milk kefir/water kefir (I prefer canned coconut milk and water it down 1/2 and 1/2 otherwise it is a bit thick. It adds the best flavor and texture to the waffles. If you use other options, make sure to increase grain choice by 1/4-1/3 cup so the batter is not too thin.)
1 1/2 cups whole raw brown rice and millet (I like to do half and half of each grain, but you can also do all brown rice or all millet. You can also use gluten-free rolled oats or quinoa, which are also wonderful additions.)
2 Tablespoons coconut oil or olive oil (preferably extra virgin cold-pressed)
2 teaspoons vanilla extract
2 eggs (preferably pastured farm fresh)
2 teaspoons baking powder
1 teaspoon sea salt
1/2 teaspoon baking soda

Directions:

1. In a blender, combine your choice of milk, grain, oil and vanilla extract. Blend on high for 1-2 minutes until the grain is broken down into tiny little bits.
2. Cover and soak overnight (about 8-12 hours).
3. After soaking, add eggs and blend again for 1-2 minutes, until the batter is smooth. You may have to add a 1/8-1/4 cup water to get the batter blending in a vortex.
4. Add the baking powder, salt, and baking soda and pulse briefly just until blended.
5. Prepare waffle iron or pancake griddle. I use olive oil on my Krups waffle iron for best results and grease generously between each waffle.
6. Cook for approximately 4 minutes on the waffle iron. If making pancakes, rotate when lightly brown and fry on other side till fully cooked.

Top with your favorite maple syrup and berry sauce (recipe to come)! You can get organic maple syrup at Amazon for only $16.83 with the Subscribe and Save option. A great deal!

Yields: 3-4 waffles, 20+ pancakes

For my standard whole grain waffle recipe, visit here.

Comments { 44 }

Sourdough Chocolate Cake & Natural Powdered Sugar Frosting

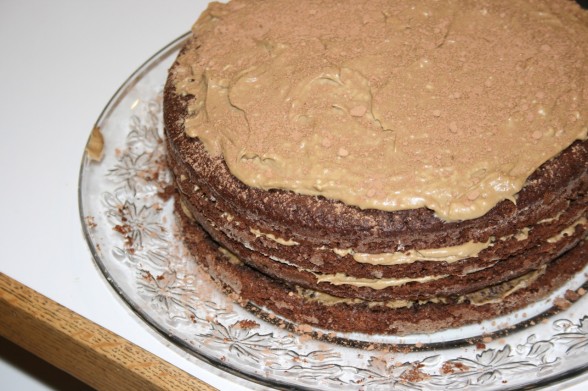
We celebrated my little man Titus’ second birthday this last week and what a joyous celebration it was. I knew it was my opportunity to experiment further with a healthy use of sourdough to make a chocolate cake. What a surprise! With my sourdough starter, whole wheat flour, and sucanat (as my natural sweetener of choice), the result was a delicious moist semi-sweet chocolate cake that was not sour in the least. I was thrilled to make a healthy dessert. I made two 8 inch round cake pans with the recipe and then cut them each in half to make a four layered cake. I layered it with cream cheese frosting and finally cocoa powder dusted over the top. A healthy cake? Amazing. Here’s my adaption:

  • 1 cup fed sourdough starter (I purchased my starter through Cultures for Health and it was alive and well in one week!)
  • 1 cup milk of your choice (I used half cow’s milk and half hemp milk)
  • 1-3/4 cup whole wheat flour (preferably whole wheat pastry flour for a softer texture)
  • 1-1/2 cups sucanat/rapadura
  • 1 cup unrefined, virgin coconut oil, melted
  • 2 teaspoons vanilla extract
  • 1 teaspoon sea salt
  • 1-1/2 teaspoons baking soda
  • 3/4 cup traditional cocoa powder
  • 2 teaspoons finely ground coffee
  • 2 large pastured eggs

Directions:

1. In a large mixing bowl, combine the sourdough starter, milk, and flour. Cover and allow to sit at room temperature for 8-12 hours. I like to set my sourdough to soaking in the evening and then finish it the next morning. You can sit up to 24 hours but you will have more of a sourdough taste to the mixture which may be less desirable.

2. Preheat the oven to 350 degrees and grease 2 (8 inch) round/square cake pans with butter or coconut oil. Dust with flour to make sure it comes out easily after cooling.

3. To the sourdough mixture, add sucanat/rapadura, coconut oil, vanilla, and eggs. Beat gently until well combined.

4. Add salt, baking soda, and ground coffee. Beat briefly till smooth.

5. Pour cake mixture into your prepared pans and bake in the oven for 20-25 minutes, or until a toothpick/knife inserted in the middle comes out clean. Cool completely before turning over the pans and allowing the cakes to pop out onto your platter of choice.

You may frost between the two layers (which will more likely fall apart at slicing), or divide the cake into four layers (each cake cut in half horizontally) by  inserting toothpicks half way up the side about 2-3 inches apart all around the side circumference of the cake. Take a serrated knife and line it up on top of the toothpicks, using them as your guide, and slice carefully through the center of the cake until it is divided in half horizontally. This technique results in a much more even cut. Here is a picture of this process.

For more inspiration on how to create your own sourdough and a wealth of delicious recipes, check out the Gnowfglins Sourdough eCourse. Thanks to Gnowfglins for the original recipe that can be found here. Highly recommended!

Cream Cheese Frosting with Powdered Sucanat

Did you know you can make a healthy natural frosting by blending sucanat (the whole cane sugar) or rapadura in a blender to make your own powdered sugar? Thanks to Laura at Heavenly Homemakers inspiration, I made my own cream cheese frosting. You may add 1/2 cup cocoa powdered to frosting for more of a chocolate flavor.

1 cup sucanat/rapadura
1 (8 oz) package cream cheese, softened
1/4 cup butter, softened
1 teaspoon vanilla extract

Place 1 cup of sucanat/rapadura in your blender and blend until light and powdered (about 30 seconds). Combine cream cheese and butter together in a large bowl and whip until creamy. Slowly add your powdered sucanat and vanilla until it reaches your desired sweetness. Spread out over your cooled cake and enjoy!

Comments { 21 }

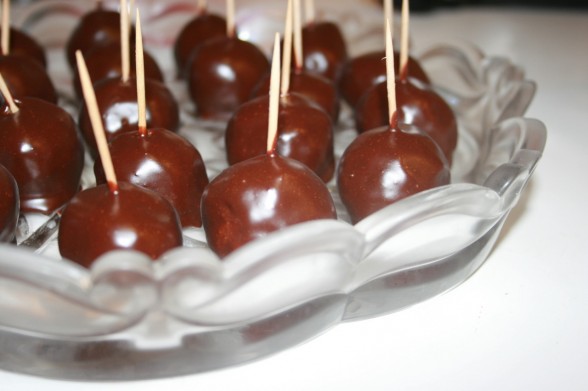
Chocolate Peanut Butter Delights – the perfect treat for your man!

Want to make an extra special treat for your husband or the special man in your life? These chocolate peanut butter delights will surely bring a smile to his face and increase his love for you! Remember the way to a man’s heart is through his stomach, and I have found it to be true. They are a true favorite for my hubby! Don’t stop creating special goodies for him and he will be a blessed and happy man!

1 cup peanut butter (creamy is preferred)
2 cups powdered sugar (you can substitute with ground rapadura/sucanat, if desired)
1 cup chopped nuts
1/2 cup butter, softened
6 oz chocolate chips
3/4 Tablespoon paraffin household wax, optional (can be found in the baking section of your local grocery store)

Directions:

  1. Mix together the peanut butter, powdered sugar, chopped nuts, and softened butter. Cover and chill in refrigerator till firm.
  2. Roll into small 1 inch balls and chill again till firm.
  3. Melt the chocolate chips and wax together in a double boiler, mixing constantly until fully melted.
  4. Place a toothpick in each ball and dip balls into melted chocolate and set up on wax paper.
  5. Chill balls again till firm. Serve and enjoy! Store in refrigerator.

The paraffin wax is an optional ingredient to help increase firmness and presentation. It can be easily eliminated or you can experiment with beeswax as a viable alternative.

Other yummy valentine treats:

Healthy Valentine Day Treats

Comments { 42 }

Cranberry Orange Coconut Cookies

Want to prepare some more healthy treats for the holidays or your upcoming cookie exchange? Or how about preparing some tasty treats for your neighbors this Christmas?
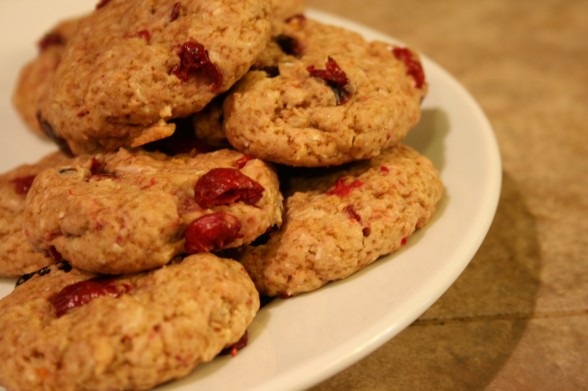
Today we are joining Domestic by Design in sharing a few favorite holiday treats that have been adapted to make them more healthy and nutritious! Check out the fun Real Food Cookie Exchange Carnival and share your favorite recipes! Since cookies are a special treat at our house, we mainly stick with unbleached white flour (or half and half with sprouted wheat), as it gives more tasty, fluffy results. But you can certainly use whole wheat flour if desired. Other than that, I like to use coconut oil and natural sweeteners to give them a more nutritious nature. Here is one of our new favorites!

These cranberry cookies are fabulous! They are soft, rich and flavorful with a splash of red color to make them a perfect holiday treat.

Cranberry Orange Coconut Cookies

Ingredients:

  • 1 cup butter or coconut oil, softened (half butter & half coconut oil works best!)
  • 1 1/2 cups rapadura/sucanat (you can certainly cut back to about 1 cup if using orange juice concentrate or dried cranberries)
  • 1 egg
  • 2 teaspoons grated orange zest
  • 1 teaspoon vanilla extract
  • 2 tablespoons orange juice or orange juice concentrate
  • 2 1/2 cups unbleached white flour or whole wheat flour (increase baking soda to 1.5 teaspoons)
  • 1/2 teaspoon baking soda
  • 1/2 teaspoon salt
  • 2 cups chopped cranberries, fresh or dried (fresh is preferred)
  • 3/4 cup unsweetened dried coconut flakes

Directions:

1. In a large bowl, with a mixer on medium speed, beat butter/coconut oil, sweetener, orange peel, orange juice, and vanilla until smooth and light.

2. In a medium bowl, mix flour, baking soda, and salt. Add to butter mixture, stir to mix, then beat on low speed until dough comes together, about 1-2 minutes. You may have to add 1 more Tablespoon water or orange juice to get it to come together. Mix in cranberries and coconut flakes.

3. Shape dough into 1-inch balls and place about 2 inches apart on an greased baking sheets.

4. Bake in a 350° degrees until cookie edges just begin to brown, 12-15 minutes (shorter baking time will yield a chewier cookie; longer baking time will yield a crispier cookie). If baking two sheets at once in one oven, switch their positions halfway through baking. Let cookies cool on sheets for 5 minutes, then use a wide spatula to transfer to racks to cool completely.

Yield: 3-4 dozen.

Some of our other favorite holiday treats, that would work beautifully on a cookie platter for your neighbors:

Healthy Homemade Fudge
Healthy Peanut Brittle

Gingersnap Cookies

Happy holiday baking!

Comments { 19 }

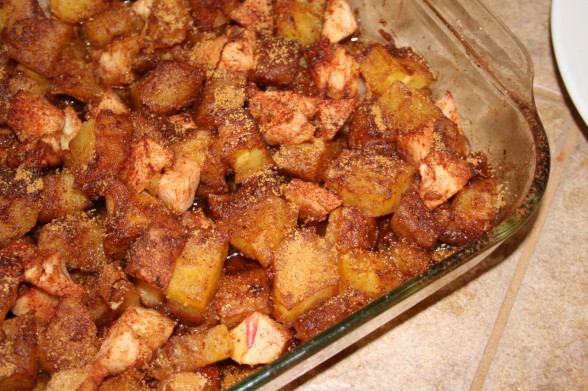
Sweet Potato & Apple Casserole

This is my favorite side dish for our holiday celebrations! It is simple, nutritious, and always receives rave reviews! Yes, it is certainly a bit of dessert with dinner. Yum! It’s even better prepared a day in advance, giving it more time to mesh the flavors.
  • 4 sweet potatoes, peeled and cut into 1/4 inch slices
  • 3 apples – peeled, cored and cut into 1/4 inch slices
  • 1/2 cup sucanat/rapadura
  • 2 teaspoon ground cinnamon
  • 1 1/2  teaspoon ground nutmeg
  • 1/2 cup butter or coconut oil (coconut oil adds wonderful flavor to this dish!)
  • 1/2 cup chopped pecans (optional)

Directions

  1. Peel and slice sweet potatoes and apples into 1/4 inch slices.
  2. Melt the coconut oil/butter and add sweetener, cinnamon, and nutmeg.
  3. Place the slices of apples and sweet potatoes throughout a 13 x 9 inch casserole dish. Drizzle with coconut oil and spice combination. Gently combine. Sprinkle with pecans, if desired.
  4. Bake at 350 degrees F (175 degrees C) for 45 minutes, or until lightly browned and soft.

Yield: 10-12 servings.

This post is a contribution for the Whole Foods for the Holidays: Side Dishes Carnival!

May you all have a very blessed Thanksgiving!

Comments { 18 }

Homemade Natural Chapstick

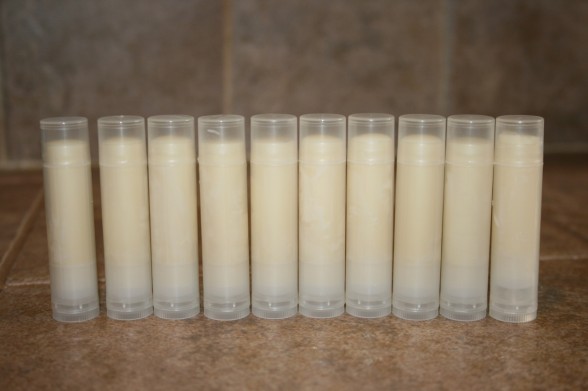
I frequently experience dry and chapped lips and often use chapstick as a means of solving the dryness and providing me with moisture and comfort to my lips. Today, I want to share with you a simple tutorial on how to make your own chapstick with 3 completely natural ingredients. They happen to be my favorite: shea butter, coconut oil, and beeswax. These ingredients help moisturize, sooth, heal, and restore dry lips naturally. They grow in creation and team up together for a very effective lip balm! The balance in the ingredients gives it a very moisturizing and non-greasy affect. It blends into your lip in a matter of a few seconds and does not leave a glistening oil appearance. This recipe is so easy, it would make great Christmas stocking stuffers. And the beauty of it is that this simple recipe also makes a fabulous hard lotion bar – perfect for dry and cracked skin. You can easily make a smaller or larger quantity as desired. Any extra can be made into a hard lotion bar by pouring into ice cube trays.
Ingredients:

2 Tablespoons beeswax (about 1 oz)
2 Tablespoons coconut oil
2 Tablespoons shea butter
12 lip balm containers
dropper

Directions:

1. Melt beeswax in a small pan or crockpot over low heat. Add coconut oil and shea butter until all ingredients a melted. Add a few drops essential oil if desired. I did not use any essential oil and it is smells wonderfully like honey!
2. Using a small medicinal dropper, pour the melted liquid into your lip balm containers. Add a few extra drops to the top after filling each container as the ingredients will shrink as they cool.
3. Cool completely to harden. Cover with cap and decorate or label as desired.

Enjoy nice cool and refreshing natural lips!

I purchased all the ingredients, including dropper and lip balm containers from Mountain Rose Herbs.

This video is offered courtesy of Made On Hard Lotion bars, where you can purchase these lovely lip balms already prepared for you!

Comments { 85 }

Creamy Garlic Mashed Potatoes

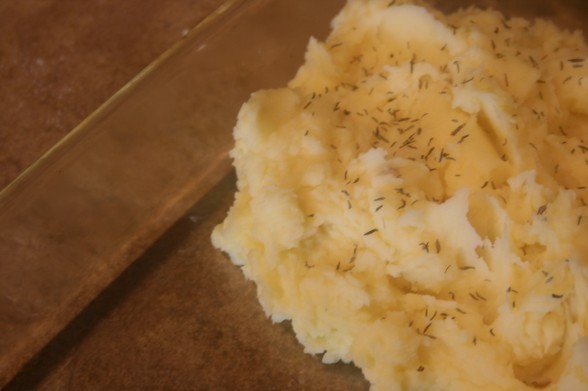
With the holidays just around the corner, we cannot miss out on a large pot of mashed potatoes! They are truly delicious when topped with gravy or simply eaten on their own. Mashed potatoes are a huge hit for our family, and we serve them with roast chicken, beef burgundy, and many other meat dishes. I find most mashed potatoes to be dry and flavorless…but not when prepared with these simple ingredients! Don’t skimp on the butter – it makes a world of difference!
8 large yukon gold potatoes (yukon gold make the most golden delicious mashed potatoes)
1 cup potato water (reserved from cooking liquid – can be replaced with chicken broth or cream for even more flavor!)
1/4 cup mayonnaise (can use cream cheese or sour cream, as desired)
2 garlic cloves, minced
1/3 cup butter (or 5-6 Tablespoons)
1 teaspoon salt
dash of pepper

Directions:

1. Peel the potatoes and cut into quarters. Place in a large pot and fill with water just until the potatoes are covered. Cover and bring to a boil. When boiling, remove lid and allow to cook for about 35-40 minutes, until potatoes are easy to prick with a fork due to softness and falling apart. Allow to cool slightly.
2. Carefully drain the majority of the water, reserving approximately 1 cup. Place all the potatoes and reserved 1 cup of the potato water in a mixer. Turn the mixer on and blend until all the potatoes are nicely mashed.
3. Add mayonnaise, minced garlic, butter and salt. Continue to mix until thoroughly combined. Season with additional salt and pepper as needed. Add more liquids if necessary to make a creamy consistency.

Keep warm till ready to serve! Yum!

Yield: 6 servings.

Comments { 13 }

Stretching A Whole Chicken for 4+ Meals

Every year our family purchases 12 lovely pastured chickens from a local farm. Chickens that have enjoyed the great outdoors to their hearts content makes the most nutritious bird. Only 12 chickens? Yes, I use one chicken each month and make it stretch for at least four or more meals for our family of four. It is a great frugal way to get the most value and nutrition by purchasing them whole. You get all bones which make fabulous broth! Here I am today to share our method of preparing multiple meals from one chicken at one time.
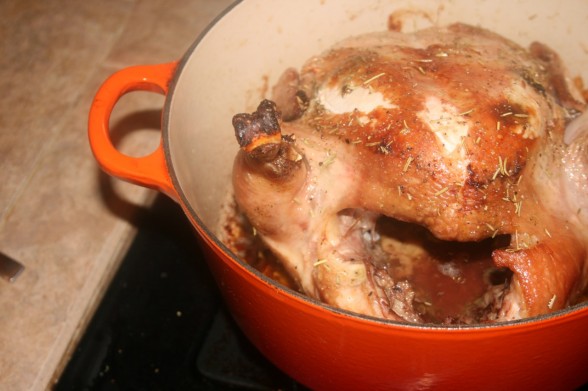
Roasted Chicken

The first step is to thaw the whole chicken and prepare it into a scrumptious roast while a batch of mashed potatoes, gravy, and a side salad!

Ingredients:

1 large chicken (4-6 pounds)
2 Tablespoons softened butter or coconut oil
2 Tablespoons melted butter, coconut oil, or olive oil
2-3 garlic cloves, minced
1 teaspoon parsley, oregano, or basil (or combination)
sea salt and pepper
Rosemary

Directions:

1. Wash and pat dry the exterior and interior of your chicken. Remove any giblets that may be in the cavity and set aside for your broth.

2. Combine the 2 Tablespoon butter with garlic and parsley/oregano/basil seasonings. Carefully peel back the skin at the back of the neck and rub the butter seasoning mix all around the meat, between the skin and meat. This will give the meat a wonderful moist texture. You can skip this step if you are in a hurry and the meat will still be fabulous with just the outside oil and seasoning!

3. Place chicken in a roasting pan, dutch/french oven, or any oven safe pan you may have. Preferably the more fitted the container the better for keeping all the juices together. Place the chicken breast side down into the pan.

4. Cover chicken with half the melted butter/oil and season with salt, pepper, and rosemary as desired.

5. Place uncovered in a 350 degree oven for 1 hour.

6. After 1 hour, rotate the chicken and sprinkle on the remaining butter/oil and season as desired and return to oven for an additional 1 hour.

7. Chicken is done when the legs pull away from the body of the chicken and if you cut in between the leg and body and the juice runs clear.

8. Allow to sit for 5-10 minutes before slicing and serving.

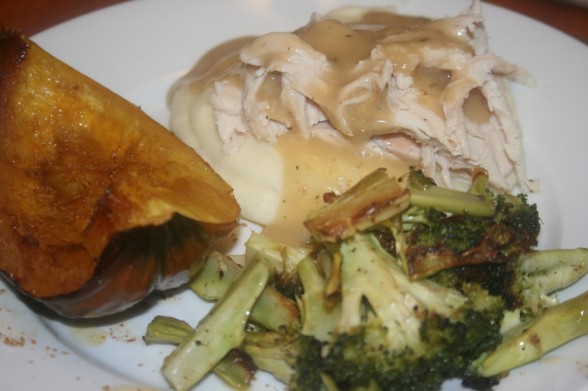
We slice up this chicken and serve with this yummy gravy:

Chicken drippings
1 Tablespoon arrowroot powder
1/2 cup dry white wine
salt and pepper to taste

1. Combine all ingredients in a small saucepan over medium heat and whisk together till smooth and thickened. Season to taste.

We don’t eat a lot of meat at any given meal, but make it stretch further by eating more vegetables. As you can see in the photo, I serve the roast chicken over mashed potatoes with a side of broccoli and squash. This really helps to get the most amount of meals from one chicken.

After we have this fabulous chicken for dinner, I place the entirety of the remaining chicken in the fridge overnight. In the morning I prepare the following two dishes at once, because it saves time and energy. Sometime the next day, de-bone the chicken and remove all the chicken meat and place in a separate bowl. Set aside two cups of meat for Chicken & Dumplings, and two cups of meat for Chicken Curry or another dish of your choice. These can be placed in a half gallon jar in the fridge till ready for use. Any additional meat is used for chicken sandwiches to send with hubby for lunches.

Chicken Stock

Bones from 1 whole chicken
Gizzards or feet (optional)
1/2 cup white vinegar
12-16 cups filtered water
1/2 onion, chopped in half
2-4 carrot peelings
2 celery sticks and tops
1 bunch parsley (or 1 Tablespoon or so dried parsley)

Homemade chicken stock is full of healing properties.

1. Place all the bones in a large stock pot. Leave a small portion of the chicken on the bone if you desire to make a chicken soup. Add the reserved giblets, chicken feet, or any additional bones you may have reserved.

2. Fill the pot with approximately 12-16 cups of filtered water.

3. Add white vinegar and allow the mixture to sit for 30 minutes. Vinegar is necessary to draw out the minerals, particularly calcium, magnesium and potassium, into the broth. During this time, you want to prepare your vegetable additions.

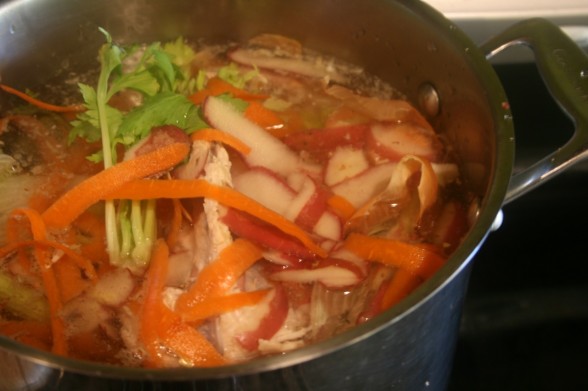
4. You can use any older looking vegetables, carrot peels, onion peels, celery tops, potato peels, etc. I love making stock because nothing goes to waste! Many times I will store a bag of peelings in the freezer from other dishes that can be thrown in for the stock.  I will actually peel my ingredients for my next recipe, a double batch of Chicken & Dumplings, and use the peelings for my stock. I use approximately 4 carrot peelings, 1/2 onion (cut into wedges), 2 celery tops and 1 celery stalk cut in half, and 2 potato peelings. There is no need for perfection here. I use what I have on hand and it all goes in. ;)

5. After adding the vegetables, bring the pot to a boil and then reduce the heat to a simmer and let it cook for 12-24 hours.

6. About 10 minutes before finishing the stock, add 1 bunch of parsley.

7. After it has cooked, cool completely. Then drain the broth from the vegetables and bones. I will discard the vegetables and remove any additional meat on the bones for a chicken soup or other purpose before discarding the bones. I will freeze half of the stock by placing in a large gallon size freezer bag. This will be used for soup for another meal.

The remaining stock I will use for soup within the week – Garden Chowder or Zuppa Tuscana are regular delicious soups at our house!

Chicken & Dumplings

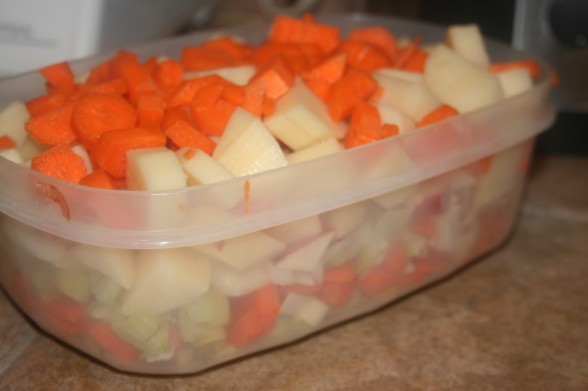
In the picture above, you see all the chopped veggies that I prepare for my Chicken & Dumplings dish. I have just peeled them all for my stock and use the remaining vegetable chopped nicely for this dish. I use the reserved two cups of chopped chicken for this recipe. I can then prepare this right away or cover and place in fridge for the evening meal. I can easily make a double batch of Chicken & Dumplings in two separate 8 x 8 pans and freeze one for another busy day.

Chicken Curry

With the additional 2 cups of reserved chopped chicken meat, I will often make Chicken Curry - another delicious and nutritious meal. Another favorite would be Chicken Enchiladas that could also be made with this meat.

Finally, any remaining meat makes some fabulous lunches for my husband throughout the week. Roasted chicken sandwiches with mayo, dijon mustard, cheese, pickles, lettuce and any other toppings make a full satisfying sandwich!

So my whole chicken has made 1 roast, 1 batch of chicken stock (enough for at least 2 soups), 2 main dishes, and enough for a few additional chicken sandwiches for lunch! I would say we used everything possible on that chicken!

How do you use your chicken?

Comments { 93 }