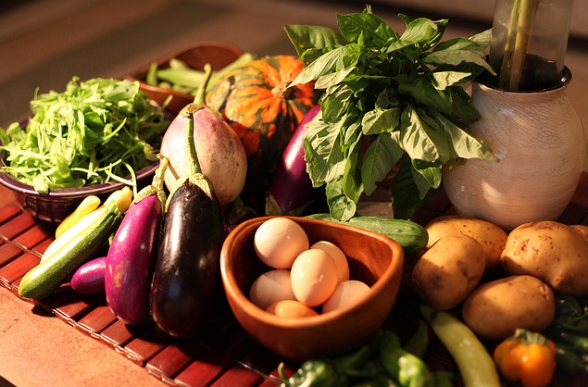
Archive | recipes & kitchen tips RSS feed for this section

Healthy Coconut Vanilla Granola (sugar free, dairy free, gluten free)

IMG_1082Want a easy and delicious granola that can be eaten any time of the day? This is hearty and healthy and protein packed, to sustain you throughout your day. It is great with milk for breakfast, served with yogurt for a fruit salad bar, and mixed in with raisins and nuts for a crunchy trail mix. It is also my daily bedtime snack! :) We love it. It can be sweetened as you prefer, but I love xylitol made from birch trees (rather than from corn as many brands are) because it doesn’t spike your blood sugar and tastes so yummy.

Ingredients:

8 cups rolled oats (use gluten-free oats if you are more cautious about gluten contamination)
1 1/2 cup coconut flakes
1 1/2 cup xylitol (or replace with your favorite sweetener – 1 cup raw honey or maple syrup works too!)
4-5 Tbsp vanilla extract
2 scoops protein powder (I use paleo protein powder or Jay Robb’s stevia sweetened protein powder), optional
1 cup coconut oil (extra virgin, cold pressed), melted
1 cup egg whites
1 cup raw mixed seeds, ground in coffee grinder (pumpkin seeds, sesame seeds, chia seeds/flax seeds, and or sunflower seeds – I usually do a 1/4 cup of each)
2 teaspoons sea salt

Directions:

Combine all ingredients together in a large bowl until thoroughly mixed. Spread out evenly over two large 12×17 baking sheets. Bake at the lowest temperature you can set your oven to (150-175 degrees) for 1-2 hours, till just lightly browned. Rotate the pans at least once while baking, and mix up the granola on the tray a couple times throughout the baking time to get it evenly toasted. It will still be soft when you remove from the oven, but will harden as it cools. Makes about 1 gallon.

Comments { 10 }

Homemade Mint Chocolate Chip Ice-Cream (Sugar free!)

IMG_0335

One of my favorite family fun activities every summer is making homemade ice cream! I absolutely love my Cuisinart ice cream maker for its functionality and simplicity. Its a wonderful investment for blessing your family with yummy healthy treats. Keep an eye on the price…it fluctuates all the time. Homemade ice cream is a breeze to make and yummy! You can use various milk options due to your preferences, and can adapt your sweeteners as well. I use almond milk and xylitol because it is sugar free and on the Trim Healthy Mama plan that I follow loosely. It doesn’t spike your blood sugar, and easily adapts to all recipes because it is a 1:1 ratio, so its a great option if you want to go a bit more healthy. :) This recipe is considered low-carb on the THM plan (if you use sugar free chocolate chips). I prepared this mint chocolate chip recipe for my husband as his request for our Father’s Day dessert. We were all delighted with the results! It was fabulous!

Ingredients:

3 cups heavy whipping cream
1 cup unsweetened almond milk (or milk option of your choice)
1 cup xylitol (or sweetener of your choice – white sugar, rapadura, honey, etc – I buy xylitol through Azure Standard, but it is also available through Amazon)
1 teaspoon vanilla extract
1 teaspoon peppermint extract
1 cup chocolate chips (I used Trader Joe’s semi-sweet chocolate chunks, but Lily’s chocolate chips are a true sugar free option for the purist)

Directions:

Combine all ingredients, except chocolate chips, together in a blender. Pour into your ice cream maker and allow to combine according to manufacturer recommendations (I do 30-45 minutes). Add chocolate chips in the final 10 minutes. Transfer to a freezer container and place in freezer till firm. Enjoy!

Check out our recipe index for more ice cream recipes!

Comments { 2 }

Quick & Easy Gyros

IMG_0134

It’s been a beautiful spring around here with a few glorious days of summer peeping through the window with warm weather, roses and iris’ in bloom, and the craving for summer menu ideas, those quick and easy recipes when I don’t want to start sweating in the kitchen cooking over a stove. This adaption to my favorite gyros recipe makes preparation time super quick and simple. I can get this dinner made in 15 minutes! That’s my kind of meal. :) Not truly authentic gyros, but still super yummy and we all love these! It’s a great way to stretch a pound of hamburger, making it pretty frugal too.

SUBSTITUTIONS: If you are gluten free, or following Trim Healthy Mama, layer all the ingredients on a bed of lettuce or a low-carb tortilla instead to make an S meal. I’ve also used goat’s cheese instead of feta.

GYRO MEAT:

1 pound ground beef (preferably grass-fed for highest nutrient value, but I also use Zaycon Fresh ground beef, which are primarily grass-fed)
1 1/2 teaspoons dried oregano
1 teaspoon garlic powder
1 teaspoon onion powder
1 teaspoon sea salt
1/2-1 teaspoon pepper (season to your taste)

TOPPINGS:

1 cucumber, diced
2 tomatoes, diced
5-6 green onions, chopped
Plain feta cheese, crumbled
1 head of romaine lettuce, chopped
1-2 packs of Mediterranean flat bread or pita bread (We love Trader Joe’s whole wheat flat bread. At other stores, it is often labeled mediterranean greek flat bread.)
Ranch dressing (this replaces the traditional Tzatziki sauce which is a yogurt/cucumber dressing)

For low-carb or Trim Healthy Mama adaption, serve over a bed of lettuce or a low-carb tortilla!

DIRECTIONS:

1. Cook ground beef in a medium frying pan until no longer pink. Crumble ground beef as it cooks. Drain grease if desired, and then add oregano, garlic powder, onion powder, salt, and pepper.
2. Prepare other toppings, by slicing or dicing as described.
3. Layer seasoned ground beef on each flat bread (or bed of lettuce, low carb tortilla), followed by feta, cucumbers, lettuce, tomatoes, onions, and drizzle ranch dressing over the top. Enjoy!

Serves 5-6 people.

Comments { 4 }

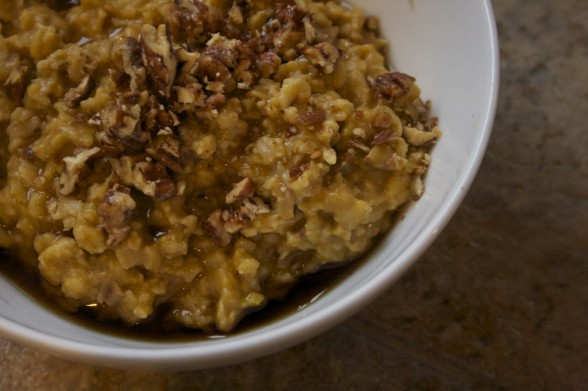
Pumpkin Oatmeal

We eat oatmeal at our home about two to three times each week because it is cost effective, filling, and nutritious. But it can often get a little old without some fun variety here and there. With the fall season, pumpkin is a favorite flavor that adds a scrumptious taste to traditional oatmeal. It’s yummy, simple, and healthy!

2 cups rolled uncooked oats
3 1/2 cups coconut milk (or combination with water or other milk of your choice)
1 cup pumpkin puree
1 teaspoon vanilla
1 teaspoon pumpkin spice (or 1/2 tsp cinnamon, 1/8 tsp ginger, 1/8 tsp nutmeg, dash of cloves)
Candied pecans/walnuts
Maple syrup or honey, to sweeten

1. In a medium saucepan, combine rolled oats, coconut milk, pumpkin puree, vanilla and spices. Mix till well blended.
2. Place saucepan over high heat on the stove and bring to a boil. Turn down to a simmer and allow to cook for about 5 minutes, stirring frequently.
3. Remove from heat and transfer to individual bowls and top with chopped nuts and sweetener of your choice. You may want to add a bit more milk to your taste.

Enjoy!

Yield: 4-5 servings.

Comments { 25 }

How to Make Your Perishable Food Items Last for Two Weeks

After my recent post on menu planning and sharing my current two week grocery shopping routine, I had several readers ask how I made my produce and perishable items (like dairy & bread) last for a two week period. Here are a few tips I have learned to make it work!

1. Use the more perishable produce items during the first week and save the more hearty produce during the second.

For example, we will use the softer produce, green beans, cucumbers, pears, grapes, etc during the first week and use more of the coniferous vegetables squashes, broccoli, carrots, potatoes, apples, oranges, and such for the second week. Pears and bananas usually take a week to ripen anyway, so they can be consumed later as well, depending upon their ripeness at time of purchase.

So in my menu planning, we will usually eat fresh salads, green beans, zucchini, carrot sticks, and such during the first week, with grapes, pears, bananas, and such for lunches, and then once that is consumed, we will eat squashes, broccoli, steamed carrots and other veggies with our dinners during the second week, and more apples and oranges for breakfasts and lunches. I also occasionally purchase some frozen produce (such as spinach, peas, and corn) during the second week as needed for fillers to throw into many meals. Many vegetables can be blanched and frozen to preserve them. This helps preserve the most nutrients. If you store the lettuce properly, we usually can still have fresh salads in the second week as well.

2. Store produce in airtight containers.

A general rule of thumb is that you can rinse and prepare your produce and store in airtight containers in the fridge to extend their life. For a full extensive list on this practice without using any plastic bags, check out: How to Store Vegetables & Fruit without Plastic. This helpful article explains how many vegetables can be stored wrapped with a damp towel or paper towel. I also have found green bags to be very effective in preserving produce in the past. They can be rinsed and reused many times.

Another effective method is storing a paper towel in a ziploc bag with your produce items (lettuce, cucumbers, zucchini, etc) and that helps absorb the extra moisture from the produce and prevent early spoilage.

A few tips on specific items:

Lettuce – I recommend buying lettuce in airtight sealed bags or plastic 1 lb bins, as this prevents the lettuces from perishing quickly. Many stores carry organic spring salad mixes in these bins, and I have found they last at least two weeks in the fridge, if not longer. Also, many stores sell lettuce in sealed bags that you don’t have to open until needed, which keeps them dry and preserved for much longer than just buying a head of lettuce.

If you choose to buy by the head, you can also rinse and dry your lettuces with a salad spinner. Allow to sit at room temperature for an hour or so until lettuce is completely dry before transferring to the fridge. Store in the airtight container until ready to use.

If my lettuce begins to spoil, I will simply throw it into a green smoothie, and nothing goes to waste!

Bananas – I find it best to purchase bananas in various stages of ripeness so they can be used throughout a two week period. If they start to fade and I cannot get to them, I will simply open them up, cut into small chunks, and stick in a ziploc bag in the freezer to use with smoothies on another occasion. This works really well.

Pears – I store pears on the countertop until they just start to get ripened and then I transfer them to the fridge in a paper bag to preserve them until they can be consumed.

Apples & Oranges – These store well in the same drawer together in the fridge. Apples do give off a gas that can cause other fruits to spoil more quickly, so it is best to keep one drawer for just apples and oranges, since oranges are not affected in the same way.

Berries - I buy all my berries in bulk during the summer time and then freeze them in ziploc bags to use throughout the year for smoothies. The key is not to rinse them until they are ready to be used otherwise they perish quicker in the fridge or clump together in a frozen mess in the freezer.

Onions – I keep these together with potatoes, winter squashes, and other vegetables and fruit that take time to ripen on a shelf in my kitchen. These can also be stored in the fridge to preserve them longer. I try to keep one or two in the fridge at all times, as the refrigeration process seems to eliminate the watery eye syndrome that is common with onions.

Celery - This can be stored upright in a jar with a small amount of water in the bottom to keep them fresh. Cut off the ends and store them by individual stalks. More often then not, I just keep in the original bag and it lasts just fine.

Mushrooms – I usually buy mushrooms by the pre-assembled package to help preserve them. Otherwise, store in a brown paper bag.

Bread- (Obviously, not produce item, but someone asked how I extend the life of my bread) Since we eat a fair amount of bread, I buy a dozen loaves of bread at a local discount organic bread store and store in the freezer and pull out as needed. This prevents any bread from getting moldy.

Milk – We go through about three gallons of milk every two weeks (we certainly could use more but we are also on a budget ;) . I usually buy raw milk for the first week and a half (since that is about as long as it lasts before going sour) and then a gallon of organic milk for the last portion. We just have to make sure we use it slowly but surely and not overindulge to make it last the full two weeks.

Cheese & Butter- These two dairy items freeze very well, so I will buy my cheese in a 5 lb block and cut it into 1 lb chunks and place in ziploc bags in the freezer until needed. Butter can be stored in the original box and pulled out also as needed.

All other dairy products seem to last just fine for the full two week period.

Remember, it will take a bit of trial and error to figure out how much you will consume to make a twice a month shopping excursion work for your family. I know personally, it took me two or three tries before I really figured out how much we needed to eliminate quick trips to the store between the two week cycle. And that’s perfectly normal and okay. I also find it useful to make sure to plan in a extra buffer meal or two (sometime quick and simple (baked potato bar, cans of refried beans for quick burritoes) and dessert, for those impromptu guests and evenings when I just don’t feel up to making a big dinner.

For a complete guide on how to store all your produce, check out this excellent list.

{Photo Credit}

Comments { 39 }

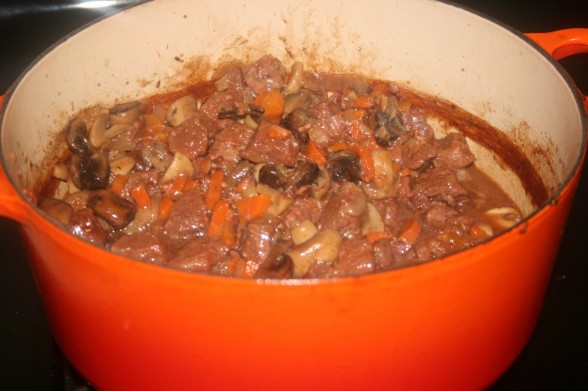
Beef Bourguignon w/Slow Cooker Adaption

Hey friends! My goal this year is to adapt one of our favorite family recipes each month to a more simplified slow cooker version! Here is one of our favorites that I am sharing today while republishing the original recipe from the archives. You won’t be disappointed!

After watching the film Julie & Julia on the life of Julia Child awhile back, I was determined to learn to cook a few of Julia Child’s recipes, starting with her Beef Bourguignon, since it was so emphasized during the film (and I have the very same Le Creuset french oven as well!). After several attempts, I have come up with a fabulous adaption of the recipe that is so much simpler than the original and still ever as delicious! This meal is absolutely fabulous – especially for the meat loving husband. It is certainly a special treat for us on a budget, but it makes the man very happy, so I make it once a month or so. It is also a excellent dish for hospitality and has received rave reviews wherever we have served it. We serve over creamy garlic mashed potatoes or noodles for a delicious comforting meal. Unfortunately, I really failed in my photography on this one…but it is truly my favorite meal!

Ingredients:

  • 6 strips of bacon
  • 2-3 pounds stew meat, cut into 1 inch cubes
  • 2 carrots, chopped
  • 1 onion, chopped
  • 1 teaspoon sea salt
  • 1/4 teaspoon pepper
  • 2 Tablespoon arrowroot powder or cornstarch
  • 3 cups red Burgundy wine (pretty much any cheap red wine works as well. I recommend sticking within the french wines for best results.)
  • 2-3 cups beef stock
  • 2 garlic cloves, minced
  • 1 teaspoon thyme
  • 1-2 crumbled bay leaves
  • 2 pounds mushrooms, quartered
  • 1/4 cup butter

Directions:

  1. In a large 9-10 inch fireproof casserole pan, cook bacon over medium/high heat until tender and browned. Remove bacon from pan, while leaving the bacon grease in the pan.
  2. Dry the beef in a paper towel before placing in the casserole and saute it on each side until nicely browned.
  3. Add the carrots, onions, and 1/2 cup beef broth and saute until tender.
  4. After bacon has cooled, chop into small pieces, and then add back to the pan with stew meat and vegetables.
  5. Toss with salt, pepper, and arrowroot powder and mix till well combined.
  6. Add the wine, remaining beef broth, garlic, thyme, and bay leaf. Add enough liquid so that meat is barely covered. Bring to a boil.
  7. Turn oven to 325 degrees. Cover the casserole and place in the lower third of the oven. Regulate heat so liquid simmers very slowly for 2 1/2 to 3 hours.
  8. While the beef is cooking, prepare the mushrooms. In a large skillet, melt 1 Tablespoon butter and 1 Tablespoon olive oil. As soon as you see that the butter foam has begun to diminish, add the mushrooms. You may want to do them in two separate batches to prevent overcrowding, which will prevent them from browning nicely.
  9. Toss and shake the pan for 3-5 minutes until mushrooms are nicely browned. Remove to a large bowl.
  10. After the meat has cooked for 2 hours, add the mushrooms. Return to oven for the remaining 1/2 hour to 1 hour.
  11. The meat is done when a fork pierces it easily. Serve immediately or cover and refrigerate. The taste improves with age! Simply reheat to serve.

Enjoy!

SLOW COOKER ADAPTION:

Yes! I am all about simplifying and making life easier for myself, so my recent adventure was adapting this recipe to make in the slow cooker. And it works beautifully

Simply throw all the ingredients into your slow cooker. The only changes you will want to make include eliminating the beef stock (as it will make it too wet) and doubling the arrowroot powder/cornstarch. You do not need to precook the meat in anyway. I like to throw the bacon in whole and then after it is cooked, I will remove and chop it up. You can saute the mushrooms as the recipe above describes for extra flavor before adding, or you can simply toss them in as well without any advance preparation. Cook on low for 6-8 hours for best results. You can cook it on high for a shorter period of time, but if you want the stew meat to be soft and tender, it is best to cook low for the longer period. Yum!

Comments { 55 }

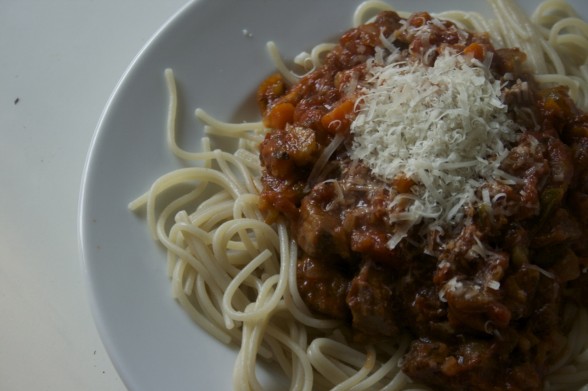
Hearty Spaghetti Sauce

I love the Italian heritage that runs in my family and the immense flavors for delicious simple spaghetti sauce. It is perfect for a cozy fall night and a great means of concealing a lot of extra veggies in one place. Plus when you throw it all in the slow cooker or stove top and allow it to slowly simmer all day, the flavors mesh in amazing ways leaving you with a rich satisfying meal. You can add zucchini and carrots discreetly by simply finely chopping them before adding. I usually use a pound of ground beef or half ground beef and half sausage for a tasty addition. This last week I used stew meat and it was good. This is a family recipe that has been passed down through the years. You can’t go wrong.
Ingredients:

1 onion, chopped
1 green or red pepper, chopped
3 garlic cloves, minced
1-2 carrots, finely chopped (for disguise purposes)
1 zucchini, finely chopped
2 celery stalks, chopped
2 Tablespoons oil
1-2 pounds ground beef, pork roast, italian sausage, stew meat, meatballs (your choice!)
1 can diced tomatoes (28 oz) or 1 quart of homemade canned tomatoes
1 can tomato sauce (15 oz)
1/4 cup dried parsley
1 Tablespoon dried basil
2 teaspoons dried oregano
2 teaspoons salt
1/2 teaspoon pepper
1-2 Tablespoons natural sweetener (honey, xylitol, rapadura), for balancing of flavors
2-3 Tablespoons cornstarch or arrowroot powder
Parmesan cheese, topping (optional)
16 oz package of spaghetti noodles (we love brown rice and quinoa noodles! Tip: wash in cold water to prevent sticky noodles!)

Directions:

1. Saute onion, pepper, carrots, celery, and zucchini in oil until soft.
2. Add meat and cook until no longer pink.
3. Add remaining ingredients.
4. Cover and simmer for several hours, or transfer to a slow cooker and cook on low for 6-8 hours, stirring occasionally. If you use slow cooker, add more thickener as needed.

Yield: 6-8 servings.

Comments { 20 }

Pink Coleslaw: A Refreshing Salad for A Warm Day

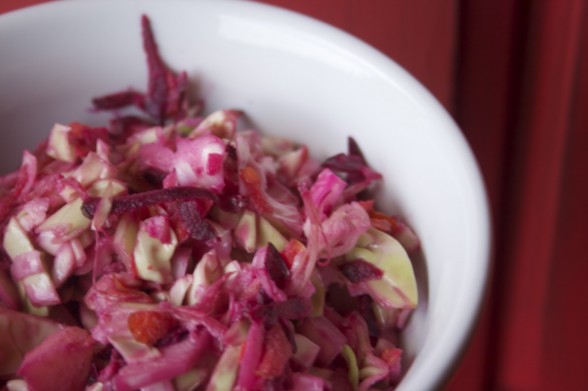
Delicious fresh in-season produce is widely available at the market right now and I have been exploring making a variety of new salads and dishes to consume them all. Coleslaw has been one of those long detested side dishes until I started making it at home. Homemade slaw can come in a variety of different flavors and ingredients, and this fun new experiment made a delicious salad that we enjoyed over several days time (since it is a large batch!). It is pleasantly sweet and full of rich nutrients and vitamins from the wide variety of vegetables combined in this slaw. And it’s a fun color, thanks to the inclusion of beets. If you prefer to avoid the pink color, eliminate the beets and you will still have a colorful slaw with orange, red, and green colors. If you have a food processor, it would help in whipping this up in a flash. This is a refreshing salad for a warm summer day!
5 cups green cabbage, shredded or grated
2 large carrots, shredded or grated
2 apples, chopped
1/2 cup red onion or 3 green onions, chopped
2 celery sticks, chopped
2 beets, shredded or grated
1 cup mayonnaise (we used our homemade mayo and it is delish and so much more healthy and frugal than store bought varieties)
1/4 – 1/3 cup raw honey (to your taste)
2 Tbsp apple cider vinegar (preferably raw with the mother)
1 teaspoon sea salt
1/4 teaspoon pepper

Directions:

1. Combine all the shredded and chopped vegetables and fruit in a large bowl. 
2. Whisk together the mayonnaise, honey, vinegar, salt and pepper. Toss over the vegetables and fruit and combine till well mixed.

Yield: 8-10 servings. 

Comments { 8 }

Soaked Whole Wheat Bread in the Bread Machine

Guest post by Emily Benhase

For my first birthday after we were married, my husband gave me a bread machine. I had wanted one for months and loved it! But just a few months later, I was introduced to the “real food”/Nourishing Traditions way of cooking and eating. As I learned more about the benefits of soaking grains before consumption, the bread machine was used less and less. I assumed a soaked bread recipe and the bread machine were incompatible.

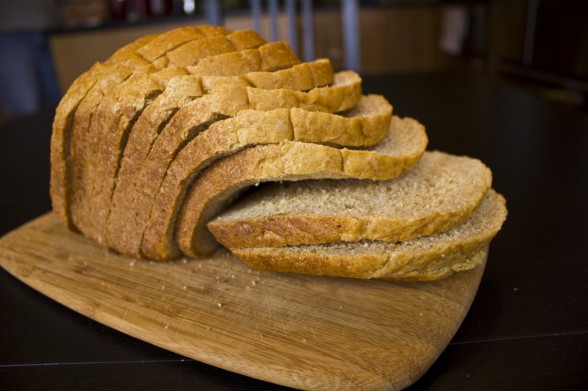
I started making Lindsay’s recipe for soaked whole wheat bread, by hand, on a bi-weekly basis, making two loaves at a time (we ate one fresh and froze the other for the following week). Although I did enjoy the process of bread making–especially kneading–I soon realized there had to be a more efficient way to make healthy, homemade bread for my family. I determined to adapt this delicious recipe to use in my bread machine. It didn’t take long before I was successful!

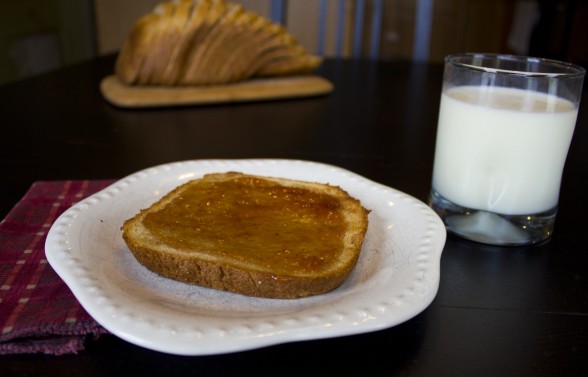
We love this bread. It is our standard bread that we use for toast, sandwiches and simply enjoying warm with butter and a drizzle of honey; we also think it makes wonderful grilled cheese! Especially now that we have added two little ones to our family, I love not only the healthfulness of this bread, but the convenience of my bread machine doing the work for me.

Tips Before You Begin:

  • Make sure the flour/water mixture you’ll be soaking is plenty moist. You don’t want it to dry out, plus this will make it easier on your bread machine to mix in the remaining ingredients the next day.
  • In order to maximize the effectiveness of the soaking, you should make sure you are using warm to hot water.
  • You do need to activate the yeast for this recipe.
  • Any combination of white/whole wheat flour can be used (I use 2 cups white whole wheat flour and 3/4 cup unbleached all-purpose flour).
  • I prefer white whole wheat flour as it provides a lighter end product. This type of flour can be found in most supermarkets these days.
  • To achieve the most even slices, let your bread sit out overnight. Do not attempt to cut it right after baking (I know it’s tempting, it smells so good!). Letting it sit will help it firm up and will result in nice, even slices. Using a quality bread knife is also very helpful!

I’ve also included instructions at the bottom on how to make the dough in your bread machine and bake it in the oven, if you prefer that method. I have done this many times with great results. If desired, you can double the recipe and make two loaves worth of dough in the bread machine.

Soaked Whole Wheat Bread in the Bread Machine

1 Tbsp apple cider vinegar (or lemon juice), plus enough water to make 1 cup
1/4 cup honey (I’ve also used raw cane sugar and maple syrup with success)
3 Tbsp oil or melted butter
1/2 cup oats
2 cups whole wheat flour (I use white whole wheat)
1-2 Tbsp add-ins (ie, ground flax seed, millet, wheat germ, etc.), optional
2 Tbsp warm water
1/4 tsp honey or sugar
2 tsp yeast
1 1/8 tsp salt
1 Tbsp vital wheat gluten
3/4 cup unbleached all-purpose flour

Directions:

1. Add vinegar, water, honey and oil to the pan of your bread machine. Then add the flour, oats and add-ins, if desired. Start the bread machine on the dough setting and allow to run for about five minutes, just until the ingredients are well-mixed. Turn off or unplug the machine, scrape down any dough stuck on the sides of the pan and allow mixture to soak for 12-24 hours.

2. After the soaking period, in a small bowl, combine the 2 Tbsp warm water, honey and yeast. Allow to activate for 5-10 minutes, until mixture is foamy. Add yeast mixture, salt, vital wheat gluten and additional flour to the bread machine pan.

3. Select the whole wheat setting and desired crust darkness (I use medium) and press start. Keep an eye on the dough for the first few minutes to see if any extra water or flour is needed. You want the dough to be slightly tacky but not too wet.

Allow the loaf of bread to cool for 10 minutes in the pan, then cool on a wire rack overnight. Slice and enjoy!

To bake bread in the oven:

Follow steps 1 & 2. Select the dough cycle on your bread machine and press start.

When the dough is finished, remove it from the pan. Punch down and on a lightly floured surface, roll the dough into a large rectangle, then roll it up and tuck the ends under so it fits in your bread pan. Place the dough in a greased bread pan, cover with a towel and allow to rise in a warm place (I turn my oven on the lowest setting: 170 degrees) until doubled, 30-45 minutes.

Once the dough has risen, preheat your oven to 350. Bake the bread for 30-45 minutes, until the sides and top are lightly browned and the bottom sounds hollow when tapped. Allow the loaf to cool in the pan for 10 minutes, then remove to a wire rack to cool completely (see notes above for slicing).

Enjoy!

To learn more about soaking, visit The Value of Soaking Your Whole Grains.

Emily is a homemaker who lives in Cincinnati, OH with her husband Ryan and their two children: Jericho (2) and Anna (4 months). Their family is passionate about urban living, good food and, most of all, living their life in a way that honors and serves God. 

Comments { 40 }

Frugal & Nutritious Barbecue Condiments

Guest post by Kresha Faber at Nourishing Joy

Summertime has arrived and with it comes outdoor meals. It is such a blessing to gather with friends and family on a warm summer evening to linger over good food and drink and be nourished by each others’ company!

Now, I don’t know about you, but in my family, these gatherings are standard grill fare only: hot dogs and hamburgers with all the fixin’s. But the “fixin’s” tend to be rather expensive to keep in stock for our large extended family and I prefer to feed my kiddos whole, natural foods whenever possible, so I started tinkering with recipes to create homemade versions of all our staples that actually taste like the store-bought alternatives.

Thus, today, I offer our take on four of the classics: ketchup, mustard, mayonnaise, and sweet pickle relish.

(As a side note, I had so much fun developing these recipes that I ended up writing an entire cookbook about condiments, which is due out sometime this month. Stay tuned at NourishingJoy.com for details!)

Easy Peasy Ketchup

Makes approximately 3 cups

1 1/2 cups tomato paste
3/4 cup raw honey
1/2 teaspoon blackstrap molasses (optional)
½ cup water
½ teaspoon onion powder
1 clove of garlic, finely grated
1 cup apple cider vinegar
1 1/2 tsp unrefined sea salt (more to taste)

Place all ingredients in a large saucepan and stir together with a whisk until smooth. Heat over medium heat and bring to a boil, then reduce to medium-low and simmer for 20 minutes, stirring often.

Remove the pan from the heat and let cool. You may certainly serve the ketchup immediately, but the flavor improves after 2-3 days.

French’s-Style Mustard

Makes 1/2 cup

1/2 cup dry mustard powder
1/2 cup water
1/3 cup white distilled vinegar
1/2 teaspoon sea salt
1/2 teaspoon ground turmeric
1/2 clove of garlic, finely grated
1 pinch smoked paprika
1 teaspoon cornstarch or arrowroot powder

Whisk everything except the cornstarch together in a small saucepan until smooth. Place over medium heat and bring to a boil, then reduce heat and simmer for 5-10 minutes, stirring often.

About 1 minute before you want to remove the mustard from the heat, stir the cornstarch together with 1 teaspoon of cold water. Then, while whisking, pour the cornstarch into the simmering mustard. Let cook for 1 minute to thicken.

Remove from heat and let stand 1 minute to set. Pour into the serving container to cool. The mustard may definitely be served immediately, but the flavor will mellow after 3-4 days.

Everyday Mayonnaise

Makes approximately 1 ½ cups

The combination of olive, coconut, and sesame may sound strange, but the three blend unexpectedly well. This mayonnaise is scrumptious on burgers and sandwiches, although I prefer a blander mayo for making salad dressings and dips.

2 egg yolks
3 tablespoons lemon juice or white wine vinegar
½ teaspoon sea salt
½ teaspoon Dijon-style mustard (optional)
2/3 cup olive oil or sunflower oil
1/4 cup coconut oil
2 tablespoons toasted sesame oil

Combine your oils in a measuring cup with a spout or in a squeeze bottle. Set aside.

Place the egg yolks, lemon juice, sea salt, and mustard in a food processor or blender and pulse until everything is combined. (Or follow Lindsay’s directions for 10-Second Mayonnaise.) Then, with the motor running, pour in the oils as slowly as possible, preferably taking 3-4 minutes to add the entire cup of oil.

Sweet Pickle Relish

Makes approximately 1 quart

1 1/4 lbs fresh pickling cucumbers, scrubbed
1 onion
3 tablespoons pickling salt or coarse Kosher salt (do not use regular salt, as the additives will change the color of the relish)
Ice cubes or ice chips
2/3 cup white distilled vinegar
1/2 cup apple cider vinegar
1 cup evaporated cane juice
2 teaspoons mustard seeds
1/3 teaspoon celery seeds
1 inch cinnamon stick
1 pinch ground allspice
1 pinch ground cloves
1/4 teaspoon turmeric

Coarsely chop the cucumbers and onion in a food processor or food grinder and place in a large bowl. Sprinkle in the pickling salt and stir so that the salt is well distributed. Place a tea towel directly on the surface of the cucumber and onions, then cover the towel with ice and let sit for 2-3 hours. Discard the ice and rinse the cucumber and onion mixture thoroughly.

In a large saucepan, bring the vinegar, sugar, and spices to a boil. Reduce heat and simmer for 5-10 minutes until the mixture has reduced slightly, then stir in the cucumber-onion mixture. Stir well, spoon into jars, and let cool. The relish can be served immediately, but it achieves the best flavor after 2-3 days. Store in the refrigerator for 1-2 months.

Kresha Faber is the chief writer and blog editor at NourishingJoy.com, a website dedicated to real food, sustainable living, natural homemaking, and joyful parenting. She is the mother of three young children, the wife of an incredibly good man, an opera singer, a cloth diapering instructor, and an avid researcher. She and her husband share a passion for living life thoughtfully and intentionally in response to God’s grace in their lives and she loves to share good meals around a very large table.

Comments { 5 }