Archive | recipes & kitchen tips RSS feed for this section

Boosting Nutrition in Your Fruit Smoothies – Greens & Herbs!

Do you feel like your diet is lacking good nutrition? Do you have any picky eaters like my kiddos who don’t particularly care for their vegetables? Are you looking for a simple inexpensive way to boost your health without the added expense of supplements? Enter smoothies.

Since beginning my journey on preparing fruit smoothies, I am continually amazed what you can add to a simple smoothie to increase the health and nutrition of this wonderful beverage and get all your supplements for the day in whole food form. In fact, it seems to be the best means of getting good nutrition in your kids diet. I have never seen a child that doesn’t love a good fruit smoothie. It is a refreshing beverage for any day of the week! And they are also a great item for any meal. We’ve had them for breakfast, lunch, snacks, and even a light dinner on those extra tiring days. Lately, I have been starting to add various herbs to our smoothies and have noticed some significant improvements in our overall health.

Here are some of the goodies we add to our smoothies:

1. Kefir

I love using kefir as the base for our smoothies because it is one of the most nutritious probiotic available. Kefir, which means ‘feel good” in Turkish, is an ancient cultured, enzyme-rich food filled with friendly micro-organisms that help balance your “inner ecosystem” to maintain optimal health and strengthen immunity.

Kefir’s tart and refreshing flavor is similar to a drinking-style yogurt, and it contains beneficial yeast as well as the friendly ‘probiotic’ bacteria found in yogurt, but is more nutritious. When used regularly, the naturally occurring bacteria and yeast in Kefir combine symbiotically to help balance your intestinal flora and boost your immunity. Learn how to make your own kefir here.

Whole milk yogurt, coconut milk, coconut kefir, coconut water, or kombucha are also excellent bases for your smoothies, depending upon your needs and preferences. I have used and love all these alternatives as well. I use about 3/4 – 1 cup kefir or alternative for my base.

2. Greens

We have been making green smoothies for some time now. Adding fresh greens can assist in boosting energy, building your immune system, detoxing impurities, and loosing weight. Greens are rich in magnesium and alkaline minerals like calcium and are superb in their Omega-3 unsaturated fat content.  Believe it or not, greens are one of the richest sources of protein. I have used organic spinach (as it is a highly sprayed crop) predominately as it is easy to add without affecting the texture. I can add half of head of spinach and it blends in well with all the frozen fruits.

We also use the Green Magna Plus Powder if I don’t have greens on hand or want to boost it a bit more. I will add 1 Tablespoon of this mixture. Magma Plus contains barley grass juice powder plus 56 other natural ingredients. It provides a full range of phytonutrients including active enzymes, antioxidants, carotenoids, flavonoids, vitamins, minerals, fiber, protein, amino acids, prebiotics, probiotics, and chlorophyll.

3. Herbs

Lately, we have started adding herb powders to our smoothies with excellent results. Adding herbs is like preparing your own vitamins. They are real food and easily digestible. God has provided all the health and nutrition that we need in His creation, and this is beautiful to behold as you study the different kinds of herbs and their functions in our bodies. These herbs may affect the texture somewhat of your smoothies, so start small and build up as you go to get your full dose.

Daily Boost Herba-Smoothie – This product is compiled by Bulk Herb Store and is specifically designed to give you full balance in your health and perfect for your daily smoothies. This mixture of herb powders contains the following:

  • Ginkgo: Brain food, better concentration and improves memory
  • Oat straw: Excellent source of the major minerals
  • Hawthorn: Best herb for strengthening the heart
  • Burdock root: Blood purifier, helps with varicose veins, detoxing, and more

Adding 1 heaping teaspoon of this herb powder is wonderfully nutritious! It blends in so well with fruit and you cannot even notice it is there. I have had increased energy and sleep since taking these herbs.

Spirulina

Spirulina powder is a blue-green algae that grows on freshwater ponds. Spirulina is 55-70 percent protein by weight and considered my many to be the greatest plant source of usable protein and is rich in B vitamins and gammalinolenic acid (GLA). We add 1 heaping teaspoon to our smoothies currently, and hope to boost it up as we go. Spirulina is certainly a superfood!

Kelp Powder

Seaweeds are the richest plant source of minerals, providing 10-20 times the minerals in land-based plants. They contain a more well-balanced and broader spectrum of minerals necessary for the body than any other organism. They are used to promote longevity, prevent disease, and boost a healthy metabolism to those courageous enough to consume them. The easiest to come by and disguise is kelp powder and can be added to smoothies. We add about 1 heaping teaspoon to smoothies and will build up to about 1 Tablespoon.

Slippery Elm Bark Powder

Slippery Elm is a “mucilaginous herb that helps absorb toxins in the bowel. In fact, it is very soothing to the entire digestive system. It is useful especially for diarrhea, bowel weakness or as a mild nourishing food for sick children. Since the herb is slightly sweet, it is one that children will often take readily if it is mixed in some cereal, applesauce or fruit juice.”

We have been adding another heaping teaspoon of this powder with our smoothies.

My cousin Amy introduced me to the idea of adding herbs to my smoothies. I asked her to share her recipes and herb combos. Amy is dairy-free, and offered these helpful recipe suggestions. The liquids can easily be changed out for whatever base you would like (yogurt, kefir, coconut milk, kombucha, etc). Each recipe is prepared for 4 servings.

1 1/2 med. bananas
1 large mango
1 1/2 c. strawberries
1/2 c. kombucha
1 Tbsp flax seed
approx. 1 1/2 c. water

2 med. bananas
1 c. frozen strawberries
1 c. frozen blueberries
1 c. water

1 large mango
2 c. frozen blueberries
1 c. frozen blackberries
1-1.5 cups liquids

3 small bananas
2 c. frozen strawberries
3/4 c. kombucha
1 c. water

2-3 c. frozen blackberries
1-2 bananas
6 TBSP coconut water
1/2 c. kombucha
1 c. water

2 bananas
2 cups frozen peaches
1-2 cups water

To each of the above combos, add any or all of the following (start smaller and gradually increase herbs as desired). Again this is per 4 servings:

1 Tablespoon orange juice concentrate (helps balance it out if a smoothie needs a bit more flavor or sweetener)
1 teaspoon vanilla extract (does wonders for adding flavor!)
1/4 teaspoon stevia powder, as needed
2 tsp ground Daily Boost Herba Smoothie Combo
2 tsp ground slippery elm
1 1/2 tsp ground nettle (increases liver and kidney function)
3 tsp ground kelp powder (this is the strongest flavored one, if I think the smoothie isn’t strong flavored enough to mask it, I’ll reduce the amount I add, or skip it altogether for that day)
3 tsp (or more) ground spirulina
little under 2 TBSP cut leaf alfalfa (rich in vitamins and minerals, chlorophyll, blood purifier)

Our family is currently using the herba smoothie combo, slippery elm, spirulina, and kelp powder and hope to start adding a bit more of other herbs as we go. A great option of getting real food in your smoothies without expensive supplements!

My kids love these smoothies, as you can see in the pictures!

These herbs can be purchased through Bulk Herb Store or Mountain Rose Herbs (with the exception of the Herba Smoothie mix), both of which are companies that I love!

What healthy additions do you like to make to your smoothies?

Please note that this information is shared for educational use. We are not licensed practitioners in any way but love to share out of our own personal experience. As far as I understand, all these herbs are perfectly safe for pregnant and nursing mothers.

Announcement: The winner of our Christa Taylor giveaway was Tara (taraalic..@)! Congrats!

Comments { 59 }

Easy No-Peel Canned Applesauce with a Blender

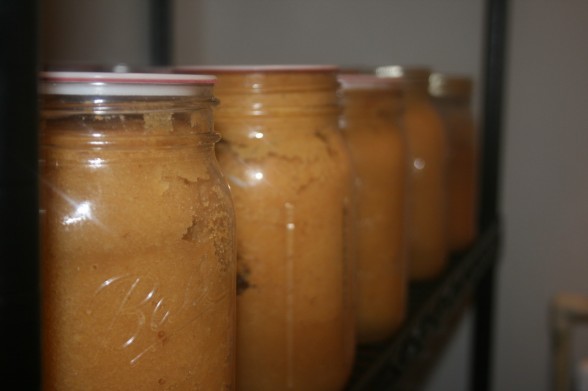
I have done the strenuous work of preparing applesauce for several years by laboring over chopping, cooking, pureeing through a food strainer (a great tool, but still extra work), and finally cooking again and seasoning. It takes a lot of time and effort and required a huge family crew. When this year came around, I knew I must simplify the process. My children love applesauce and it makes a lovely quick, easy, and healthy snack.

With my new technique, applesauce preparation was a breeze! No peeling and no straining! No need for any extra special equipment, just a blender or food processor. I used my favorite tool – the Blendtec – but you certainly can use what you have on hand. You may have to prepare smaller batches, but it will still readily save you a lot of time and effort. Plus, keep the peels on will give you more nutrition, since the majority of the vitamins are directly under the skin! You also are cooking the apples far less (just heating to warm before processing) and thus preserving more nutrition there. I made two dozen jars in just over an hour!

We also used the Tattler reusable and BPA free canning lids this time and were very pleased with the results. They do take a little extra effort, in that you have to tighten and then unscrew 1/4 inch before processing, and then tighten immediately after removing from the water bath (which can be very hot and difficult to accomplish without a thick towel), but I believe the re-usability factor out ways any disadvantages. I had one lid pop off while tightening and one pop off in the processor, so I assume it just takes a bit of time to get used to the process. I love how they are BPA free as well, so we don’t have to be exposed to this unnecessary toxin which is present in the standard Kerr/Ball canning lids. (Thanks to Stephanie at Keeper of the Home for her review of this product!). For my local friends, the Tattler lids are available at Mirador Community Store in Portland.

Here’s my video tutorial:

httpvh://www.youtube.com/watch?v=JSss7GRePs0

Directions:

1. Prepare your water bath by filling with water 3/4 way up the side of the pot. Cover and bring to a boil. In the meantime, sterilize your glass canning jars in the dishwasher by running them through a cycle. Place a small pot on the stove with the canning lids to sterilize as well. Bring to a boil and then turn down to a simmer while you can the applesauce.
2. Cut your apples into large chunks, removing the core and seeds. No peeling is necessary!
3. Place the apples in small quantities in a food processor or blender and add approximately 1/2 cup before pulsing/blending the mixture until smooth. Add more water as necessary.
4. Transfer pureed apples to a large stock pot and season as desired with sugar and cinnamon (we use about 1 Tbsp cinnamon and 1 Tbsp or more sucanat for a large stock pot full of applesauce). Heat sauce until just warm.
5. Once the applesauce is heated and sweetened, pour carefully into your sterile glass quart size canning jars (a funnel is ideal for this process). Place hot lids on jars (whether your standard Kerr/Ball canning lids or Tattler lids).
6. Place jars in a boiling water bath. Once water bath is full of jars, cover, and return water to boiling point. Once it is boiling, process for 20 minutes. Transfer to the counter to cool completely.

Comments { 63 }

The Benefits of Lacto-Fermentation & Lacto-Fermented Salsa Recipe

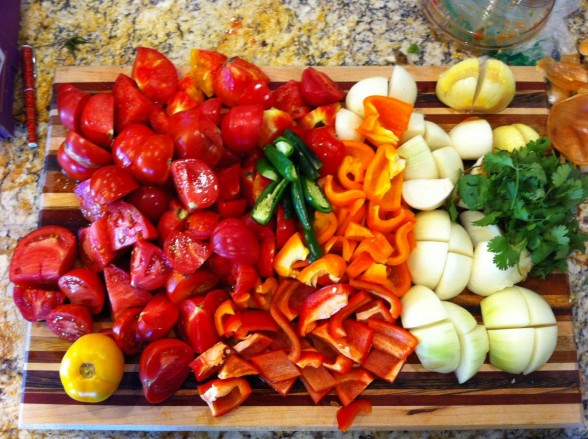
Our beautiful salsa ingredients

I have always been intimidated by the idea of lacto-fermentation. I mean, just listen to the name. Sounds scary! I always thought it was time-consuming with not so tasty results. And if it weren’t for my sweet cousin, Amy, I probably would still be in that scared state. This last week, Amy, invited me over to her home to make lacto-fermented salsa. I thought, why not? I discovered how incredibly easy this process is! And how fun to learn something new with friends. Couldn’t get much better than that – inspiring one another on in our healthy homemaking pursuits. So find a friend, and dive in with me to the world of lacto-fermentation?

What is Lacto-Fermentation?

Rather than go into all the details, I will just share a few quotes with you and direct you to my lovely friends on the web who have explained this so well previously.

Lacto-fermentation is the process of cultivating lactic acid as a natural preservative to prevent putrefication. Starches and sugars in vegetables and fruits are converted to lactic acid by the many species of lactic-acid producing bacteria. It has multiple health benefits as described by Sally Fallon in Nourishing Traditions:

“The proliferation of lactobacilli in fermented vegetables enhances their digestibility and increases vitamin levels. These beneficial organisms produce numerous helpful enzymes as well as antibiotic and anticarcinogenic substances. Their main by-product, lactic acid, not only keeps vegetables and fruits in a state of perfect preservation but also promotes the growth of healthy flora throughout the intestine.”

I have discovered that is is a simply, easy, and worthwhile means of adding wonderful vitamins, enzymes, and especially probiotics to your diet.

Fermented Foods for Beginners by Nourishing Days
Benefits of Lacto-Fermentation by Nourishing Gourmet
Wild Fermentation – a great resource as to the whys and hows of fermentation

Lacto-Fermented Salsa

Recipe adapted from Nourishing Days

Makes 1/2 gallon

1 large onion cut into large chunks
1 large green, red or yellow pepper, cut into large chunks
6 large cloves of garlic, peeled
1/2 cup fresh cilantro, unchopped
1 jalapeno pepper, cut in half
3 lbs of tomatoes, cut into quarters (approximately 4 cups)
2 Tbsp lemon juice (or juice of 1 lemon)
1 Tbsp red wine vinegar
2 Tbsp sea salt (definitely sufficient!)
1/2 cup whey (Take yogurt or kefir and place in a cheesecloth/cloth napkin and drain over large measuring cup. Squeeze the cloth gently with your hands until you get enough liquid. The juice that drains will be your whey! It’s very easy!)
1/4-1/2 cup water (UPDATE: we found this completely unnecessary and made it too watery, so use your judgment.)

Directions:

  1. In a food processor or blender, place onion, pepper, garlic cloves, cilantro and jalapeno pepper. Pulse several times until mixture is nicely diced. Transfer to a large bowl.
  2. Place tomatoes in the food processor or blender and pulse several times in likewise fashion until nicely diced. Add to large bowl.
  3. Gently combine all ingredients in the large bowl and add lemon juice, vinegar, sea salt, and whey.
  4. Transfer to a 1/2 gallon glass jar (or 2 quart size jars), and carefully add 1/4-1/2 cup water until all the ingredients are submerged. Make sure to leave 2-3 inches of headspace for expansion.
  5. Cover tightly with a lid and leave on your counter for 2-3 days until the salsa is bubbly. Transfer to cold storage or the top shelf of your refrigerator. Best used within 3 months.

Here’s our little video demonstration amidst all of our 5 little ones! We had the little girls cut up the tomatoes for us and they loved being included in the process. All in all, it took about 2 hours to make 3 gallons of salsa with interruptions so it was a very easy process. Amy is allergic to dairy, so she offers her dairy free alternative to using whey, which is Body Ecology veggie culture starters, as described in the video. Join us for all the fun we had!

httpvh://www.youtube.com/watch?v=U_81vzpHrck

Easy Fermented Beverages

Kombucha is a simple way of getting some of these fermented benefits into your diet regularly! We love this beverage! Kefir is another easy one that we have used forever for our smoothies and for soaking our grains.

Easy Fermented Condiments

After our successful salsa makings, I knew that a few other easy means of getting probiotics would be through our condiments. I love homemade ketchup and whipped it up in a few minutes and it is currently on my shelf fermenting away. Here are a few recipes:

Lacto-Fermented Ketchup
Lacto-Fermented Mustard

Lacto-Fermented Mayonnaise

I have made lacto-fermented sauerkraut in the past, and I don’t recommend the standard recommendation that you can replace whey with an extra tablespoon of salt, as we did with that attempt. It makes an extremely salty final product! Best to use the simple process of making whey as described above!

So that is a simple start on lacto-fermentation!

Comments { 56 }

Is Sourdough Really Sour? Deflating 5 Sourdough Myths

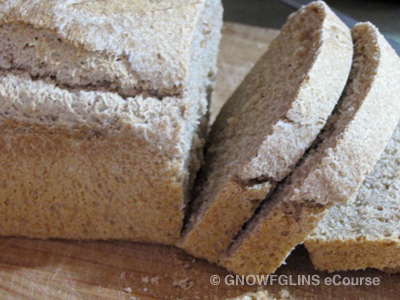
Guest post written by Wardeh Harmon from Gnowfglins.
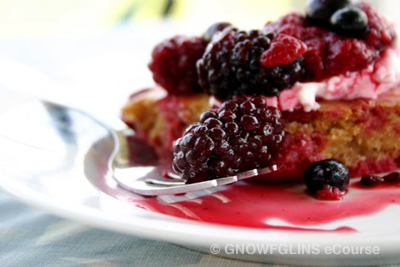
Not long after I began reading about sourdough, working with it myself, and teaching others to embrace it, I noticed a handful of misconceptions that come up again and again. These ideas get around somehow and they’re simply not true.

For instance, have you been told that sourdough is always sour? Do you get the impression that baking with sourdough is too hard for everyday moms who aren’t gourmet bakers? Has someone moaned that it’s super hard to keep a sourdough starter alive? Those are three of the five myths I’d like to deflate today. I’d like to set the record straight about our trustworthy and simple friend: sourdough.

1. Sourdough Is Just For Bread.

Actually, sourdough is one of the most versatile baking methods you’ll ever try. In addition to gorgeous, tasty and soft bread, you can make easy and mouth-watering sourdough pancakes, waffles, english muffins, muffins, donuts, crackers, biscuits, pot pie, gingerbread, pasta, cookies, scones, crepes, pizza crusts, tortillas, cakes, and more! I did go on and on, but you got the point, right?

2. Sourdough Is Difficult.

Not so! On the spot, you can whip up the easiest, tastiest, most nutritious pancakes, waffles or crepes with just leftover starter and a few other ingredients. For many other easy dishes, all that’s required is mixing up some starter, liquid and flour ahead of time. Then about 8 hours later you’ll create cinnamon rolls, biscuits, or pasta much like usual. So tell me, how hard does that sound?

3. Sourdough Is Finicky.

No, it isn’t. A sourdough starter, or a sour dough, has just a few basic, simple needs: oxygen, warmth, and food. And it’s not even too picky about those. Oxygen is a given; leave a loose cover on the starter or dough so it can breathe. For warmth, anything around room temperature will do. The food can come in the form of any flour you’re using at the time. Whole wheat pastry flour, whole wheat flour (red or white) and spelt flour all take turns in my starter; I feed the starter whatever I’m using for baking.

4. Sourdough Is Just For Flavor.

Sourdough foods have complex and compelling flavors, no doubt. Consider the distinctive San Fransisco sour tang, or fluffy Alaskan sourdough pancakes drizzled with pure maple syrup. But I love sourdough for two other reasons.

A gift from God. Prior to this century and the development of commercial yeast, folks used a sourdough starter’s wild organisms for rising and lifting doughs. Leavened bread in the Bible? Sourdough all the way. When I see a warm soured dough rising in my kitchen, I praise God for the amazing and practical gift of sourdough.

More healthful. A sourdough starter is an ecosystem of wild yeasts and beneficial bacteria that work together to add B-vitamins to grains, to break down gluten for better digestion, and to neutralize phytic acid and enzyme inhibitors. In addition, the sourdough starter’s organisms are much more versatile than commercial yeast (with regard to temperature or other conditions) and sourdough bread doesn’t stale as quickly.

5. Sourdough Is Sour.

Sourdough can be sour, but it doesn’t have to be sour. Two chief practices contribute to “sour” sourdough.

Skipped feedings. Ideally, I believe we should feed a room temperature sourdough starter twice a day. A sourdough starter (the active mother culture) contains both wild yeasts and beneficial bacteria. Regular flour feedings keep the organisms fed and in balance. But missing a feeding gives the bacteria a leg up. You see, the yeasts run out of food when the simple sugars in flour are all consumed, and they start dying off. But the bacteria still have food to eat. They eat the expired yeasts, along with the yeasts’ wastes, and continue to produce lactic acid, the main sour flavor. And so the starter gets more sour.

Long souring period. When we create a dough with sourdough starter and let it rest, this is the souring, or fermentation, period. The yeasts and bacteria feed on the flours in the dough, and their byproducts are acids (offering flavor) and carbon dioxide (rising the dough). The longer the souring period, the more sour the flavor. For best nutrition, I recommend a good 8 hours of souring. Unless the weather is very hot, the flavor won’t be that sour, if at all. On the other hand, allowing the dough to ferment for 24 hours or more will yield a pronounced sour end product.

What can we learn from this? First, feed twice a day to keep all the organisms in balance and the overall sourness slight. Second, sour your dough for less time, rather than more.

By the way, have you heard the phrase, “soda sweetens”? It’s true! Many sourdough recipes (including these pancakes, english muffins, or waffles) call for baking soda. Not only does the baking soda react with the starter to give a good rise, but it sweetens the dough or batter by neutralizing some of the acidic taste.

Are you interested in easy sourdough recipes, video demonstrations, and mouth-watering results? I welcome you to participate in the Sourdough eCourse, where I and other teachers guide you in mastering simple, tasty, nutritious sourdough. We are always open for enrollment; you can join us any time your schedule allows. God bless you all!

Wardeh (‘Wardee’) Harmon lives in Oregon with her husband and three children. They raise ducks and dairy goats on five and a half gorgeous wooded acres, which they are in the process of turning into a productive homestead. Wardeh’s passions are healthy cooking and sewing practical wool garments, although she loves to create just about anything from scratch, should the mood hit right. Wardeh teaches traditional and whole food cooking at the GNOWFGLINS blog and GNOWFGLINS eCourse.

Comments { 15 }

My Simple Natural Food Pantry

Want to know what I really keep in my kitchen? Here is a fun little video tour through my pantry! Come learn what I find are the essential real food staples and what I use them for in our home. My goal is simplicity and accessibility, so I have streamlined my pantry to the basics.

httpvh://www.youtube.com/watch?v=19ZwSzPoPv4

If you are new to whole foods and real food ingredients, please check out this list of resources and introductions to this diet.

Resources:

Variety in Your Grains - learn about the wonderful nutritental value of whole grains
My Favorite Natural Sweeteners - a basic introduction to healthy sweeteners and how to use them
The Benefits of Soaking Your Grains – the hows and whys of soaking whole grains
Basic Steps to Nutritional Eating: 12 Steps to A Real Food Diet
The World of Oils - an introduction to the best healthy oil choices
My Pantry Inventory – a pdf document of my pantry inventory that I review each month and restock as needed

Comments { 84 }

Simplifying Grocery Shopping & the Benefits of Monthly Menu Planning

Photo Credit

Loading the kids into the car is a significant endeavor – making sure we have a clean diaper, putting on socks, shoes, coats, and finally loading them in and strapping them into car seats. The whole process may take up to 30 minutes of my day. Pack a quick snack, an extra diaper, and we are off. Arriving at our destination, it takes anywhere from 5-10 minutes to remove children from the car to the grocery cart. Halfway through the store, child #2 begins to melt down. The snack holds them over temporarily (and yes, I feed them at home before we left!). By the end of the store excursion, child #1 has to use the bathroom. Ten minutes later we are back to the store aisles. And we are only at stop number one of the intended three. Does this sound familiar? After going through this experience numerous times prior, I decided it was time to make a better strategy for grocery shopping. I have been practicing these methods for over a year now, and can highly recommend it!

1. Limit your trips.

Why not make it easier on your stress levels by limiting our trips to the store? Consider starting with a weekly trip and see if you can gradually stretch it.

2. Limit your stops.

Why do we find it necessary to visit three different grocery stores to get all our groceries? Many times it may be due to various prices differences at each location, coupons, or sales. When you really think about it, is the extra time involved and the added stress of loading and unloading really worth it? When I stepped back to compare: driving, extra gas, and the added tiredness that entailed were not necessary. Find a store that you can make all your purchases, adapt your menu so that you can get all the ingredients at one location and stick with it. It will be well worth it – your whole family will be more joyful as a result.

3. Order online.

It is becoming so much easier now to actually order your groceries online. How sweet is that? Check out Safeway, New Seasons (local natural grocery in the Portland metro area), Organics to You, and other online delivery systems. Ask around in your area. Many will allow you to order online and you can pick up in store to save on delivery fees, but also save you all the time and effort of touring the store. For a busy mommy, that sounds like a wonderful alternative.

4. Make a menu plan. Make a monthly plan for real simplicity.

I have been a huge advocate of monthly menu planning and my mission was only re-affirmed after a recent season of carelessness in this area which had to lead to sky-rocketing grocery bills and frequent trips to the store. Menu planning in general is definitely not my favorite activity. I would much rather just be in the kitchen preparing the food rather than planning what to make. But taking the time to plan your menu not only ultimately saves you significant time, but it will also help save you money. Why not take a simple step to simplify it for yourself?

Where to Start?

1. Start with a simple plan.

If you are new to menu planning, please start by beginning with just a weekly menu plan, and once you are comfortable with that to adjust to two weeks. Start your weekly plan by making a list of 7 dinners, 7 breakfasts and 7 lunches. Lunches can be mainly leftovers from the previous dinner if you make a bit extra. Breakfasts can be the same each week as we do it (see examples below). After you can make that work, build a monthly menu plan and work with the seasons. You will learn how much your family needs to make it through two weeks. You will also learn to stretch your food purchases in amazing and creative ways.

2. Figure out dinner themes to work from.

I have found it extremely helpful to start out my menu planning by making daily dinner themes. That way I had something to work around. I make a vegetable and rice stir fry or main dish salad every Monday, adding variation with different vegis and sauces. Tuesdays is always soup night, served with a biscuit or muffin. Increasing soups in your diet is an excellent way of increasing nutrition but also keeping the budget down. Fridays is pizza theme each week for family night. Making a large batch and serving it for different lunches or freezing a portion for another meal is also making the most of your time in the kitchen. Here are a few ideas:

Dinner Themes:

Monday – Stir Fry/Main Dish Salad
Tuesday – Soup
Wednesday – Fish/Lentils
Thursday – Mexican/Chicken/Casserole
Friday – Special Dinner – Pizza
Saturday -BBQ
Sunday – leftovers or eat out

Other themes could include: crockpot, Italian, etc. I have heard other creative ideas such as Meat Monday, Taco Tuesday, etc. Have fun and be creative! Anything to make meal planning enjoyable for your household.

Keep your breakfast and lunch plan simple by rotating the same schedule each week. Here is ours:

Breakfasts:

Monday – kefir smoothie, bread (muffin, bagel, or toast)
Tuesday – Oatmeal w/raisins & apples
Wednesday – kefir smoothie, bread (muffin, bagel, or toast)
Thursday – Oatmeal w/raisins & apples
Friday – Eggs or French Toast
Saturday – Pancakes
Sunday – Granola (a quick breakfast before church)

Lunches:

Lunches are a bit more flexible, as often times we will have leftovers on hand to eat from a previous meal, but if not, I keep the ingredients on hand for these ideas:

Monday – Ham & Cheese sandwiches, fruit/vegi
Tuesday – Egg Salad Sandwiches, juiced vegi & fruit
Wednesday – Salmon Melts or Tomato Soup & grilled cheese/ham sandwiches, fruit, salad
Thursday- Quesadillas, burritos, or baked potato bar (chili, cheese, lettuce, misc toppings)
Friday – Peanut Butter & Jelly or regular sandwiches
Saturday – Leftovers (Saturday is generally leftover day or clean out the fridge day)

3. Make a list of 4 ideas for each of those themes.

Now simply collect ideas for 4 weeks of recipes around those themes. Chicken Ceasar Salad, Taco Salad, Cobb Salad are some of our Monday choices. Jot them down on your monthly calendar.

4. Compile a master shopping list for the items needed to make those meals.

Go through each recipe and make a master shopping list of all the ingredients required. Now each month you have the same list of groceries, and you can keep a memorized list on your computer, phone, or notebook. You can see my master grocery list here. We use the Shopper app for its usefulness in organizing our shopping to the tee – aisle by aisle and keeping track of the costs in one.

5. Limit your shopping to one major stocking day, and one small refiller day in a months time!

A easy plan is to shop at the beginning of the month for all your staples, toilet paper, body products, meats, and dairy and produce for two weeks. I have found produce and dairy can last for two weeks successfully. Then make one extra stop halfway through the month to restock on produce and dairy. Or if you have a local farmer’s market, or farm stand, that would be a even better alternative.

6. Build a new monthly plan with each season.

You will appreciate the variety if you build a new monthly menu plan for each season: Spring, Summer, Fall, Winter. In this manner you can incorporate the more comfort foods for winter, and the light refreshing foods for summer. You can stick with a Spring/Summer and Fall/Winter plan as well, as I have done in the past. Now you only have to plan a menu 2-4 times a year! How nice is that? Care to join me? For inspiration, check out my Winter monthly menu plan and Spring/Summer plan from previous years.

I have experienced it first hand that doing a monthly menu plan can definitely save you money. I have saved at least $100 per month pursuing this method – which is certainly useful when you are striving to eat naturally on a budget.

Those are just some of my practical ideas for simplifying the grocery shopping adventures!

What tips do you have to share?

Other Menu Planning Ideas & Resources:

Weekly Menu Planning – by Crystal Paine
Healthy & Frugal Menu Planning Help Part 1
& Part 2- by Stephanie @ Keeper of the Home
Printable Monthly Menu Form

Printable Weekly Menu Form

Menu Planning: Saving Time in the Kitchen
Menu Planning Made Easy

Comments { 62 }

Homemade Dill Pickles

I labored over making 27 quarts of dill pickles this week and it was lots of fun! It took about four hours to complete amidst lunch preparations, nap times, discipline sessions, and the like. Always an adventure trying to store food for the winter while managing as a mother, and that is why I limit my canning to pickles, tomatoes, and jams (although I’ll probably do applesauce too this year, if my energy survives). I made this same recipe last year and they turned out perfectly delicious and crunchy! I thought 15 quarts would surely last us the whole year, but we wolfed them all down by over two months ago. I roughly tripled the recipe below to make 27 quarts from 25 pounds of cucumbers. Here is my video tutorial of the process. Hope you enjoy my amateur efforts! ;)

httpvh://www.youtube.com/watch?v=qWZdtPPmlCk

You can find the original recipe that I adapted from Allrecipes.com:

  • 8 pounds 3 to 4 inch long pickling cucumbers
  • 4 cups white vinegar or half and half with apple cider vinegar (for the added nutritional benefits)
  • 12 cups water
  • 2/3 cup pickling salt
  • 16 cloves garlic, peeled
  • 8 sprigs fresh dill weed
  • 8 heads fresh dill weed
  • 1/2-3/4 tsp pickling spice, per quart, optional (but adds delicious flavor!)

Directions

  1. Wash cucumbers, and place in the sink or bathtub with cold water and lots of ice cubes. Soak in ice water for at least 2 hours but no more than 8 hours. Refresh ice as required.
  2. In a large pot over medium-high heat, combine the vinegar, water, and pickling salt. Bring the brine to a rapid boil.
  3. Sterilize 8 (1 quart) canning jars by running through the dishwasher. Sterilize lids by boiling in a small pan of water until ready to use.
  4. In each jar, place 1 clove of garlic, one head of dill, then enough cucumbers to fill the jar (about 1 pound). Cut off 1/16-1/8 inch off the end of each cucumber to ensure crunchy pickles. Then add 1 more garlic clove, 1 sprig of dill, and pickling spice.
  5. Fill jars with hot brine to the rim of the jar. Seal jars, making sure you have cleaned the jar’s rims of any residue.
  6. Process sealed jars by inverting and placing in a large shallow of water for 5-10 minutes. The water should cover the rim of the jar. Remove jars while inverted to a towel on your counter and cool completely before turning over.
  7. Store pickles for roughly 6-8 weeks before opening in order for the cucumbers to pickle sufficiently. Refrigerate after opening. Pickles will keep for up to 2 years if stored in a cool dry place.

Tips to Achieve Crunchy Pickles

1.Use fresh ingredients – fresh dill (no more than 1-2 days old) and fresh firm pickles, free of soft spots. You also want the most warty pickles you can find.
2. Soak in a ice cold water bath (2-8 hrs).
3. Cut off 1/16-1/8 inch of the blossoming end of the pickle before putting in canning jar.
4. Invert in small pan of boiling water to cover the rim of the jar to process for 5-10 minutes.

I followed these three steps that were shared in the comments section of the original recipe, and it definitely assured I had crunchy pickles and none went to waste!

What about Lacto-Fermented Pickles?

I would love to make some lacto-fermented pickles, for the increased nutritional benefits, but unfortunately you have to have plenty of refrigerator or cold cellar space for storage, which I lack in our small condo. Learn how to make them here:

Nourishing Days: Fermenting Vegetables
YouTube video on Fermenting pickles
Wild Fermentation: Making Sour Pickles

Kitchen Stewardship: Finally…Crunchy Pickles! (her fun attempts at pickles!)

I’d like to make a small single batch in this method soon!

Comments { 30 }

Healthy Lemon Bars

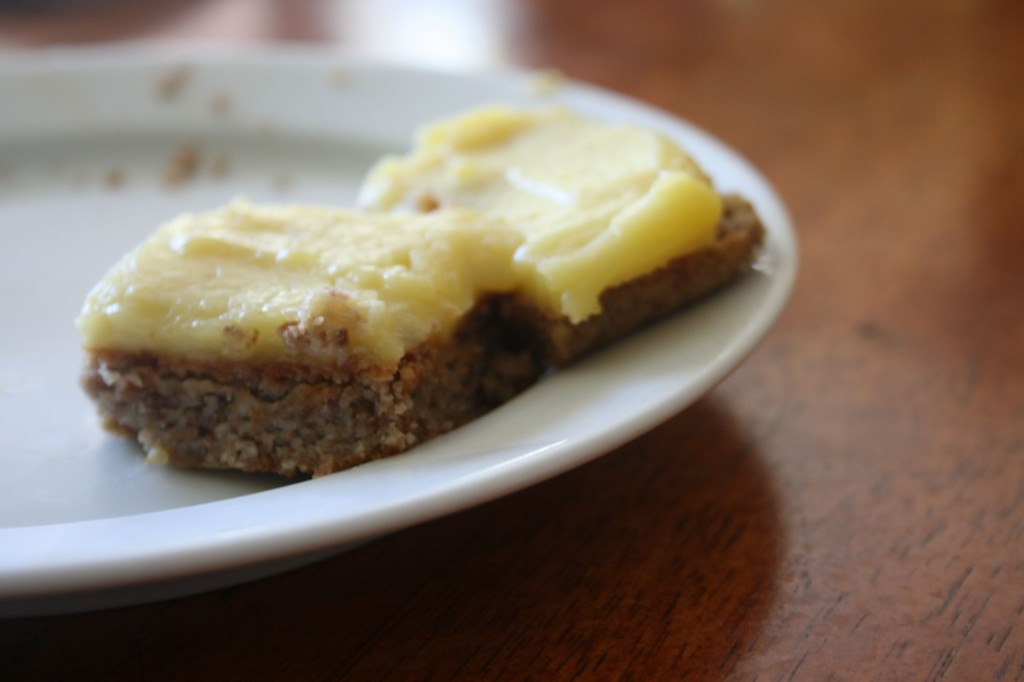
I am a huge fan of lemon bars! In fact, I think it just might be my favorite sweet. I love the combination of sweetness and tartness that they provide for my palate. I have been on the search for a means of making my own lemon bars in a more natural fashion. I found my friend Kimi’s lemon curb bars recipe, and fell in love! Not only were they incredibly simple, but they were delicious, gluten free and healthy all in one! I am all about simplifying, so I adapted her methods a bit to make it quick and easy as follows. I skipped the addition of lemon zest, because I did not have it and also found that the mixture was definitely lemony enough without them, and thus it saved a further step.

Filling:

3 whole eggs
1/4 cup honey (I found the smaller amount was perfectly sweetened enough – raw honey is your best option)
1/2 cup lemon juice
1/4 cup coconut oil (I cut back on the coconut oil from the original recipe since it was too strong of a coconut flavor to me. 1/4 cup was perfect! Choice virgin cold pressed unrefined coconut oil for best nutritional value.)

Crust:

1 cup of raw almonds (soaked and dehydrated, if possible)
1 cup of raw pecans (I have used practically any combination of nuts here!)
1/4 cup honey
1/2 cup of melted virgin coconut oil
2 eggs
1 teaspoon sea salt

Filling Directions:

1. Blend the eggs, honey, and lemon juice together in a small sauce pan until thoroughly combined.
2. Turn the heat on to medium high and add coconut oil, mixing regularly until the oil has melted.
3. Continue stirring until the mixture thickens and bubbles.
4. Remove from pan and place in a bowl in the refrigerator to cool and thicken further.

Crust Directions:

1. Place nuts in a food processor or blender and pulse until finely chopped, but not pureed. You may have little chunks of nuts, and that is fine.
2. Add the remaining ingredients and pulse again until well combined.
3. Spread over the bottom of a greased 8 x 8 inch pan.
4. Bake for 15-18 minutes in a 400 degree oven, until lightly browned and a toothpick inserted in the middle comes out clean.
5. Cool completely before layering the filling over the top. Return to the refrigerator until ready to serve.

Scrumptious! I am going to make another batch now!

Check out Kimi’s original recipe here!

Comments { 38 }

Simple Real Food Meals for Summer and Busy Seasons

Photo Credit

Busy seasons will come and go. There will be  seasons of life with greater suffering and trials to endure. Babies, morning sickness, moving, and the like. How can we pursue feeding our families nutritionally during these times? I honestly have been struggling with maintaining a real food from scratch diet in our home over the last year while enduring insomnia and caring for two lively little munchkins in our home. It simply has not been possible.

It was extremely refreshing to here from Stephanie at Keeper of the Home her post Even Real Food Bloggers Get the Blues about her own struggles with maintaining a real food diet in a busy season. Please check it out for some wonderful encouragement and suggestions. I was thankful to hear that I am not the only one.

During this season, I have been trying to slim down and stick to the basics. I do a simple natural housecleaning routine.

I currently buy sprouted bread, tortillas and the like. I am not baking much, partly due to being summer. My priority has been to maintain simplicity and maximum nutrition. I continue to make my own kefir for the wonderful antibiotics and as a great base for all of our smoothies, and kombucha (a refreshing summer beverage with lots of probiotics). These are easy and frugal at the same time.

Here are some of our simple summer meal ideas for this season:

Simple Meals at Our Home

Breakfast -we stick to the same breakfast routine at our house, rotating between oatmeal, smoothies, and eggs. Lately we have been eating a lot more green smoothies, because they are easy to prepare, the kids love them (and we don’t have to deal with picky eaters!), and you can throw practically anything in them for increased nutrition. They make an easy simple lunch or dinner as well. We add coconut oil or coconut cream for good fats and flax seeds as well. Stephanie recommended the addition of Green Foods Magna Plus Powder to increase the greens and veggie content. Great suggestion that I will be starting!

I also make a large batch of homemade granola for a simple breakfast or over top of fruit salad and yogurt, but also buy organic cereal for the enjoyment of my husband! This is one thing he really likes for me to buy on occasion. It sure is nice to have on hand for those busy Sunday mornings before church.

Hamburgers – yes, hamburgers are wonderfully delicious made from grass-fed meat. We serve with raw cheese, lettuce, pickles, tomatoes, and such on a sprouted bun. Utilizing the husband and the BBQ is wonderful. He loves learning a new skill while mommy gets a break. I appreciate this immensely! Another favorite is chicken thighs with some natural Montreal steak seasoning.
Pasta Presto - a simple meal that takes 20 minutes to prepare! Add chopped zucchini, onions and carrots for increased veggie content if you don’t have the energy for a side salad. During busy seasons I often prefer to stick with one main dish to maintain my energy.
Hummus & Pita – a wonderful simple lunch with quality protein! Make a hummus platter for a light dinner.
Salmon Melts - I keep my pantry stocked with cans of wild salmon to make these easy sandwiches that are high in omega-3 fatty acids. Makes a nutritious lunch or dinner.
Burritos - a seven layer burrito style is simple and nutritious with the addition of brown rice, black beans, grass fed beef or pastured chicken and your favorite toppings. Use canned beans if you need to!
Salmon – Trader Joe’s sells this marinated wild salmon soaked in olive oil and spices that takes 15 minutes to bake in the oven. It is delicious and easy to side with some potato wedges and a simple green salad.
Fish Tacos – I purchased some packs of Frontiers Organic Fish Taco Seasoning mix and what a delicious simple meal they make! I combine wild cod with the seasoning mix and fry it up. I use this mayo/lime juice mixture over cabbage, sliced avacados and tomatoes and serve over corn tortillas. Yum!
Baked Potato Bar - grad some chili (a can of chili if necessary) and serve over baked potatoes with an array of toppings – cheese, lettuce, tomatoes, olives, bacon bites, etc. Along these lines we have also done nachos for a quick easy meal.
Cobb Salad- this yummy salad has been a regular lately! Make your own ranch dressing with my recipe. Taco Salad or Chicken Ceasar Salad are also simple main dish salads, perfect for warm summer days.
Grilled Veggie Sandwiches – these are simple and delicious!
Roast in the Crockpot - another easy meal is to throw a pork or chuck roast into the crockpot with natural BBQ sauce and allow to cook on low all day. Nice way to get dinner out of the way in the morning.

Those are some of our simple favorites! I hope you will be encouraged to see that we are all striving to be faithful with the time and energy we have to make whole nutritious food for our families, but the Lord gives grace for these seasons! Making everything from scratch may not be all the realistic for most of us. I am also confident that the Lord is in control of our health and wholeness! It is not worth it to worry and fret over our well-being. Maintaining a peaceful and joyful home is far more of a priority. Remember, the Lord instructs us to not worry about our food or clothing, but rather to “seek first the Kingdom and his righteousness, and all these things will be added unto us (Matt. 6:33).” Being faithful but not striving to the stress of our households is key!

Comments { 29 }

Natural Summer BBQ: How to BBQ a Whole Chicken

Do you want to learn how to BBQ a wonderfully moist chicken? The key: stuff the chicken under the skin! This simple technique imparts such a lovely moisture and flavor that is beyond delicious, especially when that stuffing is butter creamed with roasted garlic and freshly grate Parmesan cheese, seasoned with herbs. As the chicken roasts, the herb butter melts beneath the skin imparting flavor and juiciness to the meat. This chicken is an excellent main course served over mashed potatoes with gravy from the juices. This recipe can be prepared in a similar fashion in the oven or crockpot. Yum!

Ingredients:

1 whole chicken (3 1/2 – 4 lbs)
1 head garlic
4-5 Tbsp butter, at room temperature
2 Tbsp finely chopped mixed fresh herbs, including parsley, chervil, basil, rosemary, oregano, and/or chives
3 Tbsp freshly grated Parmesan cheese
coarse salt and black pepper

Directions:

Garlic Butter:

1. Wrap the garlic head in tin foil (or in a small covered glass oven safe pan), and place in the oven/toaster oven at 350 degrees for 30-40 minutes until softened. Allow garlic to cool to room temperature.
2. Place the butter, herbs, and Parmesan in a small mixing bowl and beat with a spoon until light and fluffy. Cut the garlic head in half through the cloves and squeeze the garlic from each half into the flavored butter. Season with salt and pepper and beat to mix.

Stuffing the Chicken:

1. Remove the giblets from the body cavity. Rinse and dry the chicken.

2. To stuff the chicken, start by working one finger under the skin at the top of the neck cavity. Carefully loosen the skin from the meat, guarding against tearing the skin, if possible. Gradually widen the gap between the skin and meat until you can fit two fingers followed by your whole hand. Loosen skin from the breast, thighs, and drumsticks.
3. Spoon the garlic butter by hand under the skin. Spread the butter all over the chicken meat by gently rubbing the skin with your fingers.

4. Dash the exterior of the chicken with rosemary, salt and pepper. Ideally, you will want to truss the chicken at this point, but up till now we have got away without it.

5. Set up the grill for indirect grilling and preheat to medium. If using a charcoal grill, place a drip pan in the center. For our charcoal grill, we light the charcoal and form two heat zones by raking the coals into two piles at opposite sides of the grill. Our weber performer grill has baskets, which makes this easy to divide the coals evenly between the two, placing the drip pan between.

6. Place the chicken, breast-side up, in the center of the hot grill grate over the drip pan and away from the heat, and cover the grill. Grill until the chicken is deep golden brown and the meat is cooked through, 1 1/4- 1 1/2 hours. If using a charcoal grill, you’ll need to add 12 fresh coals per side after 1 hour. Internal temperature should be 180 degrees.

7. Transfer chicken to a platter to rest for 5 minutes. Carve as desired.

8. Pour the juices from the drip pan into a small pan on your stove top to prepare a gravy. I add arrowroot powder, salt and pepper to thicken and flavor as needed.

Recipe adapted from How to Grill by Steven Raichlen.

This is a continuation of our Natural Summer BBQ series. Check out our BBQ tools recommendations & our steak marinade.

Comments { 13 }