Archive | June, 2011

Adapting Your Favorite Recipes to Increase Nutrition

So you are on a quest for eating more nutritionally as a family and yet the task appears rather daunting. Do I have to develop a whole new menu plan with healthy recipes? Who wants to throw out all your family favorite recipes that have been passed down? Or those favorite comfort foods that make your family feel so satisfied and rejuvenated? The last thing any of us moms want to do is start from scratch when it comes to healthy real food eating.

Today, we would like to offer a resource of ideas for helping you adapt your favorite recipes to make them more healthy. The truth of the matter is, you don’t have to throw out your favorite cookbooks and recipes. In fact, practically every recipe on this site has been a family favorite for quite some time, and have only been adapted in the past several years to replace the ingredients with more real whole food alternatives. The flavors may have changed slightly, but overall, choosing to use real food ingredients only increases the flavor and intensity of each recipe.

I have provided here for you a simple chart to convert those standard ingredients in your everyday recipes to real, whole food ingredients.

Sweeteners

Learn about these healthy sweeteners here.

White sugar: Replace with equal amounts of rapadura or sucanat (both of which are whole cane unrefined sugars), or 1/3 less of raw honey or pure maple syrup (Vermont or Canadian sources). You can run rapadura/sucanat through the blender to get a less grainy texture, a perfect alternative for powdered sugar.
Brown sugar: Replace with equal amounts of sucanat or rapadura which have an excellent darker texture and tone similar to brown sugar. If you desire that wetter texture of brown sugar, simply add a Tablespoon of blackstrap molasses to the sucanat or rapadura.
Powered Sugar: replace with powdered sucanat/rapadura, or a dash of stevia.

Grains

White Rice: Replace with brown rice. Basmati brown rice is very similar in texture to white rice. Brown rice takes a longer time to cook so make sure to check the packaging. I usually use 1 cup brown rice to 2 cups water.
White Flour: The Colorado State University Cooperative Extension recommends the following for substituting flour when baking.
1 cup of white, all-purpose flour for baking can be substituted with the following:
• 1 1/2 cups bread crumbs;
• 7/8 to 1 cup corn meal;
• 1/2 cup cornstarch plus 1/2 cup rye, potato or rice flour (sift together 6 times, use with 2 tsp baking powder per cup in quick breads as wheat flour allergy substitute);
• 5/8 cup potato flour;
• 7/8 cup rice flour;
• 1 1/3 cups rolled oats;
• 1 1/4 cups rye flour;
• 1 cup minus 1 Tbsp whole wheat flour.

If you are new to using whole wheat, try using half and half with unbleached white flour (choice unbleached to avoid the dying process), and gradually increase the whole wheat content until you can make it 100% whole wheat. Sourdough options are my favorite for getting a light fluffy texture and delicious results even when using whole wheat.

Bread products: Try to find sprouted whole wheat options (Dave’s Killer Bread, Food for Life or Alvarado Street Bakery are all good sprouted bread companies) & or make sure to check labels that they are made from 100% whole wheat without the addition of high fruitose corn syrup or enriched wheat flours.
Pastas: Your best option is brown rice pastas (Trader Joe’s and Tinkyada are great brands), as they are both gluten free and low in phytates. You can get most varieties of pasta in brown rice varieties now.

Learn how to use more variety in your grain choices here.

Dairy

Generally, choose whole milk alternatives for any recipe calling for low-fat, non-fat, or skim. Whole milk is essential for getting quality fats from dairy products. Low or non-fat alternatives have been processed and are very difficult for the body to digest. If you have access to raw milk, this is your best option. Otherwise, choose whole milk cultured dairy products. Substitute them for equal portions in recipes. Other good alternatives include coconut milk, hemp milk, or organic milk based products.

Margarine: Replace with real butter made from whole milk.
Buttermilk: Replace equally with cultured kefir or yogurt. (Coconut milk kefir is a good choice as well.) You can also make your own milk kefir.

Oils

Your best choices here are olive oil, coconut oil, or butter.
 Read more about healthy oils here and part 2. Choice cold-pressed unrefined options. I use these three oils exclusively in all my cooking and baking.

Canola/vegetable oil: replace with olive oil for salad dressings, melted coconut oil for baking, and melted butter or coconut oil for sauteing. Real butter can be used for baking or sauteing.
Crisco/Shortening: replace with palm oil, coconut oil, or butter in their solid state.

Meat/Eggs

Look for pastured grass fed varieties for best nutritional value. These are animals raised on pasture that are fed a variety of greens rather than corn products. Wild fish products are preferred to farm raised. Find local sources here.

Canned Goods

The main concern with condensed soup is the MSG content. Either just eliminate these recipes altogether or replace with the following options:

Condensed Soup (Mushroom, Chicken, etc): replace with this easy homemade version or with cultured sour cream (as used in my enchilada recipe which originally called for cream of mushroom soup).

To learn what canned food brands do not have BPA in the lining, check out this list or Treehugger’s list.

Seasonings/Condiments

Table Salt: Replace with sea salt (I recommend RealSalt for its high mineral content). Or replace salt with herbs, either fresh or dried, and other seasonings. Freshly ground pepper and fresh seasonings have so much flavor, you won’t miss the salt.
Thickeners: Replace cornstarch or white flour called for in a recipe to a smaller portion of arrowroot powder (i.e. 1/4 cup flour = 1-2 Tbsp arrowroot powder).
Bouillon cubes: replace with homemade or organic free range chicken/beef broth. Usually a recipe will say 1 bouillon cube and 1 cup water, and you can simply replace both with 1 cup homemade broth. You can also freeze homemade stock in ice cube trays to replace the bouillon cubes.
Pancake Syrup: Replace pancake syrup (the fake HFCS sugar syrup) with pure maple syrup (Vermont or Canadian sources), honey, or fruit syrup.
Mayonnaise: Make your own homemade mayonnaise or purchase coconut oil mayonnaise or safflower mayonnaise.
Ketchup: Make your own or choice fermented ketchup or an organic variety that does not use HFCS.
Bread crumbs/croutons: Make your own!
Vanilla Extract: Use pure vanilla extract (not vanilla flavoring or imitation vanilla) or make your own.
Salad Dressings: The best nutritious salad dressing is a simple balsamic vinegar and cold pressed olive oil. But you can also make your own recipes of salad dressings using healthy fats, as described here.
Worcestershire Sauce (this often has corn syrup): replace with equal amount of white vinegar
.
Baking powder/baking soda: Chose aluminum free varieties (Bob’s Red Mill or Rumford brands).

For further help, please check out Baby Steps to a Real Food Diet.

Did I miss an ingredient? I am sure I did…let me know and I’ll add our source to the above list. Have a favorite recipe that you are just not sure how to adapt? Share below and I’ll try my best to offer some suggestions.
Photo Credit

Comments { 79 }

(Effortless) Freezer Cooking

VegetablesPhoto Credit

Written by monthly contributor, Natalie Didlake.

I love having frozen food to pull out in a pinch!

But how and when to get it in the freezer, in the first place?

With a little planning ahead, it’s easy to make a little extra here and there, and stick the extra in the freezer. Soon enough, the freezer will be full of homemade meals! (Or at least meal starters.)

Getting Started

The best thing I did when I got started was to sit down and brainstorm. I thought about all the meals we typically ate, and wrote down what steps I could complete in bulk, and freeze ahead…things like chopping veggies and pre-cooking meat or beans. Now, I can open the freezer nearly any night, and find at least some of my meal prep there, ready to go!

Here are some of my favorite things to keep in the freezer.

Veggies

Chopping fresh veggies every night for cooking is time consuming! I love having them in my freezer, ready to throw in the pan.

I’ve had success with carrots, celery, green pepper, and onions (double-bag onions so that your ice doesn’t taste oniony!)

Someday, I might even make my own custom, frozen “mixed veggie” bags, for standard dishes in our house.

What to do:

  • Buy in bulk, and plan to freeze, when a veggie is on SALE! I bought green peppers recently for $.35 each! A perfect opportunity to buy and freeze!
  • Peel/chop vegetables in large quantities.
  • Put them in zipper bags and freeze! Break off a chunk when you’re ready to cook.

Meat

Having frozen, pre-cooked meat really cuts down on dinner prep time ! Getting it into the freezer doesn’t even require much extra planning or time…just a little extra money up front. I wait to buy extra until I can get it on SALE! Sometimes I can diffuse the cost of the extra meat, by planning other, cheaper meals, like bean dishes or pancakes.

The great part is, once you have a stocked freezer, you won’t have to buy and cook multiple meats in one week…because you will have already have them frozen! You will then only need to buy and cook what needs replenishing.

Beef

  • Begin by planning a meal into your weekly menu that uses beef. Buy several extra pounds (like 5 lbs. of ground beef, instead of 1 lb.)
  • Cook, divide, and freeze in zipper bags.

But don’t just cook a bunch of plain ground beef! Think meal prep. Some of my favorite beef meal starters are:

  • Taco-flavored meat
  • Italian sausage
  • Turkey burgers -make and freeze patties
  • Meatballs – separate into 1-meal portions and freeze separately
  • Meatloaf – mix, form, wrap, and freeze. Thaw in fridge 24 hours
  • Stroganoff meat -brown ground beef with onions/mushrooms

Chicken

We all have our different ways of buying/cooking/serving chicken…but I can’t resist mentioning my new fave way to do chicken. I have started cooking 10-15 lbs of bone-in breast at once, at the beginning of the month! Sometimes I’ll take a bit out to freeze raw, for cooking later. But the rest, I cook, bones and all. From that, I fill my freezer with LOTS of chicken stock, and tons of cooked, shredded chicken. Chicken for the month, done!

Here’s a link to a great how-to if you want more details.

Breakfast Ideas

  • Muffins – Making a double batch, and freezing the extra, is a painless way to stock the freezer. I like to make mini-muffins for breakfast-on-the-go or trips.
  • Pancakes -My husband doesn’t care for thawed, reheated pancakes, but the smaller members of my household could care less! (Especially when they contain chocolate chips.)
  • Yogurt – freeze yogurt in small cups. Thaw for an hour or so, toss in fresh fruit and granola.

Other Meal Starters

  • Pizza – make multiple pizza crusts, wrap extras well, freeze. It might be fun to put the toppings on first…homemade frozen pizza!
  • Quiche – One of my fave freezer meals! Making multiples is so easy! Mix all ingredients of your best quiche recipe together, freeze, one quiche per zipper bag.
  • Beans – Canned beans are easier, but dried beans cooked at home are cheaper and healthier. I cook large quantities and freeze for later use. Be sure to label, or you’ll end up with “unidentified frozen objects”!
  • “Leftover Soup” – Throw any extra cooked veggies in a med/large container. Put in the freezer. Once it starts to fill up, throw it all in the crock pot with some seasoning, a little tomato sauce, and you’ve got veggie soup! Cook on low all day. Or, even better, add leftovers from a beef roast, and have veggie beef soup. Yum!

What are you going to freeze? Can’t wait to hear your ideas!

Comments { 53 }

12 Efficiency Tips in the Kitchen

Since I spend a lot of time in the kitchen between preparing meals and cleanup, I am always looking for further ways of increasing my productivity in this environment. Here are some of my favorite recommendations:

1. Multiply your meals – cook for a small army.

I always like to double if not triple my dinner meals because it gives plenty extra to spread out over other meals – leftovers are a huge time saver and makes the most of my limited time and energy. I double casseroles and freeze the second for another easy dinner when I am weary, or double soup and freeze the extras, while always reserving enough to cover lunch the next day. When you have all the ingredients lined up…why not cook for tonight and then another?

You might be surprised by what is freezable: not just stews and soups but pre-baked potatoes (stuffed or not), quiche, bread and cakes, sauces of many kinds, pesto, hummus and much more. If you’re not sure, try freezing a small quantity and test later to see how it worked out.

2. Get all your supplies together before you start.

Another favorite tip from the kitchen is to gather all your ingredients together before you begin the recipe. This helps me make sure I have everything on hand before I get out a mess, and it also speeds up the process by having all items within arms reach. Looking for this or that halfway through a recipe is no fun.

3. Clean as you go.

When you are done with that spice or dairy product, simply put it back where it belongs. It cuts down on the final dish duty but also spreads it out to make it more manageable and enjoyable. Who wants a pigsty when you are finally finished preparing a meal?

4. Keep a simple kitchen.

I keep only the essential spices on hand for my cooking so I’m not searching high and low for a spice in a huge collection. Many spices can be substituted for others (read more here), but if you keep to simple down home cooking, you don’t need that many any way. The basics include: parsley, oregano, garlic powder, paprika, basil, seasoning salt, chili powder, cumin, rosemary, thyme, salt, pepper, etc. I also keep one simple drawer of all my basic tools – measuring cups, measuring spoons, rolling pin, grater, can opener, wooden spoons, and garlic press. No random gadgets here to dig through when cooking time comes.

If you find yourself swamped in to many gadgets, ask yourself: Have I used this tool/gadget in the past 6 months to a year?

5. Invest in some equipment.

Having a few reliable quality kitchen appliances can save you time and energy. One reason I love my Blendtec is because of it’s auto turn off feature, enabling me to start on another task while it is going. Having a trustworthy blender and mixer have been truly a blessing to my kitchen. For my larger appliance recommendations, read here.

6. Prepare staples in batches.

Buy cheese in 5 pound blocks and grate it all at once and store in freezer ziplocs. Prepare a large crockpot of beans or lentils and freeze extras. Freeze homemade stock/broth in ice cube trays. Whip up larger batches of your favorite seasoning mixes. Consider setting up a monthly baking day for your bread making or other goodies.

7. Keep only every day use tools on the counter top.

If you are not using it every day, it doesn’t deserve a place on your counter-top. Keep your counter tops clutter free and you will find it takes less time to clean up and your kitchen will look more organized.

8. Keep simple storage tools.

I love storing leftovers in basic quart and pint size glass canning jars with these great little plastic lids. A great way to reuse what I have plus safe and economical. And they all are the same size so they are easy to store in the fridge or cupboard.

9. Organize according to area of use.

Store your items of similar use close together so you don’t have to go here and there around your kitchen when preparing your favorite apple pie. Pots and pans by the stove. Set up a baking center with all your spices, baked goods, measuring cups, spoons, and mixing bowls all in one spot. Plates and silverware should be kept close to the dishwasher for easy transfer.

10. Keep a running shopping list on the fridge.
Keep a running shopping list on your fridge with a pen right by it so that you can add things as soon as you realize you’re running low. This helps as a simple reminder not to forget it at the store and you’ll have the next package before your completely finish the last one.

11. Adopt a menu plan routine.

Whether it be monthly or weekly, adopt a menu plan routine. It will save you time and money.

12. Keep your knives sharp!

This is one I need to take care of now! Keeping my knives sharp will certainly speed up my meal preparations. Who wants to labor over a dull inefficient knife? I’ve heard they are more dangerous as well. No wonder I cut myself last week…although maybe trying to cut a frozen piece of meat wasn’t such a good idea?

Random efficiency tips:

- Hard boil your eggs - bring it to a boil and then turn off for 15 minutes. Cuts down on your electricity or gas consumption and is just as effective as letting the flame run!

- Flaxseed binder – Running out of eggs? This is a frequent occurrence at our house especially when I get randomly inspired to do a baking spree. This little trick has saved me time and time again!

Have any favorite productivity tips to share for the kitchen?

Comments { 22 }

Easy Summer Meals: Fish Tacos

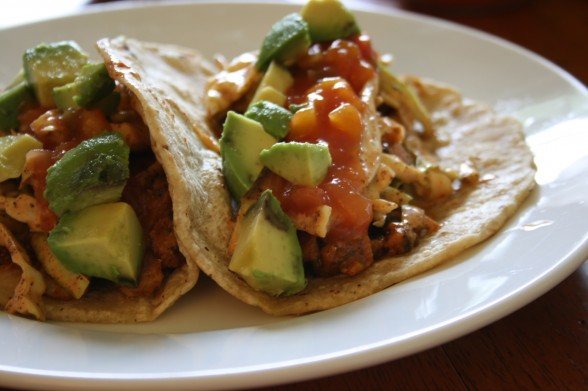
We are huge fans of fish tacos at our house – it is one of my hubby’s favorite dishes and a wonderful summer meal. Plus it is super easy and healthy at the same time. A fun way to add some good nutritional fish to your diet, especially if you are like us and don’t really care for it alone. This recipe uses a fish taco seasoning mix, but you are welcome to explore making your own seasoning. This mix contains a combination of: paprika, garlic, salt, red chilis, onion, cilantro, cumin, pepper, and coriander. I use the mix because it makes it especially simple to throw this meal together last minute and I have not found any recipe to compare to the flavor that is in the Simply Organic mix. It’s that good!

Ingredients:

1/2 head green cabbage
1/4 cup mayonnaise
1/4 cup sour cream
2-3 limes (or 2-3 teaspoons lime or lemon juice)
1 Tablespoon chili powder
1 teaspoon sweetener (sugar, honey, sucanat, etc)
1/2 teaspoon sea salt
1 Tablespoon apple cider vinegar
1 pound wild cod or halibut fillets (I buy frozen wild Alaskan cod fillets from Trader Joes)
1 package (1.13 oz) fish taco seasoning (we use Simply Organic brand and love it! I buy it by the case from Azure Standard.)
1 avacado
Peach or Mango salsa (Trader Joe’s sells a fabulous peach salsa that we enjoy!)
7-8 corn tortillas

Directions:

1. Cut up the fish into 1/2 inch strips or chunks, as desired. Place in a medium bowl and toss with fish taco seasoning mix and the juice of one lime. Allow to marinate as you prepare the rest of the recipe.
2. Thinly slice the cabbage and toss with mayonnaise, sour cream, chili powder, remaining lime/lemon juice, sweetener, salt, and apple cider vinegar.
3. Cut the avocados into small chunks and set aside in a small bowl.
4. Saute the marinated fish over medium/high heat until cooked.
5. Heat corn tortillas in another frying pan with a bit of olive oil or butter on both sides to warm and soften the tortillas.
6. Layer each tortilla with a layer of fish mix, dressed cabbage, avacados, and salsa. Top it off with a bit more lime juice, as desired. Serve and enjoy!

Yield: 4 servings (approx. 7-8 tortillas)

Comments { 17 }

MISSIONS in our KITCHENS

Written by monthly contributing writer, Ann Dunagan.

How can you glorify God in your kitchen?

Proclaim Your Purpose on the Fridge!

The refrigerator is a perfect place for us as moms to declare our FAMILY MISSION. We can post our prayer needs and praise reports, pictures of loved ones, recent missionary newsletters, and Bible verses to meditate on. Our fridge gives a glimpse of who we are, both to our family and to others!

Here's a glimpse of our mission-minded refrigerator!

. . . and a few Bible verses I've been thinking about!

See Your Kitchen as an Embassy Center for Kingdom-Advancement

I’m in our kitchen a lot; but it’s much more than a place to cook food. Our kitchen is our Grand-Central Station for coordinating and leading our family’s kingdom-advancing purposes.

Our homes are like God’s heavenly embassy in a foreign land; the kitchen is the command center and the HUB of our home. I think of all the LIFE that happens in our kitchen! Morning discussions with kids. Weekly home groups with church friends. Times of self-discipline (saying “NO” to a cookie or praying for more grace). And yes, lots of cooking, eating, and cleaning.

Disciple Yourself, Your Kids, & Others . . . in Your Kitchen!

Our kitchen is probably my biggest place for discipleship — of my kids, of myself, and of others.

I think about all the homeschooling-drills, dream-times with teens, world-issue discussions, or down-time with cup of coffee as I’m planning for an effective day.

My kitchen counter is where I frequently lay my writing projects and ministry work (to think about for a while, scribbling notes in-between stirring soup or taking bread out of the oven). Right now, it’s covered with papers — speaking notes for an upcoming family camp, copies of a possible new project for overseeing village churches, plus a random assortment of homeschooling books, Bibles, and missionary biographies.  The other day, my daughter and I were right there sharing Jesus with two sweet neighbor girls (while eating cookies and playing with a puppy).

We’ve also have great kitchen times mentoring for missions. Sometimes this is done in the midst of a fun potluck or party. Other times, our “discipleship-moments” are more intentional. Recently, we had two families join us for dinner and a delightful evening. In the midst of our food and fellowship, we shared stories of how we stepped out into ministry, started our orphanages, and learned to trust God for His provision. One of these families are now totally switching-gears. This month, the husband and wife are heading on a short-term mission to Tanzania, as they’re preparing to MOVE their family to Africa, long-term, to work with orphan children and to minister the Gospel. A few months ago, we were just dreaming about these possibilities; today, their family’s first missionary newsletter is displayed on our fridge!!! WOOHOO!!! That’s what I’m talking about!!!

Our kitchen is a reflection of who we are. It’s the center of where we live and enjoy LIFE. Our kitchen is a hub of our home and where we live-out our family’s MISSION for God. As the Bible says in Joshua 24:15, “As for me and my house [and my "kitchen'], we will serve the Lord.”

Our kitchen decorations can also convey our passions and family mission. I specifically picked a fruit theme for our kitchen, as I was praying for a life of increased "fruitfulness" for God's Kingdom.

Comments { 6 }

Preserving the Family Meal Table

“There is no life experience that replaces the connection and significant created by eating together at the table. Whether young or old, when a person experiences trauma, temptation, or embarrassment, being invited to the table makes them feel valued and restores their sense of significance.” – Devi Titus, The Table Experience

“Come and get it!” was often the call resounding through our home at the dinner hour. I have many a precious memory from our family dinner table as a child to a young adult. It was often a challenge to gather all eight children plus mom and dad around the table. Family togetherness at dinner was a thing my mother preserved. It may have been only 3-4 nights each week, but they were special sacred times together, especially our weekly family night every Friday evening.

Sometimes it may have been buffet style, at other times it was a more formal pass the plate around the table, or a picnic out on the back deck or lawn, or simply take and bake pizza, but in every case the preservation of love and relationships were cherished. Many times it was simply served on paper plates, but that mattered little, as we were together. Food has such a powerful way of bringing us together. Turn off the distractions, the technology, and build your health as well. It is an opportunity to slow down and focus on what is most important – our relationships. It is one way to preserve and protect the family.

Preserving Laughter & Relationship

Conversation and fellowship over the meal provides wonderful opportunities for family bonding and planning. The ability to share our lives with one another face to face not only strengthens our own identity but also fosters security, love, and affection. Use the time to ask each other about their day, to laugh at our mistakes, and encourage one another. Plan family trips, church activities, ways to serve others, or any other upcoming events. Eating together can have such power in building a strong family unity that will make a difference in this day and age.

Preserving Thankfulness

Why not make the table a place to cultivate thanksgiving? Go around and ask each family member what they are thankful for, or something that they are thankful for that transpired that day. This is a simple way to share the events of the day and conclude it in a spirit of joy and thanksgiving, which not only encourages one another, but draws the attention back to acknowledging the Source of our lives.

Preserving Prayer

The dinner table is a powerful opportunity to come together and pray on behalf of others. Set up a world map next to your table with missionaries or other people on your heart as a reminder for prayer. Designate a night each week with a prayer theme. Perhaps pray for neighbors on Mondays, your nation on Tuesdays, etc.

Preserving Hospitality to Your Own

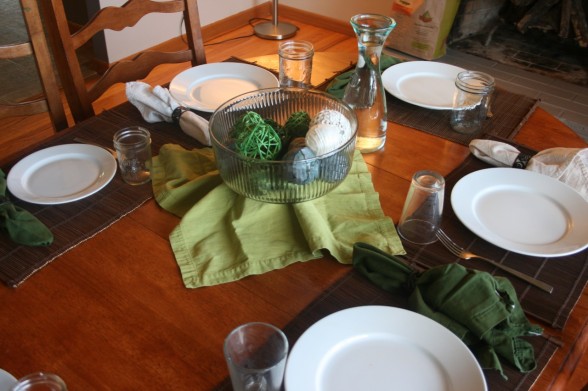
Preserving the dinner table is an opportunity to demonstrate hospitality to those dearest to us. Put a little thought into your table setting. Make it special with candles, cloth napkins, cloth place-mats, a simple bouquet of flowers, or something meaningful to your family. Serve a favorite meal. Or designate one night a week as a special celebratory family night. We love having homemade pizza every Friday night followed by some fun family outing, games, or movie night. Be creative. It need not be every meal, but making an extra effort on occasion can really bless your family. They need to know that we love and care for them just as we would others.

Preserving Working Together

Meal preparations were often a family affair at our home. Mom would have an assigned helper for the meal or my sisters and I would take an evening meal once a week to prepare on our own. More often then not, there were multiple of us in the kitchen cooking together. This not only helped build our nutrition and cooking skills but also assisted in building our relationships as we prepared meals side by side. With younger children in tow, it’s fun to include them in meal preparations as well. From simple dicing with a safe knife, to setting the table, it is easy to find a job for eager hands to complete. For more ideas and inspiration, read Cultivating Learning in Everyday Activities- in the Kitchen.

That being said, it doesn’t have to be dinner time for these goals to be accomplished. Strive for one other meal during the day to which you could sit down face to face with each other. Or if one member is not available, don’t throw in the towel altogether. You can still cultivate peace and relationship even if one or two are absent.

It’s beneficial for the body and soul.

“Every soul has its unique nuances. Each of us is uniquely formed in our mother’s wombs…However, there is one thing we all share – the need to connect. To dine with someone is to connect with that person. The table experience with your spouse, family, friends, and colleagues – and even your enemies – has the potential to begin bonding human hearts in a new way, a deep way that brings spiritual connection, a bonding that life’s circumstances should not break. During meals hurting hearts heal, sad hearts are made glad, depressed hearts get new vision, and divided hearts come to peace.” – Devi Titus, The Table Experience

Further Resources:

Dinner Table Conversation Starters
The Surprising Power of Family Meals: How Eating Together Makes Us Smarter, Stronger, Healthier & Happier
by Miriam Weinstein
The Table Experience: Discover What Develops Deeper, More Meaningful Relationships
by Devi Titus

How do you maintain a regular time of eating together as a family? Any hints you might share?

Comments { 14 }

Four Secrets to Thick, Creamy Yogurt Every Time

Written by contributing writer, Trina Holden

Yogurt is one of the simplest traditional foods and a staple in the real food kitchen. Everyone should make their own. The problem is, many have tried to master this simple technique only to have it turn out runny, flavorless, or sour. Eventually they return defeated to the expensive, overly sweetened, store bought version that is all-too-often stripped of good fats.

I have been making yogurt for sixteen years and only in the last six months been able to obtain consistent results with a yogurt that is creamy and thick as custard. (See  the photo – my yogurt is so thick it can stand on its head!) My kids crave it and even my husband will eat it–hooray!

If you have not been satisfied with your yogurt attempts so far, I encourage you to check out these tips and see if there isn’t something here that was missing from your previous attempts. Many of my friends have finally achieved the goal of making their own yogurt by following this step-by-step recipe and keeping in mind these tips…

The Four Secrets to Thick and Creamy Yogurt Every Time

  • Keep it fresh! Get new starter every month or so. You can use your own yogurt for starter several times over, but if your yogurt starts turning out runny or has a funny consistency, it’s time for new starter.
  • Keep it clean! Sterilize the jars you will incubate and store the yogurt in. You want to have control over what bacteria and cultures are growing, so always start with a clean slate.
  • Respect your starter! Don’t beat it to death – let it retain some of its form and dignity and it will work well for you every time.
  • Let it rest! A long incubation time gives the yogurt a full flavor and thicker consistency. Don’t be afraid to leave it overnight!

Yogurt in 10 Simple Steps

1. Pour 1/2 gallon of milk int a large, heavy bottomed sauce pot. For vanilla yogurt, add 1T. vanilla extract and 1/2 c. maple syrup, honey, or sucanat.

2. Heat milk to 180 degrees, or until it bubbles and forms a sking. Turn of heat.

3. Cool milk to 120 degrees. or until you can keep your finger in the milk without burning yourself. Place pot in sink of cold water to speed up this step.

4. Meanwhile, sterilize 2-3 qt. jars by pouring boiling water over them and letting them drain.

5. When milk has cooled, scoop one cup milk into a small bowl and gently swirl in 1/2 c. yogurt (any fresh plain yogurt from the store will work or you can use a yogurt starter)–no stirring!

6. Pour starter mixture back into pot and swirl gently. You are introducing the starter to the milk, not incorporating it.

7. Pour the milk into sterilized jars, if you see chunks of yogurt, you know you did steps 5 and 6 right! Try to divide these chunks between your jars.

8. Cap jars and set them in the pot you warmed the milk in. Fill pot to rim of jars with hot tap water and leave in sink or on counter.

9. Let yogurt incubate 10-18 hours.

10. Move jars to fridge to chill.

Enjoy!

Note from Trina: This recipe is from my new ebook, Real{Fast}Food. It’s full of time saving tips for the real food kitchen, teaching you how to plan better, cook faster, and eat healthier! You’ll find lots of great recipes and techniques to get you through the busy summer months. For more information, visit Real{Fast}Food.

Comments { 161 }

Easy Summer Meals: Burritos w/Homemade Refried Beans

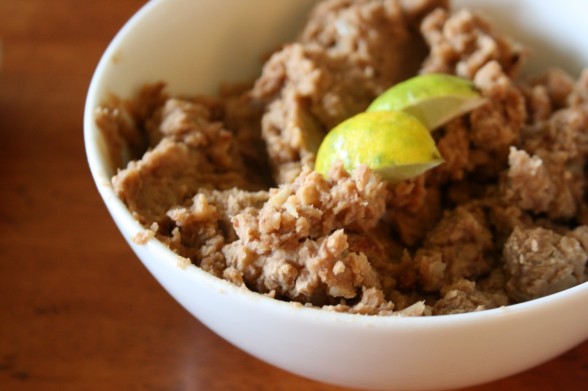
I love easy simple meals that are full of healthy ingredients but don’t require a lot of time or energy to prepare! Burritos is one of those that provides a well balanced meal with lots of flavor and as much variety as you desire. You can add meat of any kind and spice it up with a little taco seasoning mix, or keep to a basic flavorful refried bean for the frugal minded. There are numerous recipes out there for refried beans, but here is our concoction to get you inspired! We make a large batch of refried beans at one time and I freeze them in smaller batches for future easy meals (lunches or dinners). I will put quart size mason jars of refrieds in the freezer for easy access. This cuts down on your work and makes it more simple.
Refried Beans

8 cups dry pinto beans
1 1/2 Tablespoons sea salt
2 teaspoons cumin
4-6 garlic cloves, minced
1 onion, chopped
dash of hot sauce or 1-2 jalapeno, seeded
pepper, season to taste

1. Soak your beans overnight in a crockpot with fresh filtered water and 1-2 Tablespoon raw apple cider vinegar, white vinegar, or lemon juice. This helps to de-gas the beans and break down the phytates that inhibit proper digestion.
2. Rinse the beans and fill your crockpot again with fresh filtered water to cover the beans by about 2 inches. Turn on low for 5-6 hours. Keep an eye on them and add more water if needed.
3. After the beans are soft, drain and reserve about 1 cup of the liquids.
4. In a large stock pot, saute your onions and garlic. Add the cooked beans and just enough liquids to make a smooth paste. With a hand mixer, blend up the beans till it reaches your desired consistency. Add more liquids as necessary. Add your salt, cumin, hot sauce, and season with pepper to taste.

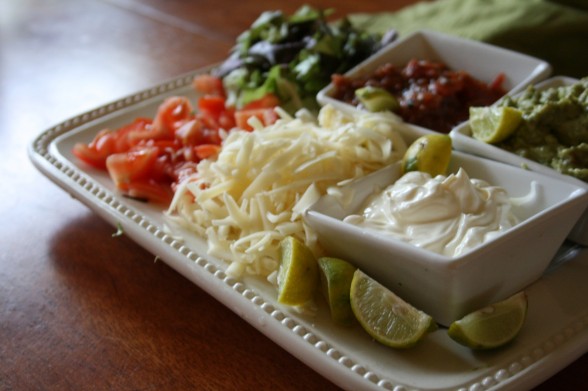
Our favorite toppings include: salsa (our fermented salsa is a huge hit!), sour cream, raw cheddar cheese, tomatoes, limes, lettuce, and guacamole! For a gluten free variety, we serve on brown rice or corn tortillas! Simply heat them up on both sides in a pan with a bit of butter or olive oil and you have a wonderful pliable tortilla to fill with goodness.

Enjoy!

Comments { 28 }

Cooking: An Instrument of Comfort


Photo Credit

Welcoming our new monthly contributing writer, Emily Pastor.

“You probably need to eat something,” the baker said. “I hope you’ll eat some of my hot rolls. You have to eat and keep going. Eating is a small, good thing in a time like this,” he said.

~“A Small Good Thing,” by Raymond Carver

We are surrounded by hurting and weary people. Some are in our families, some are friends, some are strangers. We all face times when exhaustion and loss characterize our own seasons in life. During those times, it’s hard to overemphasize the important role that food plays in providing comfort and healing.

When I walk into my kitchen, I often consider the importance my cooking plays in physical health, but easily forget about it’s role in the emotional health and security of my family. As a health-conscious mama it’s easy to fixate on preparing frugal and healthy meals for family and forget about the comforting aspect of food. I can get so caught up in finding the healthiest ingredients, serving faultlessly rounded meals, and making sure we all get enough good fats that I forget about the hearts and souls finding refuge in these meals. Cooking can be an instrument of comfort through familiarity, routine, and provision.

Comfort of Routine

Routines revolving around meals provide security and comfort. Have you ever noticed that most families have dinner seating arrangements that never change? Whenever we go over to my parents house for dinner, my grown siblings and I still sit in the same spots. We each have a place and the comfort of knowing we belong.

Last year I took a trip to visit my sister-in-law and niece while my brother was deployed. My sister-in-law’s meal routines really impacted me. For each meal, she set the table, put out cloth napkins, prayed before the meal, and enjoyed the menu of the day. These simple routine acts surrounding meals provided a comforting and enjoyable routine three times a day.

While routines establish security and comfort, they also provide a safe stage for creativity and change. The routine of setting the table is a fun routine that can change with the seasons, the holidays, or with whatever inspires your creativity. Asking table questions provides a routine that opens up constantly different, meaningful, or fun conversations each night. Prayer centers the focus of the meal and provides an outlet for constant changing praises and requests.

Comfort of Familiarity

When I think of comfort food, random meals come to mind: bean burritos, chicken pad thai, deli sandwiches, cheap chinese food. Even though each of those meals differ greatly, they all share a thread in bringing back memories of familiar and happy times. Bean burritos remind me of leisurely lunches growing up at home. Pad Thai reminds me of the early days of marriage when my husband worked at a Thai restaurant. Deli sandwiches remind me of summer. Cheap chinese food was my family’s favorite meal to eat out growing up. Some of these meals are more “healthy” than the others, but the comfort is in the feelings and memories they bring back. Everyone’s comfort foods are different and they hold memories in the smells, tastes, and textures of those foods.

While I don’t want to downplay the importance of healthy food, I’ve realized that sometimes an “un-healthy” meal can be more “nourishing” than a Sally Fallon endorsed entree. Sometimes a bowl of macaroni and cheese feels more nourishing than a bowl of steamed vegetables. Sometimes cinnamon rolls bring more peace than soaked whole wheat bagels. While not all comfort food is “un-healthy,” my point is that we should take into account our friends and family’s comfort foods and cook in such a way that reflects our love for them and their tastes. Serving familiar foods to loved ones is a tangible way we can say, “I know you; your tastes are important to me.”

Comfort of Provision

When I’m having a hard day, I love being invited over for dinner. I really don’t care if that means driving 40 minutes away…if you invite us, we’re on our way! There is comfort in someone meeting your most basic needs. For me the comfort of that meal means more than just enjoying food with friends and family. I feel the comfort all through the day as it gives me time for a nap instead of meal prep, more time to sit and chat after dinner instead of dishes, and a little more breathing room in my food budget. Providing meals for others is a practical way we can help meet not only the physical needs of others, but social, emotional, and financial needs as well.

What foods do you and your family find comforting?

What are your family’s established mealtime routines?

Who in my life is in need of some comfort that a meal could help provide?

Whether it’s in a warm cinnamon roll or a steaming bowl of soup, my hope is that we realize the healing power of our cooking when we use it as an instrument of comfort.

In my opinion, that’s no small thing!

Comments { 15 }

Simple Healthy Summer Meals

Photo Credit: Kirti Poddar

Note from Lindsay: My heart is full this week as I process all the intense images and knowledge I gained this past week in the Philippines. My body is also taking its precious time to adapt to the time change. Sleep has been avoiding me. I’m just trying to take it easy and pray for the Lord’s grace to just focus on my priorities this week. Going to launch right into our June theme where we will be sharing about cultivating simplicity and intentionality in the kitchen. Join us!

Post by Contributing Writer, Michele

Summer is usually a time of impromptu gatherings with friends, overnight visitors, and busy children’s activities in our family. On those hot summer days, standing in front of the oven is the last place I want to be, but everyone still needs to be fed.

To keep from resorting to ice cream for dinner (most of the time), I love having some frugal, simple-prep meals/ingredients on hand, using a combination of “once-a-month” meal preparations, a slow-cooker, and fresh produce.

Beans & Grains

Cook up a big batch of beans. You can put them in the slow cooker, if you just can’t bear to turn on the stove, and put it in your garage or shady porch to cook during the day.

I usually find black beans or chickpeas/garbanzo beans pretty versatile for summer meals. Store extras in freezer containers or baggies (stack bags flat in the freezer) for future meals. You can do the same with grains, such as millet or brown rice. (Cooked rice is perfect for making a fried rice to go along with a stir-fry!)

Some fun summer bean meals:

Photo Credit: roland

Blender Meals

On a hot day, a nutrient-rich smoothie can be a welcome side to a meal. You can make a Green Smoothie or a Fruit Smoothie, adding in plenty of whole milk yogurt or kefir. A chilled, blended soup can be refreshing on a hot evening, such as:

Eggs

When talking with fellow “real food” blogger friends last fall, most of us mentioned the favorite “busy day meal” trio of Popcorn, Smoothies, and Omelets (toss in some garden veggies!). Stuffed Deviled Eggs, Omelets, or even a “breakfast for dinner” of scrambled eggs & soaked waffles are simple, nourishing meals that won’t heat up the kitchen.

Photo Credit: sporkist

Batch Grilling

Not just for burgers; use the barbecue grill, and cook up a whole chicken, big batch of meats, or veggies while the coals are still hot! Leftover cold grilled chicken or beef is perfect for summer salads (such as Southwest Chicken Salad) or sandwiches. Grilled veggies or sausages are delicious in an omelet or soups, as well as Grilled Veggie Sandwiches.

Photo Credit: coanri

Fresh Produce

You may be gleaning produce items from your garden on an as-needed basis (such as lettuce, tomatoes, or carrots). But if you have a veggie drawer or fruit basket full, prep them into salads or veggie trays for quick snacks or appetizers (perfect for those drop-in guests!).

Use a melon baller to make quick work of a large melon, and toss together a fruit salad. A bowl of a nourishing homemade creamy dip is a great option to have on hand, too, with your veggie trays.

Cold salads can be made into meals, too! Stir in some shrimp or canned salmon, and serve in a wrap or stuffed into a bell pepper for a fun picnic meal.

You don’t have to do all your prep-cooking on one day.

Just make extra when you do cook a meal, and put it in the freezer- alongside the Strawberry Ice Cream! What are your favorite summer meals?

Comments { 14 }