Archive | recipes & kitchen tips RSS feed for this section

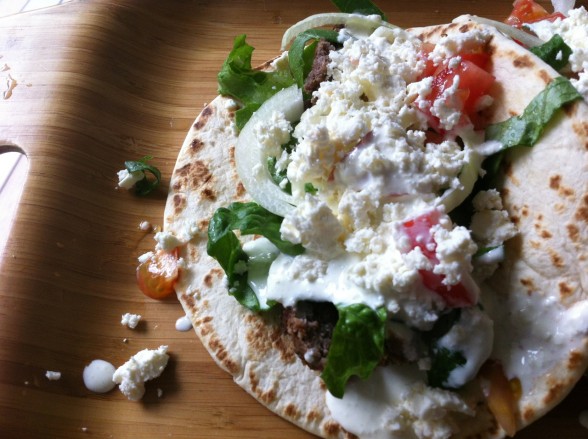
Ground Beef Gyros

Gyros have been my favorite food of choice when it comes to exploring the various food carts around Portland…since we live in a city that is famous for these small little restaurants on wheels. One of my goals this summer was to prepare our own homemade gyros with quality natural ingredients, and with some experimenting and fun, I have compiled a recipe that is scrumptious and frugal! We all have been enjoying this recipe multiple times over the last month and it is mouth watering yumminess. Dont skimp on the feta!

GYRO PATTIES:

1 pound ground beef (preferably grass fed) - It is also fabulous with thinly sliced sirloin steak or roast marinated (see below), but ground beef it more frugal so a great alternative!
1 1/2 teaspoons dried oregano
1 teaspoon garlic powder
1 teaspoon onion powder
1 teaspoon salt
1 teaspoon pepper

CUCUMBER SAUCE:

1/2 medium cucumber, peeled, cut into chunks
1 cup plain greek yogurt, or sour cream
2 Tablespoons onion
2-3 garlic clove, minced (start with two and add more to your tastes)
1/4 teaspoon sea salt
1/4 cup apple cider vinegar

TOPPINGS:

Feta cheese, crumbled
1 cup Lettuce, shredded
1-2 Tomatoes, chopped
1 small onion, sliced or chopped
4-5 Mediterranean flat or pita bread (I prefer the soft pliable texture of flat bread over pita bread as it makes a huge difference to the taste – It is available at Trader Joes or in the fresh baked goods section at your local store. Often labeled mediterranean greek flat bread.)

Directions:

1. Combine in a bowl the ground beef, oregano, garlic powder, onion powder, salt, and pepper. Shape into 4-5 patties and cook in a skillet until fully cooked. Cut patties into thin slices.
2. To make cucumber sauce: combine cucumber, yogurt/sour cream, garlic, salt, and vinegar in the blender, and pulse until smooth and slightly chunky. (This sauce makes enough for two batches of this recipe, so store the remainder in the fridge until next time! It lasts for a good month).
4. Layer on your pita or flat bread, sliced beef patties, cucumber sauce, feta cheese, onion, tomato, and lettuce. Enjoy!

I recommend that you layer ingredients directly on a flat pita bread rather than trying to open it up. It falls apart too easily if you try to open the pita bread up. Flat bread is my favorite choice as it is more moist than pita bread and more substantial and less likely to fall apart while consuming.

Yield: 4 servings.

Alternative Recipe: If using sirloin steak/roast or lamb steak, marinade in the following blended mixture for best results. A fabulous step up to the recipe!

1/2 onion, cut into chunks
1 garlic clove
3/4 Tablespoon raw honey, xylitol or other natural sweetener (I used honey and it was delicious!)
1 1/2 teaspoon ground mustard
1/4 teaspoon ground ginger
3/4 teaspoon pepper
1/4 cup soy sauce
1 pound sirloin steak, cut into thin strips

Marinade for 1-2 hours before frying in a saute pan, and proceeding with the rest of the recipe above.
Comments { 17 }

Our Morning Vegetable Juice in the Blender


My husband and I recently watched, Fat, Sick and Nearly Dead (watch it free here), and were quite fascinated by this remarkable documentary. I was reminded again how beautiful God designed food to be the healing power to restore order and health in our bodies. I was also challenged to eat more fruits and vegetables and to see that it is more simple than I realized. With my insomnia and hormonal imbalance issues and my hubby’s high cholesterol levels (it seems to run in his family), we have been striving to be more intentional in learning what would be best for getting us both into a place of balance and better health.

Juicing is a simple way to increase your consumption of vegetables in an efficient manner. When juiced, the nutrition is made available to the body very quickly. Juicing helps you to absorb all the nutrients from the vegetables as it helps to break them down and  ”pre-digest” them for you. I also love how it helps us add a wider variety of vegetables to our diet that we don’t often eat or prefer otherwise. Beets would be one of those vegetables that is packed full of nutrition but we just don’t honestly eat a lot of it.

But…I don’t have a juicer. And honestly, juicers are kind of a pain in my experience. I had one a while back and it was so much work to clean the whole machine out after each use, our relationship ended rather quickly. Then I realized…there’s got to be a way I can use what I have. And yes, I have found an extremely simple way to make homemade juice with my blender. It’s so easy to do that it has been possible to add it to our morning breakfast meal.

What you need?

A blender (I use my Blendtec which I love and it works incredibly well! You can also use a standard blender, but plan to add more water and add ingredients one at a time)
nut/milk bag or a paint strainer bag (available at your local hardware store)

Here’s a silly little video of me assembling our juice for your viewing pleasure! Don’t laugh…;)

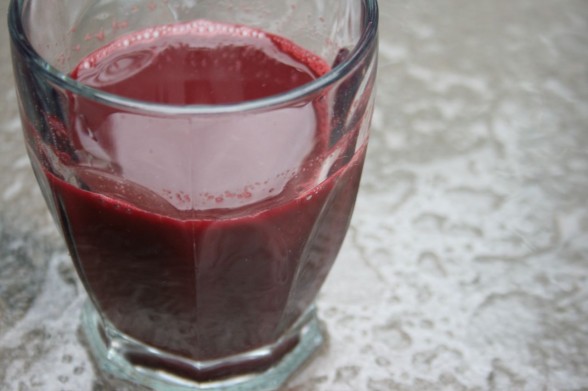
Our Morning Boost: Carrot, Apple & Beet Juice

This mixture of fruits and vegetables is high in vitamin A, C, folate, nitrate, calcium, antioxidants, electrolytes, and iron, giving you a great boost to start your day!  Carrots and beets are especially good for cleansing your blood and liver. As I understand it, apples are the one fruit that can be safely mixed with vegetables (Learn the recommendations about food combining here). But I did read here, that if you juice it, then it eliminates this problem…not sure who to believe on this one. ;)

1 large beet, diced
6 carrots, cut into medium chunks
1 – 2 apples, cut into chunks
2 celery slices, cut into chunks
Handfull of greens – kale, salad greens, romaine, etc
1/2 -1 cup water (when using a blender for juicing, you have to add a bit of water to help puree the ingredients. This is not necessary if you have an actual juicer)

Directions:

1. Wash and scrub all vegetables thoroughly. No need to peel them, unless you desire to do so. Cut up all ingredients into 1-2 inch chunks.
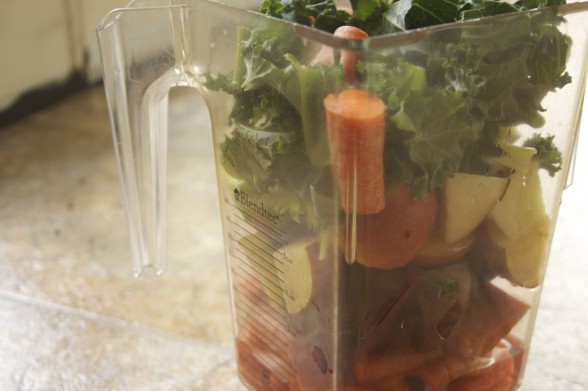
2. Gradually load your blender with each ingredient and add water. If using a standard blender, start with softest ingredient and try adding one ingredient at a time and blend till smooth between each addition.
3. Place blender onto your base and pulse or use whole fruit setting (when using a Blendtec), till fully blended.
4. Place your strainer bag in a large pitcher and gradually pour your juice into the bag. Gently, squeeze the strained juice out of the strainer bag.
5. Compost the leftover pulp (or make it into a fruit leather snack) and consume the juice! 

Consume immediately, otherwise add a bit of lemon juice and place in a sealed container and store in the refrigerator. Best to consume on an empty stomach and 1 hour before or after other food items.

Yield: 32 oz.

In this manner we have juice each morning and cut back on our other food consumption. For example, we now have a 12 oz cup of juice and 1 egg and a half piece of toast for a full complete meal. My husband and I are feeling so much more energized as as result. The kids enjoy it as well!

I believe it is important to maintain a balanced whole foods diet. I believe God designed our bodies to enjoy a wide spectrum of real food that he has fashioned each with various nutrients for our bodies. Each vegetable, fruit, protein, or carbohydrate offers different value to our bodies. Thus, you won’t see me advocating any special diet. We need a whole variety of real foods in balance and moderation to one another. The disadvantage to juicing is that it does eliminate the fiber in the vegetables through the straining process, although apple juice is high in fiber, thus bringing more balance. In light of this, we try to make sure we have a whole fiber green smoothie or other fresh salad at another meal during the day to make sure we are enjoying the full spectrum of nutrition. The benefit of juicing for us is that it gets more vegetables into our body quicker and gives us that jump start on the day with a clearer mind and increased energy.

For a whole range of fresh vegetable juice recipes and detoxing juicing plans, check out Reboot Your Life.

My next mission is to experiment in using the discarded pulp for other food snacks. Muffins, crackers, fruit leather, add to a green smoothie? No waste is the goal…although composting really isn’t wasting in my opinion.

Comments { 64 }

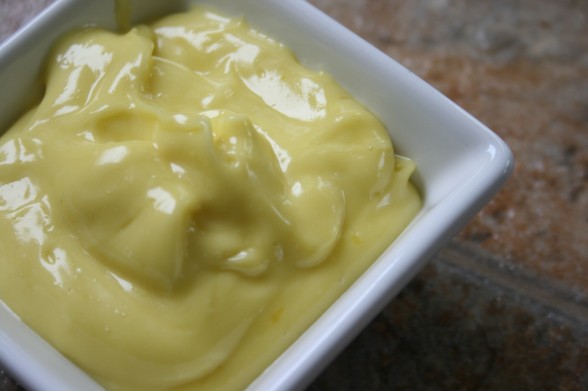
Homemade Healthy Mayo with a Stick Blender in 10 Seconds

I received a stick immersion blender for Mother’s Day this year…and I have certainly been thrilled with the performance of this little machine. I have made guacamole, mayonniase, baby food, pureed soups right in the pot, deviled eggs, and numerous other food items and it has been a huge time saver with fantastic smooth results. This tool retails for approximately $30. I have tried making homemade mayonnaise in my regular blender several times over the years in my pursuit of using more natural home prepared ingredients, and never had the best results. It sure never got really fluffy and took forever to gradually pour the oils in drip by drip as most recipes required. I was stunned when I made mayonnaise in just 10 seconds with my hand blender. Yes…10 seconds.

This recipe is pretty flexible to use whatever oils you desire. For the nutritional benefits, I chose to use 1/2 olive oil plus another oil. Olive oil alone results in a pretty bitter mayo. But coconut oil alone will give you a very solid product in the fridge once it cools completely. I liked 1/2 olive oil and 1/2 coconut oil, but it still got solid over time in the fridge. So our current favorite is 1/4 cup olive oil and 3/4 cup grapeseed or sunflower oil for the mildest flavor. It also does not get so solid with these oils. It is easily adaptable to your preferences.

Ingredients:

1 egg yolk (we use local farm fresh pastured eggs)
3-5 teaspoons white vinegar
1/4 + 1/8 teaspoon sea salt
1-4 teaspoons sugar, optional (we used xylitol)
1/4 teaspoon lemon juice
1/4 teaspoon dry mustard
1/4 cup olive oil (cold pressed) or coconut oil, melted
3/4 cup grapeseed, or sunflower oil

  1. Make sure all ingredients are at room temperature. Break egg yolk into the bottom of the hand blender jar that comes with your stick blender (or a container that is just wide enough to let the blender pass through – a wide mouth mason jar would work as well).
  2. Add all the other ingredients except oil on top of the egg.
  3. Carefully pour 1 cup oil on top of all the ingredients in the bottom of the jar.
  4. Put mixing blades of hand blender (turned off) flat at the bottom of the jar over the egg yolk, pressing down over the egg yolk.
  5. Turn the blender on high and blend for 5 seconds, holding it in place at the bottom of the jar. Gradually pull the blender up to the top of the jar over an additional 5 second period. Turn off blender. You will then have beautiful fluffy mayonnaise.

Yield: 1 1/4 cup

Caution: Learn from my mistake and make sure to unplug your stick blender before cleaning out the excess ingredients that collect inside the blades. Yes, I lost my finger nail this week in this manner. ;) It wasn’t a pleasant experience. I make silly mistakes just like any other homemaker…

Comments { 50 }

Summer is for Ice Cream

We have been enjoying 10 days straight of glorious sunshine here in the Northwest. It’s a little taste of summer. We are soaking it up before it disappears back to rain. With summer on our minds…we have been thinking about homemade ice cream! Summer is such a fun time of year to whip up some homemade ice cream to serve to your family and friends. It is a fun thing to create in the kitchen with kids and come up with all sorts of yummy concoctions. Here are a few helpful tips and recommendations for making the best ice cream:

- Add more sweetener than you think – it kind of disappears in the freezing processing. You want to make it slightly too sweet when preparing and it will be perfect when frozen.

- The more cream the better- Try to go for at least 1/2 heavy cream and 1/2 whole milk. The more cream you use, the more creamier the results will be. I have also substituted coconut milk many times as well for easy dairy free ice creams. Coconut milk has a really nice creamy texture to it.

- Keep it simple. You don’t need to add egg yolks or cook your ice cream as many recipes call for. Skip the eggs as they really aren’t necessary in the recipe. Some say they make it creamer, but I haven’t really noticed much difference. I just throw all the ingredients in my blender, whirl it around till smooth, and then throw it in to my ice cream maker. Works every time and takes less than 10 minutes to prepare.

- Transfer to another covered container and keep in your freezer for no more than 2 hours before serving. This will maintain the soft creamy texture. If you leave in the freezer too long, it will become very solid and more icy. If you have leftovers, just make sure to give it 20-30 minutes to thaw. But it will always be the best texture if served shortly after preparing.

- Use a quality ice cream maker - An electric ice cream maker is such a fun summer investment for your family. It gives you opportunity to make yummy ice cream with quality ingredients in just a few minutes. We have been using the Cuisinart Ice cream maker for several years now and we absolutely love it! It takes just 30 minutes to make a fresh batch of ice cream.

- Make sure your ice cream maker bowl is completely frozen for at least 24 hours before using! I have learned the hard way that it just doesn’t work without this time period for the bowl to become re-frozen.

- To prevent freezer burn, make sure to wrap your ice cream maker bowl in a few plastic grocery bags and store in the freezer between uses in this manner.

Here are some of our favorite recipes:

Banana Ice Cream
Coffee Ice Cream
Chocolate Peanut Butter Ice Cream
Strawberry Ice Cream 
Egg Nog Ice Cream
Coconut Ice Cream 

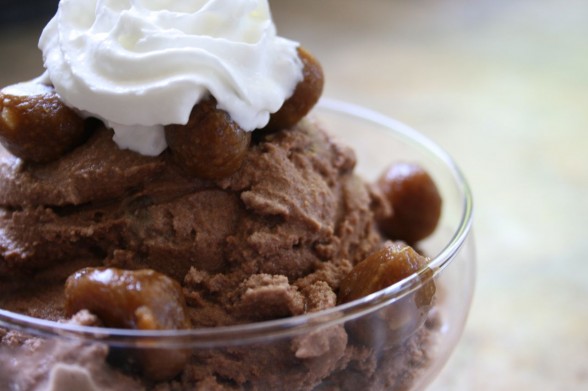
And our newest concoction (pictured above)…

Chocolate Peanut Butter Cookie Dough Ice Cream

Adapted from Just Making Ice Cream 

Ice Cream:
2 cups heavy cream
1 1/2 cups whole milk (or substitute all milk for coconut milk for a dairy free alternative- yum!)
3/4 – 1 cup sucanat, sugar, honey, maple syrup, etc (use less if using honey or maple syrup)
2 teaspoons vanilla extract
1/2 cup cocoa powder

Cookie Dough:
1/2 cup sucanat, rapadura, sugar
1 cup peanut butter
1 egg

For cookie dough: Combine sweetener, peanut butter, and egg and combine until blended. Roll into very small balls and place on a cookie sheet. Place in freezer until frozen.

For ice cream: Throw all the ingredients in your blender and pulse until smooth. Transfer to your ice cream maker, and let it go! Once the ice cream maker has completed its cycle, fold in the cookie dough balls, even if they aren’t totally frozen yet. Transfer to a covered container to store in the freezer for 1-2 hours before serving. Enjoy!

For a whole array of ice cream recipes make with real ingredients, check out Just Making Ice Cream. While I personally don’t feel it necessary to add eggs or cook the ingredients as I mentioned before (I tend to be very simplistic), this ebook has lots of fun inspiring ideas for you and can easily be adapted for your preferences and choice of ingredients.

Comments { 16 }

2012 Spring/Summer Monthly Menu Plan

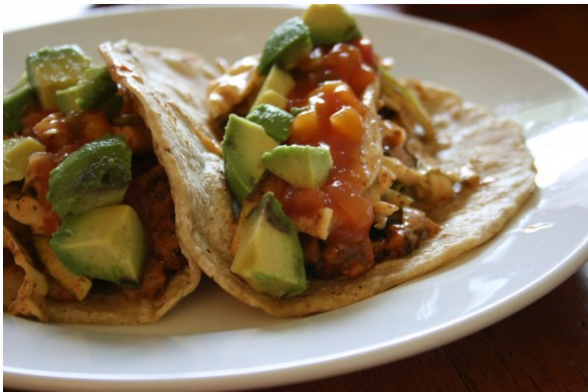
Our favorite fish tacos!

Spring is here and time to refresh the menu! Here is my updated menu plan for the Spring and Summer months for May through September. I have a few new recipes to try that I am excited about, including making my own homemade gyros and pizza on the grill! Can’t wait! For more information on my strategy for monthly menu planning, visit here.

Mondays – Main Dish Salads

1. Cobb Salad
2. Macaroni Ham Salad
3. Chicken Caesar Salad
4. Bacon & Blue Cheese Steak Salad 

Tuesdays – Sandwiches 

1. Grilled Veggie Sandwiches (an awesome vegetarian frugal meal!)
2. BBQ Beef or Pork Sandwiches (throw a roast in the crock pot with soy sauce and your favorite BBQ sauce and let it cook on low all day! Shred the meat and serve with additional bbq sauce on hamburger buns! Yum!)
3. Eggplant Sandwiches – (this is a new recipe to try! I love goat cheese, so may mix and match with this recipe)
4. Beef or Lamb Gyros - this is on my new list to try and experiment with this summer! I am a huge fan of gyros and want to learn how to prepare them myself!

Wednesday – Italian

I like to use brown rice pasta for all our pasta needs – it’s yummy, more easily digestible than wheat, and far more nutritious than white, and still light and flavorful!

1. Pasta Presto (twice a month)
2. Summer Squash Chicken Alfredo (with homemade alfredo sauce and substitute with raw cream)
3. Penne w/Chicken and Asparagus (or in season produce – summer squash, bell peppers, etc.)

Thursday – Mexican

1. Grilled Stuffed Burritos (We love to put all the ingredients in a tortilla and wrap it up and grill on all sides on the stove)
2. Fish Tacos (twice a month)
3. Chicken Fajitas (sliced chicken, bell peppers, onions, tomatoes, black beans, and corn, sauted together with taco seasoning mix! Serve with sour cream, salsa, and guacamole.)

Friday – Pizza

Friday is family night, so it is usually our traditional homemade pizza! I make a batch of 4 crusts at one time and stick them in the freezer for easy pull-out on Friday nights.

1. Homemade Pizza Supreme on Homemade Pizza Crust - one of the things I want to try this summer is pizza on the grill! (twice a month)
2. BBQ Chicken Pizza
3. Pepper, Onion & Feta Pizza (add humus underneath ingredients)

Saturday – BBQ

Saturday is Daddy’s opportunity to have fun on the grill and give Mommy a break! ;)

1. Pork Chops
2. Hamburgers 2x
3. BBQ Chicken, Steak or some other special meat

Sundays

We like to try to intentionally keep Sunday as a day of rest at our home, so one way we have found to make it fun, simple, and intentional is to often eat out as a family on Sunday evenings. Otherwise, we eat leftovers, baked potato bar, nachos, etc.

For further inspiration, check out Real Food Meals for Summer and Busy Seasons.

What are your favorite summer recipes?

Comments { 38 }

Covering Our Nutritional Needs with Green Smoothies

If you are anything like our family, it is rather challenging to get my little ones to eat any vegetables. So we mash and puree soups and some casseroles at the request of my little girl just so the evidence of their existence has disappeared. Salads are another challenging task unless they are nicely sweetened with a raisins and apples. Green smoothies has been my solution for a long time to help supplement their diet and ours as well.
Green smoothies are very nutritious because they are easy to digest, are a complete food because the contain the fiber (as opposed to juices), are enjoyable for all ages and optimal for human consumption (with a recommended 60:40 ratio of fruits to greens), and so easy to make. (Ten Health Benefits of Green Smoothies)

Here are a few tips I have learned in the journey of creating delicious smoothies backed with lots of greens and fruits:

Limit the Ingredients

When I originally started on this quest of creating green smoothies, I tried to stuff everything imaginable in them – multiple fruits, greens, and nutritional herbal powders. Some smoothies would turn out descent, but others were downright gross. I was just trying to get the most nutrition out of one smoothie! I recently discovered that the key to a green smoothie is limiting your ingredients to 3-5 items. Why? “This makes the absorption and digestive process easier on your body and to derive the maximum amount of nutrients from the ingredients you do add.” (Green Smoothie Guide).

Find A Good Base 

Some of the best base liquids to use in green smoothies, include yogurt, coconut milk, kombucha or orange juice. I keep all of these liquids on hand to create a variety of smoothies and they add simply delicious flavors and added nutrition with priobiotics and protein from yogurt, healthy fats from coconut milk, and fermented benefits with kombucha. I like to add a bit of orange juice concentrate to most of my smoothies for a touch of added sweetness and flavor. Also, you will always want to keep bananas on hand. I add a ripe banana or two to every smoothie for smooth texture and wonderful sweet flavor. Avacado makes another good base for a similar end result.

Eat Your Smoothies as a Snack

I’ve also learned the importance of eating your green smoothies as a snack as opposed to part of a meal. It is recommended to eat other foods in a 40-60 minute window before or after eating your smoothie to give your body adequate time to consume the maximum nutrients from the smoothie. So a green smoothie makes the perfect afternoon pick me up before dinner time!

Rotate Your Greens

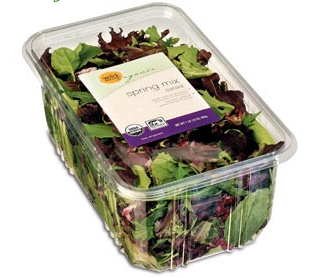
In order for your body to get the most value from your green smoothies, it is valuable to rotate your greens. Celery, spinach, romaine make good choices to rotate through. I have also found that an organic spring salad mix is an awesome option because there are multiple different greens in one mixture including baby leaves of red and green romaine and oak leaf lettuces, lollo rosa and tango lettuces, red and green chard, mizuna, arugula, frisée and radicchio. I buy the 1 lb packages of organic salad mixes (example pictured at right) that are stored in the plastic container and these greens really last in this packaging. Yes, not ideal in plastic. But something about the process of being pre-washed, dried, and packed in this container keep the greens fresh and extend their life incredibly so. I buy 2-3 of these bins each month and they last me at least through the entire month. This is our main green choice but I also love getting celery in there as well. I’m not sure if I’m officially following the rotation of greens idea with this mix…but it works for us and we are getting a good variety!
Here are some of the combinations we like best. Have fun and be creative!

Banana + salad mix (I like to stuff my blender full!) + 2 oranges + 1 can coconut milk + 1 Tbsp concentrate = creamy orange julius!

Banana + salad mix + 1 cup raspberries + 1 cup blueberries + 1 cup of grape juice = berry delicious!

Banana + 1 apple + 3-4 stalks celery + orange juice concentrate + water/kombucha = light apple kick!

Banana + frozen mango/pineapple + lots of greens + orange juice concentrate & water/kombucha = citrus bliss!

Banana + salad mix + strawberries + orange juice = strawberry banana delight!

Looking for some more recipes to get you started? 

Check out these free guides:

The Green Smoothie Guide (download from the sidebar of Raw Smoothie Recipes)
Fruit & Green Smoothie Recipes
Green Smoothie Web App – tons of recipes with the ability to search by ingredient! They also offer an iPhone app for $1.99.

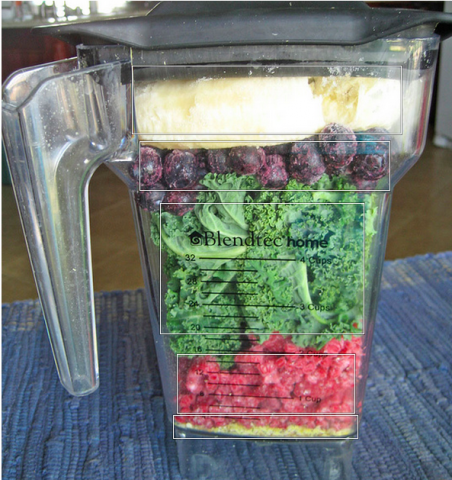
Photo Credit - I didn’t have my own picture to share…but this Blendtec photo looks incredibly similar to our daily concoctions! We use a Blendtec at our home on a daily basis if not multiple times a day and we love it!

Comments { 51 }

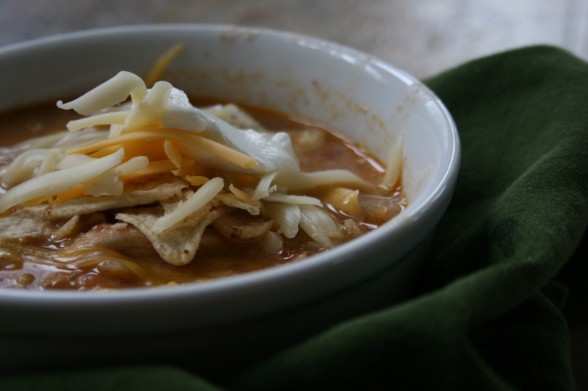
Chicken Tortilla Soup w/Crockpot Adaption

This soup has been a favorite on our dinner menu over the last few months…we just can’t get enough. It has such a rich flavor and incredibly satisfying for every cold night! Need I say…yum!!!
1-2 skinless, boneless chicken breasts
1/2 teaspoon olive oil
3-4 garlic cloves, minced
1/2 teaspoon ground cumin
4 cups chicken broth
1 cup frozen corn kernels
1 large onion, chopped
2 celery stalks, chopped
2 zucchini, diced
1-2 cups black beans, as desired (or 1 -15 oz can)
1/2 teaspoon chili powder
1 tablespoon lemon juice
1 cup chunky salsa (we use our homemade fermented salsa – yum!)
1 tsp sea salt (add if you are using your own homemade broth, season as desired)
8 ounces corn tortilla chips
1 cup shredded cheese (we use raw cheddar, but you can use monterey or peppered jack)
Sour cream, optional

 Directions:

1. Brown chicken breasts in olive oil until fully cooked or you may boil them in a medium pot of boiling water until they are cooked through. Remove from pan, cool, and then shred with two forks.
2. In a large pot, saute onions, zucchini, and celery until soft and browned. Add cumin, garlic cloves, chicken broth, corn, black beans, chili powder, lemon juice, salsa, salt, and shredded chicken. Bring to a boil and then turn the heat down to a simmer and cook for 20-30 minutes.
3. Break up some tortilla chips in the bottom of each bowl and pour the soup over the chips. Top with sour cream and cheese.

Crockpot adaption: In a crockpot, combine all your ingredients, except chips and cheese. It is easiest to leave chicken breasts whole until they are fully cooked, then pull them out and shred them with two forks and place the chicken back into the pot during the last hour. Cook on low for 4-6 hours in your crockpot. Break up some tortilla chips into individual bowls and pour soup over chips. Top with cheese and sour cream as desired.

Yield: 6 servings.

Comments { 24 }

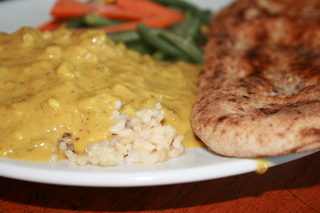
Crockpot Chicken Vegetable Curry

I have recently been on a mission to adapt most of our family favorite recipes into simplified crockpot adaptions that could easily be combined in a freezer ziploc bag for a future meal. I love my crockpot for the simplicity it provides to my homemaking – one pot meals with little mess to clean up afterwards. This week we made an easy adaption to my favorite chicken curry recipe, added a few more yummy vegetables, and threw all the ingredients in the crockpot. And guess what? It was our favorite curry yet! 

1-2 chicken thighs, cut into chunks
3-4 Tbsp curry powder (adjust depending on how spicy you like it)
1 Tbsp dry ginger (or 4 Tbsp fresh, finely chopped)
1 Tbsp garlic powder (or 4-6 garlic cloves, minced)
1 large onion, chopped
1 large sweet potato, peeled and cut into small chunks
1-2 zucchini, cut in small chunks
1 apple, diced
2 carrots, cut in small chunks
2 celery stalks, chopped
4 Tbsp arrowroot powder or cornstarch
1 Tbsp sea salt
1-2 Tbsp sucanat, rapadura, or other natural sweetener
2 1/2 cups chicken broth
1-2 cans (14 0z) coconut milk (adapt to your tastes)

Cut, chop, and prepare all your ingredients as described above and throw together in your crockpot. Turn crockpot on low for 4-6 hours. Stir on an hourly basis until fully cooked. You may desire to thicken further with additional flour or arrowroot powder or remove the lid during the last hour so some of the liquids can simmer off. We also like to add additional coconut milk and puree in the blender for the kids so it is not too spicy for them. Serve over a bed of brown rice and enjoy!

If you want to make this ahead of time for the freezer, simply combine all the raw ingredients above and place in a freezer ziploc bag. Store in the freezer until you are ready to thaw and prepare in your crockpot on another occasion. Be aware that it may take longer to cook if you place the ingredients directly from freezer to crockpot. This is crockpot freezer cooking for you!

I’m eager to adapt my recipes so we can have a weekly or monthly freezer crockpot meals preparation day! That would certainly simplify my life!

Comments { 46 }

Healthy Peppermint Patties

Mint chocolate is my thing…Andes Mints have my favorite chocolate for as long as I can remember. Minty freshness with a hint of sweetness just makes my day. Any other chocolate simply have no appeal to me. With the holiday season came the thought of trying to make a healthy adaption of peppermint patties for a fun little treat and gift for others. I came across Elana’s Pantry version and knew I just had to give it a try. I prefer using raw honey in replacement of agave nectar for the increase nutritional value, so I adapted the recipe as follows. I also found you could use maple syrup just as easily. I also increased the peppermint extract because it needed a bit more. I doubled the recipe below and it made about 20 small peppermint patties. It turned out simply scrumptious and received rave reviews to the recipients that I shared it with. It is a simple 4 ingredient little treat for anyone!
Ingredients:

1/2 cup coconut oil (solid state – firm at temperatures below 76 degrees)
1/4 cup raw honey or maple syrup
3/4 teaspoon peppermint extract
1/2-1 cup dark chocolate chips, melted and cooled slightly (I found it easiest to melt them and thin slightly with a Tablespoon of milk to get the best consistency. Cooling is essential for it to stick correctly.)

Directions:

1. Combine the coconut oil, honey/maple syrup, and peppermint extract in a food processor or blender till smooth.

2. Place in freezer until the ingredients are fairly solid (15 minutes or so).

3. Scoop out mixture with a 1.5 teaspoon scoop or whatever you have on hand (I used a standard Tablespoon) and form small balls on a parchment paper/wax paper lined cookie sheet. Press down into flattened rounds. (It will naturally melt a bit when brought in contact with your hands, so quickly form little mounds but don’t stress for perfection, because it will not happen. ;)

4. Transfer back to the freezer to solidify again.

5. Remove from freezer after they are firm again and dip with a spoon into your melted cooled chocolate until fully covered. Allow 10 minutes or so to harden. Store in refrigerator until you are ready to consume.

Yield: 10-12 small patties (if you want to make them larger, go for it!)

Enjoy!

Comments { 37 }

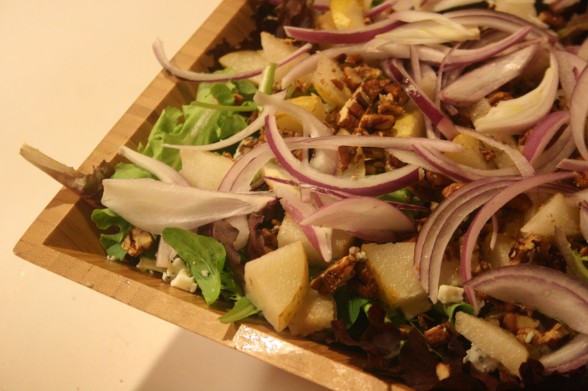
Pear & Bleu Cheese Salad

We made this pear salad for our Thanksgiving feast and it has become our new absolute favorite salad! It is so flavorful and delicious, balancing sweet and savory. I seriously could eat this whole salad at once! ;) Just had to pass on the recipe for your own enjoyment. You can make it lovely and festive with dried cranberries and avocado as well.

Ingredients:

1 bag (10 oz) fresh salad greens, or 1 head spinach
1 red onion, thinly sliced
1-2 pears, thinly sliced or cubed
1/2 cup bleu cheese, crumbled
1/2 cup candied pecans or walnuts (make your own here)
1 avocado, cubed (optional)
1/4 cup dried cranberries (optional)

Dressing:

1/4 cup maple syrup or honey (preferably raw)
1/3 cup apple cider vinegar (preferably raw)
1/4 cup olive oil (preferably cold pressed)
1/3 cup mayonaise
3/4 teaspoon sea salt
1/4 teaspoon ground pepper

Directions:

1. Layer the mixed greens, onion, pears, bleu cheese, pecans. Add avocado or dried cranberries as desired.
2. Blend the dressing ingredients together in a blender. Pour over the salad just before serving.

Comments { 5 }