Archive | health & nutrition RSS feed for this section

Stocking Your Natural Herbal Medicine Cabinet

Screen shot 2009-10-20 at 7.22.56 AMPhoto by niachan

Edited and republished from the archives. Originally published 10/20/2009.

We have already been attacked with our first bout of illness for the year with coughs and colds, so it is time to restock the medicine cabinet with our favorite natural remedies. I love using herbal tinctures and remedies for our healing and was eager to share with you what we concluded were some of the best items to have on hand for all the little ailments that could come upon us. I am not apposed to using antibiotics on occasion if it is totally necessary, but for the everyday headaches, wounds, colds, flus, fevers, here is what I have found to be effective natural solutions.

Colds/Congestion

Emergen-C – I have talked previously about our favorite Vitamin C drink Emergen-C here. I like to stock up on this when I get a good deal. Trader Joe’s has a good price on it as well as Vitacost.com. Pumped full of 1000 mg of vitamin C, it also has a good portion of energy boosting B vitamins, in addition to various minerals and electrolytes.  This will keep you healthy or kick out those nasty colds quickly! When we get sick, we will drink several packs of this product daily. It tastes delicious and is a good way to cover up any other herbal tinctures that we may add to it. We use the Kids Emergen-C for our little ones. They normally drink one package each day for boasting the immune system during the winter.

Traditional Medicinals Teas – Gypsy Cold, Breathe Easy, Throat Coat – I love these delicious teas for specifically formulated with various herbs for every ailment. They are delicious, relaxing, and refreshing and really help solve the problem. They also help to encourage you to drink more fluids, which is most beneficial for healing. Amazon sells a sampler pack with subscribe & save discounts providing you with great natural support at low prices all winter long. Their Just for Kids line of teas is wonderful for your little ones.

Eucalyptus Oil – Eucalyptus in it’s essential oil form is wonderful to have on hand as it is highly beneficial. Add a few drops to the humidifier for easier breathing and rub it on the chest to help relieve congestion. We use this for our children especially. Dilute a few drops of oil in a dab of coconut or olive oil and rub on their chest to relieve congestion.

Echinacea/Goldenseal – A great combination to boost your immunity. We take in tablet form. Most do not recommend for pregnant mothers.

And as my mom always says, when the kids are sick, give them regular baths and change their sheets often! Keep those germ bugs running away.

Coughs

Coughs Remedies for Infants & Kids – We have recently discovered the wonderful natural remedies of cough syrups by Hylands and found them to be quite effective for our little ones. It is hard to find something safe for infants, but Hylands offers an infant cough syrup that works very well with all natural ingredients. They also offer a cough syrup for Kids ages 2+ made with honey. These are wonderful to have on hand for those nights when they just cannot go to sleep due to extensive coughing.

Adults – We love the Ricola Cough Drops for soothing coughs and sour throats, in addition to the Traditional Medicinals teas.

For further ideas for natural healing of colds, check out our previous posts:

Natural Cold Remedies for Children

Natural Healing for the Family

Soup Remedy for Colds

Flu/Fever

Elderberry Syrup – Elderberry is anti-viral, contains high levels of flavonoids and antioxidants, has cell-protecting components, soothes sore throats, and supports the immune system and respiratory system. The elderberry is effective in fighting viruses, such as the flu, and upper respiratory infections. According to Prescription for Herbal Healing, “a clinical study of elderberry found that it cured 90 percent of flu infections within seventy-two hours. In the same trial, patients receiving a placebo needed six days.” This is also effective as a cough syrup. We recommend Quantam Elderberry Syrup as it is naturally sweetened with honey or the sugar free version. This is recommended for children over 1 year. A nursing mother can take 1 Tbsp of Elderberry syrup 5 minutes before nursing to pass the benefits on to a infant less than a year old. For infants, Wise Woman Herbal for the Childbearing Years, recommends putting 1 drop per pound of body weight directly on a baby’s tongue, or administer while nursing. This book states it is completely harmless and can be given repeatedly as needed to help decrease fevers and the like. You can be taking this regularly as an immune booster as well. Make your own elderberry syrup and save money. Follow this recipe.

Echinacea – To ward off the flu at the first hint of symptoms, take echinacea, an herb with powerful antiviral and immunity-boosting effects, says renowned herbalist Rosemary Gladstar in her book, Herbal Recipes for Vibrant Health. Echinacea is available in most health food stores in supplement form, as a tincture and as a tea. Echinacea works best over a short period of time, and isn’t an effective immune strengthener when taken long term. She suggests using the herb for no more than a week.

For infants, Wise Woman Herbal for the Childbearing Years, recommends mixing 10 drops of Echinacea in a four ounce bottle of water. Allow baby to suck this as desired to keep a fever in bounds. A mother can also take a dose of 5-15 drops two to three times daily that will pass through the breast milk to protect the infant.

Calming Children, Teething

Catnip Tea – A combination of catnip and chamomile is a great aid in calming children when dealing with various stress, teething, pain, etc. Traditional Medicinals offers a catnip tea as well as Mountain Rose Herbs (the Quiet Child Tea) that we enjoy. You can freeze this tea in ice cube trays and allow a baby to suck on it for teething relief. I also dilute it a bit and offer it to a baby in a bottle if needed. Hylands also sells Teething Tablets that are semi-effective. I’ve also had people recommend a drop of brandy rubbed on the gums does the trick. I have yet to try this method. ;)

When all else fails and baby just can’t sleep, we do use a small dose of Infant Advil dye-free drops for teething and fevers.

Ear Ache

Garlic OilThis is a good recipe to use as a preventative as well! Press 2-3 garlic cloves in 2 Tablespoons olive oil. Let warm on stove for 15-20 minutes. Strain garlic from oil. Lay child on side and drop 2-3 drops of garlic oil in ear and massage lower outer ear for a few minutes. Wait for half hour or so before doing the other side so oil won’t drain out. 3-4 times daily. You can also buy a garlic oil already prepared for you. Make sure to use this homemade tincture right away or store in the refrigerator for up to one weeks time to avoid any safety risks. Please DO NOT store at room temperature.

Muscle Pains/Aches

Arnica Spray - Arnica is highly valued for sprains and bruises when the skin is not broken. Can help prevent bruising if applied quickly. Great relief for sour muscles. Also available in several other forms, as a tincture and in ointments, it makes an excellent treatment for rheumatism and some skin irritations as well. We use Hyland’s Arnica Spray.

Headaches/Nausea

Hylands Headaches – Hyland’s Headache is a traditional homeopathic formula for the relief of symptoms of head pain due to stress and sick or nervous headache. No side affects but rather natural healing response. Safe for adults and children. Take at the first sign of a headache for best results.

Ginger Tea - Ginger’s wonderful effects as a treatment for nausea have led it to be highly recommended for sea sickness or motion sickness as well. Ginger tea is very settling. A great aid for pregnancy nausea as well.

Stress

Rescue RemedyBach’s Rescue Remedy is a natural form of healing for everyday stress and help maintain control in your body. Homeopathic remedy. Composite of five of the flower remedies discovered by Dr. Edward Bach. Rescue Remedy calms the nerves, eases tension, buffers emotional shock, and combats stress. You can use this on your pets as well under the guidance of a holistic veterinarian. Crisis Calm from NaturoKits is also a great stress reliever. Our favorite tea for stress relief is Tension Tamer.

Herbal Healing Salts - My favorite way to relieve stress, muscle pain, or to heal any wounds, is to take a hot bath with a combination of herbal healing salts. Epsom salts is in this combination as well. But with the addition of lavender and other herbs it is very relaxing.I use the herbal bath salts from Mountain Rose Herbs and absolutely love them (they are on sale in October as well)! They help to relax me in order to sleep well.

Cuts, Bruises, Muscle Pain

Epsom Salts – Excellent for soaking a small open wound to prevent infection. Use daily as a soak for warts as well. It really works! These are also effective after childbirth to heal the vaginal area. These are cheap and available at your local supermarket.

Hydrogen Peroxide – A great antiseptic. Pour directly onto a wound to clear out dirt and fight infection. Cover with band aid.

Witch Hazel – Witch Hazel is one of the most widely used first aid remedies, both for its astringent and blood clotting actions. Use distilled Witch Hazel as a compress for minor burns and sprains, or apply directly to the skin for insect bites, nosebleeds and cuts. Witch Hazel also makes a good skin toner.

Super Glue & Butterfly Band-Aids – Butterfly band-aids and super glue are a must for the slighter deeper cuts as well. Saves you from getting stitches and prevent scaring. We used it all the time growing up with deeper cuts on the head or fingers. Use your discernment as to the deepness of the cut. Aaron gashed his finger a few months back which was definitely deeper than a regular band-aid would heal. So we cleaned it out with hydrogen peroxide, and then held the gash shut with our fingers and applied a thin strip of super glue  and covered with a butterfly band-aid. I cannot say how natural super glue but it was designed originally to quickly patch up soldiers on the battlefield during the Vietnam War. They even used it to glue lacerated livers together (lovely, huh?). I did find reference to it being non-toxic though. It does seals the cut and allows it to heal beautifully! We saved ourselves from many hospital trips growing up by using this simple frugal method. For more on this solution, read Super Glue: Safe for Treating Cuts? and How To Use Superglue for Cuts.

Stomach aches

Papaya Enzymes are a chewable digestive aid that is 100% natural. Each serving contains papaya fruit. Pepermint and chlorophyll are added to refresh and sweeten breath, so it is also a great breath refreshener! We love these chewable tablets! They really work! I usually use only two for myself when needed and one tablet for children.

Burns

Aloe Vera – The one to turn to for burns and skin irritations of all types. When you can, using a piece of live plant. Break off a leaf and rub it directly onto the skin for relief of burn, sunburn or poison ivy. Not for internal use.

I also love the Wild Weed Salve in the NaturoKits First Aid kits that works wonders for burns of every kind.

Baking Soda – for quick relief of the pain of a burn (as in receiving a burn in the kitchen), dash a little bit of baking soda on the burn. Love it!

Other items and supplements…

Lastly, we all take cod liver oil daily for it’s omega-3 content and naturally occurring vitamin A and D, which are also wonderful immune boosting aids. Cod liver oil is excellent for overall health and wholeness. We use the Nordic Naturals brand as recommended by my naturopath. Aaron takes the EPA version, I take the DHA version (more suitable for pregnancy, nursing, and female hormone balancing) and our baby and kids take Childlife Cod liver oil. I give the children a natural liquid multi-vitamin especially in the winter as a preventative. We use PediVites (also recommended by our naturopath due to it’s completely pure contents). Beyond that, we don’t take any other supplements.

Looking for a good reference guide for natural healing? An excellent resource that every family should have on hand to use as a guide for natural healing is the Prescription for Nutritional Healing: A Practical A to Z Reference to Drug Free Remedies. We use this book all the time and it is the only one I keep on hand for frequent use!

Further Reading:

Natural Insomnia Help

Hay Fever Homemade Allergy Tonic

Boosting Baby & Toddlers Immune System Naturally

5 Natural Medicine Cabinet Essentials

Those are the items in our medicine cabinet! Take stock of what you have for now is the time to prepare for the winter cold/flu season! These items will save you doctor’s bills because many basic sicknesses can be solved naturally at home.

Most of these items recommended above can be found very reasonably at Vitacost. Some links above to Amazon are affiliate links and we do receive a small percentage of the sales made through our links.

Disclaimer: As always, remember that I am not a doctor and offer these recommendations from my own personal experience and research into natural healing. Please double check with your naturopath/holistic practitioner before using any of these suggestions. Find a naturopath for the health and wholeness of your family!

Do you have any recommendations for natural healing that you would like to add to the list?
 

Comments { 166 }

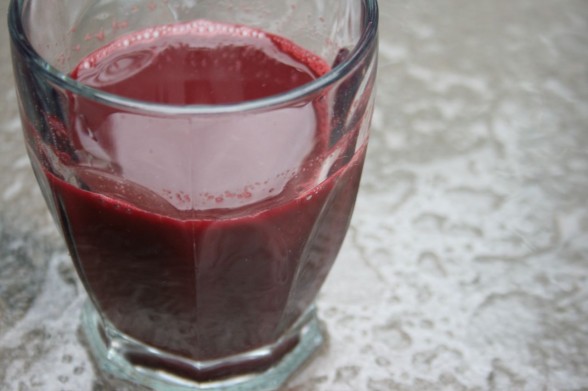
Our Morning Vegetable Juice in the Blender


My husband and I recently watched, Fat, Sick and Nearly Dead (watch it free here), and were quite fascinated by this remarkable documentary. I was reminded again how beautiful God designed food to be the healing power to restore order and health in our bodies. I was also challenged to eat more fruits and vegetables and to see that it is more simple than I realized. With my insomnia and hormonal imbalance issues and my hubby’s high cholesterol levels (it seems to run in his family), we have been striving to be more intentional in learning what would be best for getting us both into a place of balance and better health.

Juicing is a simple way to increase your consumption of vegetables in an efficient manner. When juiced, the nutrition is made available to the body very quickly. Juicing helps you to absorb all the nutrients from the vegetables as it helps to break them down and  ”pre-digest” them for you. I also love how it helps us add a wider variety of vegetables to our diet that we don’t often eat or prefer otherwise. Beets would be one of those vegetables that is packed full of nutrition but we just don’t honestly eat a lot of it.

But…I don’t have a juicer. And honestly, juicers are kind of a pain in my experience. I had one a while back and it was so much work to clean the whole machine out after each use, our relationship ended rather quickly. Then I realized…there’s got to be a way I can use what I have. And yes, I have found an extremely simple way to make homemade juice with my blender. It’s so easy to do that it has been possible to add it to our morning breakfast meal.

What you need?

A blender (I use my Blendtec which I love and it works incredibly well! You can also use a standard blender, but plan to add more water and add ingredients one at a time)
nut/milk bag or a paint strainer bag (available at your local hardware store)

Here’s a silly little video of me assembling our juice for your viewing pleasure! Don’t laugh…;)

Our Morning Boost: Carrot, Apple & Beet Juice

This mixture of fruits and vegetables is high in vitamin A, C, folate, nitrate, calcium, antioxidants, electrolytes, and iron, giving you a great boost to start your day!  Carrots and beets are especially good for cleansing your blood and liver. As I understand it, apples are the one fruit that can be safely mixed with vegetables (Learn the recommendations about food combining here). But I did read here, that if you juice it, then it eliminates this problem…not sure who to believe on this one. ;)

1 large beet, diced
6 carrots, cut into medium chunks
1 – 2 apples, cut into chunks
2 celery slices, cut into chunks
Handfull of greens – kale, salad greens, romaine, etc
1/2 -1 cup water (when using a blender for juicing, you have to add a bit of water to help puree the ingredients. This is not necessary if you have an actual juicer)

Directions:

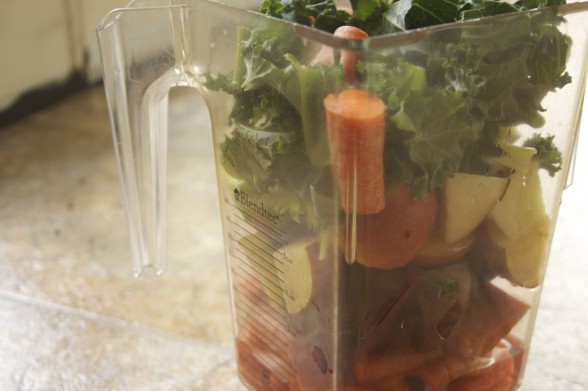
1. Wash and scrub all vegetables thoroughly. No need to peel them, unless you desire to do so. Cut up all ingredients into 1-2 inch chunks.
2. Gradually load your blender with each ingredient and add water. If using a standard blender, start with softest ingredient and try adding one ingredient at a time and blend till smooth between each addition.
3. Place blender onto your base and pulse or use whole fruit setting (when using a Blendtec), till fully blended.
4. Place your strainer bag in a large pitcher and gradually pour your juice into the bag. Gently, squeeze the strained juice out of the strainer bag.
5. Compost the leftover pulp (or make it into a fruit leather snack) and consume the juice! 

Consume immediately, otherwise add a bit of lemon juice and place in a sealed container and store in the refrigerator. Best to consume on an empty stomach and 1 hour before or after other food items.

Yield: 32 oz.

In this manner we have juice each morning and cut back on our other food consumption. For example, we now have a 12 oz cup of juice and 1 egg and a half piece of toast for a full complete meal. My husband and I are feeling so much more energized as as result. The kids enjoy it as well!

I believe it is important to maintain a balanced whole foods diet. I believe God designed our bodies to enjoy a wide spectrum of real food that he has fashioned each with various nutrients for our bodies. Each vegetable, fruit, protein, or carbohydrate offers different value to our bodies. Thus, you won’t see me advocating any special diet. We need a whole variety of real foods in balance and moderation to one another. The disadvantage to juicing is that it does eliminate the fiber in the vegetables through the straining process, although apple juice is high in fiber, thus bringing more balance. In light of this, we try to make sure we have a whole fiber green smoothie or other fresh salad at another meal during the day to make sure we are enjoying the full spectrum of nutrition. The benefit of juicing for us is that it gets more vegetables into our body quicker and gives us that jump start on the day with a clearer mind and increased energy.

For a whole range of fresh vegetable juice recipes and detoxing juicing plans, check out Reboot Your Life.

My next mission is to experiment in using the discarded pulp for other food snacks. Muffins, crackers, fruit leather, add to a green smoothie? No waste is the goal…although composting really isn’t wasting in my opinion.

Comments { 64 }

Covering Our Nutritional Needs with Green Smoothies

If you are anything like our family, it is rather challenging to get my little ones to eat any vegetables. So we mash and puree soups and some casseroles at the request of my little girl just so the evidence of their existence has disappeared. Salads are another challenging task unless they are nicely sweetened with a raisins and apples. Green smoothies has been my solution for a long time to help supplement their diet and ours as well.
Green smoothies are very nutritious because they are easy to digest, are a complete food because the contain the fiber (as opposed to juices), are enjoyable for all ages and optimal for human consumption (with a recommended 60:40 ratio of fruits to greens), and so easy to make. (Ten Health Benefits of Green Smoothies)

Here are a few tips I have learned in the journey of creating delicious smoothies backed with lots of greens and fruits:

Limit the Ingredients

When I originally started on this quest of creating green smoothies, I tried to stuff everything imaginable in them – multiple fruits, greens, and nutritional herbal powders. Some smoothies would turn out descent, but others were downright gross. I was just trying to get the most nutrition out of one smoothie! I recently discovered that the key to a green smoothie is limiting your ingredients to 3-5 items. Why? “This makes the absorption and digestive process easier on your body and to derive the maximum amount of nutrients from the ingredients you do add.” (Green Smoothie Guide).

Find A Good Base 

Some of the best base liquids to use in green smoothies, include yogurt, coconut milk, kombucha or orange juice. I keep all of these liquids on hand to create a variety of smoothies and they add simply delicious flavors and added nutrition with priobiotics and protein from yogurt, healthy fats from coconut milk, and fermented benefits with kombucha. I like to add a bit of orange juice concentrate to most of my smoothies for a touch of added sweetness and flavor. Also, you will always want to keep bananas on hand. I add a ripe banana or two to every smoothie for smooth texture and wonderful sweet flavor. Avacado makes another good base for a similar end result.

Eat Your Smoothies as a Snack

I’ve also learned the importance of eating your green smoothies as a snack as opposed to part of a meal. It is recommended to eat other foods in a 40-60 minute window before or after eating your smoothie to give your body adequate time to consume the maximum nutrients from the smoothie. So a green smoothie makes the perfect afternoon pick me up before dinner time!

Rotate Your Greens

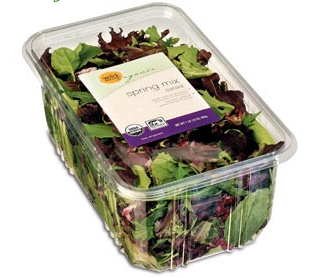
In order for your body to get the most value from your green smoothies, it is valuable to rotate your greens. Celery, spinach, romaine make good choices to rotate through. I have also found that an organic spring salad mix is an awesome option because there are multiple different greens in one mixture including baby leaves of red and green romaine and oak leaf lettuces, lollo rosa and tango lettuces, red and green chard, mizuna, arugula, frisée and radicchio. I buy the 1 lb packages of organic salad mixes (example pictured at right) that are stored in the plastic container and these greens really last in this packaging. Yes, not ideal in plastic. But something about the process of being pre-washed, dried, and packed in this container keep the greens fresh and extend their life incredibly so. I buy 2-3 of these bins each month and they last me at least through the entire month. This is our main green choice but I also love getting celery in there as well. I’m not sure if I’m officially following the rotation of greens idea with this mix…but it works for us and we are getting a good variety!

Here are some of the combinations we like best. Have fun and be creative!

Banana + salad mix (I like to stuff my blender full!) + 2 oranges + 1 can coconut milk + 1 Tbsp concentrate = creamy orange julius!

Banana + salad mix + 1 cup raspberries + 1 cup blueberries + 1 cup of grape juice = berry delicious!

Banana + 1 apple + 3-4 stalks celery + orange juice concentrate + water/kombucha = light apple kick!

Banana + frozen mango/pineapple + lots of greens + orange juice concentrate & water/kombucha = citrus bliss!

Banana + salad mix + strawberries + orange juice = strawberry banana delight!

Looking for some more recipes to get you started? 

Check out these free guides:

The Green Smoothie Guide (download from the sidebar of Raw Smoothie Recipes)
Fruit & Green Smoothie Recipes
Green Smoothie Web App – tons of recipes with the ability to search by ingredient! They also offer an iPhone app for $1.99.

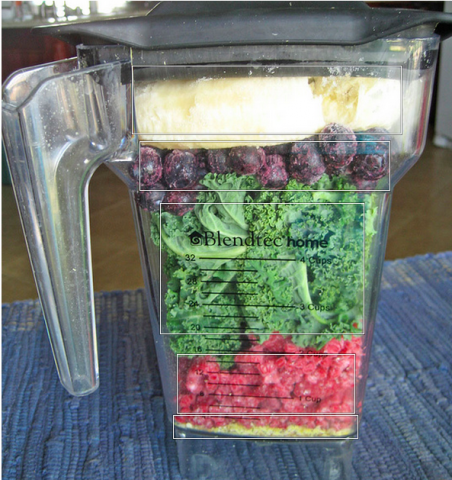
Photo Credit - I didn’t have my own picture to share…but this Blendtec photo looks incredibly similar to our daily concoctions! We use a Blendtec at our home on a daily basis if not multiple times a day and we love it!

Comments { 51 }

Eating Well While On the Road

Written by monthly contributing writer, Trina Holden.

Summer means road trips and adventures in our family, but along with the fun and change of scenery is the challenge of eating well while away from home. Did you know you can  enjoy the comfort and nutrition of home cooking while traveling with just a little bit of planning? Here are my tips for real food on the road, actually written from our campsite in PA. while attending Creation Festival Northeast. We’re saving money and enjoying delicious, home-cooked meals the entire trip, thanks to these menu ideas…

While on the Road…sandwiches get old fast. I like to packed hearty salads and pepperoni rolls to spice things up. Try these quick and tidy meals for in the car or at a rest stop.

  • Taco Salad To Go: Layer seasoned meat, shredded lettuce, grated cheese, and chopped veggies and beans of your choice in a bowl with a lid. Pack sour cream, salsa, and chips on the side. When you get hungry, throw the toppings on, put the lid on and shake it to mix.
  • Rice Salad: Combine cooked rice, cooked and chopped chicken, sliced avocados, slivered almonds, chopped celery, and dried cranberries. Make a simple dressing of mayonaise, yogurt and a bit of curry powder. Store in the cooler. Refreshing and filling!
  • Pepperoni Rolls: Roll pizza dough out into a wide, thin rectangle. Spread sparingly with pizza sauce, then sprinkle with grated mozzarella cheese, basil, and chopped pepperoni. Roll up jelly-roll style and slice into 1 inch thick sections. Place cut-side up on a greased baking sheet. Brush with beaten egg, sprinkle with Parmesan cheese, and let rise for 30 min. Bake at 350 degrees for 25-30 min. Enjoy fresh and hot OR cold and packed in the cooler – great for passing to kids in the back seat!

At Your Destination...The secret to nourishing, tasty meals on vacation is doing the work before you leave and planning meals you can heat and serve with minimal effort. I begin filling my freezer weeks in advance of a trip by doubling a night’s dinner and freezing half for the trip. Meals that work great for this include:

  • Sloppy Joes: Sauce and Rolls freeze well, and the rolls won’t get crushed as easily if they’re frozen!
  • Pizza Dough: Thaw the dough while you’re hiking or at the pool, have everyone pitch in with toppings for a great family dinner when you get back.
  • Meatloaf: Season and shape meatloaf in advance. Throw it in the oven with a few baked potatoes and serve with fresh, local produce.

Roughing It With Real Food…Camping may be the most challenging place to attempt real food, but again, planning ahead gets you there. Frozen meats and other foods will keep several days in a sealed cooler, so use one cooler as ‘fridge’ and one as ‘freezer’ and only open your ‘freezer’ once a day to pull out dinner.

  • Hamburgers: Make your own hamburger and hotdog buns ahead of time, freezing them to keep them from getting crushed on the trip. Season and shape, and freeze hamburger patties ready for the coals.
  • Marinade: Freeze chicken or steak in your favorite marinade so it’s all ready for the grill.
  • Chili: Don’t overlook the simplicity of a good pot of soup. Choose something that doesn’t burn easily (vegetable beef stew, chili, or goulash). Make ahead, freeze, and it will help keep the rest of your cooler contents cold.

I hope these tips help you realize that “Bon Voyage” doesn’t mean “Farewell” to good, home cooking. You can take your diet convictions and comfort food with you on vacation and get the best of both worlds.

What are your favorite travel-worthy menu ideas? Please share!

For more tips for travel, check out Healthy & Frugal Travel Meals.

Comments { 15 }

Basking in Beauty – the Joy of Prayer Walks

There are two things that have been most difficult for me to accomplish as a mom. In my physical needs, exercise is most lacking, and in my spiritual walk, prayer has often been limited to the dinner table. Exercise for one because I don’t care for it. It’s really last on the “to-do” list, and that’s not because it is not important, but rather because its very difficult to do with little ones in tow. How fast can I really walk with two little ones that desire to walk or ride their bikes beside me?
I also passionately desire to grow in the area of prayer. I understand the importance and power of walking in God’s presence throughout the day and desire to grow ever more in lifting up the cares and concerns of others and the world around me through it. I know that as women we can accomplish much for the kingdom through prayer. I want to be known as a woman that is a passionate prayer warrior. But when to do it?

After much prayer over the last few months trying to figure out a means of accomplishing both of these goals, the Lord gave me a little idea. Why not kill two birds with one stone? Let’s take a prayer walk.

Ahh…what a glorious idea. Get out in the beauty of His creation, get walking (or jogging, whichever suits you) at a good aggressive pace, and pour out your heart to the Lord. So I started getting up a bit earlier two days a week, Tuesdays and Thursdays, before the kids were awake and before my hubby left for work, between 6:30-7:00am, after my personal devotions. I get dressed, get bundled, and go out, rain or shine (a trusty umbrella is a useful tool), and head out on a 30 minute walk. No one is out to hear me. No one really cares. It’s just me, the Lord, and my trusty Ipod that enables me to read Scripture (you can’t go wrong praying Scripture), memorize Scripture, and provide little prayer reminders as needed (jotting down prayer requests in it as I hear them). And its completely free!

I am so much more motivated to exercise in this way. Being out in creation serves as a reminder to help draw me into a spirit of worship. You can go as long or short as your schedule allows. You don’t have to go in the morning either. Mornings work best for getting me spurred on for the day, but you can certainly do it in the evenings as well.

If your spouse is not around at a doable time, don’t let that hinder you. Lock up the house and circle laps around it or in close proximity to it. Carry a monitor if needed. ;) I honestly have done this, because these two things are important to my body and soul.

Being in the fresh air is glorious for the soul. It strengthens the weary heart. It renews the energy. And it reminds us what it is truly all about…the magnificence of our Creator. Pouring out my soul before Him provides such grace for the day. He cares about every little thing, concern, or fear on my heart. He has open ears.

This is the confidence we have in approaching God: that if we ask anything according to his will, he hears us. And if we know that he hears us—whatever we ask—we know that we have what we asked of him. (1 John 5:14-15)

Photo Credit

Comments { 37 }

Adapting Your Favorite Recipes to Increase Nutrition

So you are on a quest for eating more nutritionally as a family and yet the task appears rather daunting. Do I have to develop a whole new menu plan with healthy recipes? Who wants to throw out all your family favorite recipes that have been passed down? Or those favorite comfort foods that make your family feel so satisfied and rejuvenated? The last thing any of us moms want to do is start from scratch when it comes to healthy real food eating.

Today, we would like to offer a resource of ideas for helping you adapt your favorite recipes to make them more healthy. The truth of the matter is, you don’t have to throw out your favorite cookbooks and recipes. In fact, practically every recipe on this site has been a family favorite for quite some time, and have only been adapted in the past several years to replace the ingredients with more real whole food alternatives. The flavors may have changed slightly, but overall, choosing to use real food ingredients only increases the flavor and intensity of each recipe.

I have provided here for you a simple chart to convert those standard ingredients in your everyday recipes to real, whole food ingredients.

Sweeteners

Learn about these healthy sweeteners here.

White sugar: Replace with equal amounts of rapadura or sucanat (both of which are whole cane unrefined sugars), or 1/3 less of raw honey or pure maple syrup (Vermont or Canadian sources). You can run rapadura/sucanat through the blender to get a less grainy texture, a perfect alternative for powdered sugar.
Brown sugar: Replace with equal amounts of sucanat or rapadura which have an excellent darker texture and tone similar to brown sugar. If you desire that wetter texture of brown sugar, simply add a Tablespoon of blackstrap molasses to the sucanat or rapadura.
Powered Sugar: replace with powdered sucanat/rapadura, or a dash of stevia.

Grains

White Rice: Replace with brown rice. Basmati brown rice is very similar in texture to white rice. Brown rice takes a longer time to cook so make sure to check the packaging. I usually use 1 cup brown rice to 2 cups water.
White Flour: The Colorado State University Cooperative Extension recommends the following for substituting flour when baking.
1 cup of white, all-purpose flour for baking can be substituted with the following:
• 1 1/2 cups bread crumbs;
• 7/8 to 1 cup corn meal;
• 1/2 cup cornstarch plus 1/2 cup rye, potato or rice flour (sift together 6 times, use with 2 tsp baking powder per cup in quick breads as wheat flour allergy substitute);
• 5/8 cup potato flour;
• 7/8 cup rice flour;
• 1 1/3 cups rolled oats;
• 1 1/4 cups rye flour;
• 1 cup minus 1 Tbsp whole wheat flour.

If you are new to using whole wheat, try using half and half with unbleached white flour (choice unbleached to avoid the dying process), and gradually increase the whole wheat content until you can make it 100% whole wheat. Sourdough options are my favorite for getting a light fluffy texture and delicious results even when using whole wheat.

Bread products: Try to find sprouted whole wheat options (Dave’s Killer Bread, Food for Life or Alvarado Street Bakery are all good sprouted bread companies) & or make sure to check labels that they are made from 100% whole wheat without the addition of high fruitose corn syrup or enriched wheat flours.
Pastas: Your best option is brown rice pastas (Trader Joe’s and Tinkyada are great brands), as they are both gluten free and low in phytates. You can get most varieties of pasta in brown rice varieties now.

Learn how to use more variety in your grain choices here.

Dairy

Generally, choose whole milk alternatives for any recipe calling for low-fat, non-fat, or skim. Whole milk is essential for getting quality fats from dairy products. Low or non-fat alternatives have been processed and are very difficult for the body to digest. If you have access to raw milk, this is your best option. Otherwise, choose whole milk cultured dairy products. Substitute them for equal portions in recipes. Other good alternatives include coconut milk, hemp milk, or organic milk based products.

Margarine: Replace with real butter made from whole milk.
Buttermilk: Replace equally with cultured kefir or yogurt. (Coconut milk kefir is a good choice as well.) You can also make your own milk kefir.

Oils

Your best choices here are olive oil, coconut oil, or butter.
 Read more about healthy oils here and part 2. Choice cold-pressed unrefined options. I use these three oils exclusively in all my cooking and baking.

Canola/vegetable oil: replace with olive oil for salad dressings, melted coconut oil for baking, and melted butter or coconut oil for sauteing. Real butter can be used for baking or sauteing.
Crisco/Shortening: replace with palm oil, coconut oil, or butter in their solid state.

Meat/Eggs

Look for pastured grass fed varieties for best nutritional value. These are animals raised on pasture that are fed a variety of greens rather than corn products. Wild fish products are preferred to farm raised. Find local sources here.

Canned Goods

The main concern with condensed soup is the MSG content. Either just eliminate these recipes altogether or replace with the following options:

Condensed Soup (Mushroom, Chicken, etc): replace with this easy homemade version or with cultured sour cream (as used in my enchilada recipe which originally called for cream of mushroom soup).

To learn what canned food brands do not have BPA in the lining, check out this list or Treehugger’s list.

Seasonings/Condiments

Table Salt: Replace with sea salt (I recommend RealSalt for its high mineral content). Or replace salt with herbs, either fresh or dried, and other seasonings. Freshly ground pepper and fresh seasonings have so much flavor, you won’t miss the salt.
Thickeners: Replace cornstarch or white flour called for in a recipe to a smaller portion of arrowroot powder (i.e. 1/4 cup flour = 1-2 Tbsp arrowroot powder).
Bouillon cubes: replace with homemade or organic free range chicken/beef broth. Usually a recipe will say 1 bouillon cube and 1 cup water, and you can simply replace both with 1 cup homemade broth. You can also freeze homemade stock in ice cube trays to replace the bouillon cubes.
Pancake Syrup: Replace pancake syrup (the fake HFCS sugar syrup) with pure maple syrup (Vermont or Canadian sources), honey, or fruit syrup.
Mayonnaise: Make your own homemade mayonnaise or purchase coconut oil mayonnaise or safflower mayonnaise.
Ketchup: Make your own or choice fermented ketchup or an organic variety that does not use HFCS.
Bread crumbs/croutons: Make your own!
Vanilla Extract: Use pure vanilla extract (not vanilla flavoring or imitation vanilla) or make your own.
Salad Dressings: The best nutritious salad dressing is a simple balsamic vinegar and cold pressed olive oil. But you can also make your own recipes of salad dressings using healthy fats, as described here.
Worcestershire Sauce (this often has corn syrup): replace with equal amount of white vinegar
.
Baking powder/baking soda: Chose aluminum free varieties (Bob’s Red Mill or Rumford brands).

For further help, please check out Baby Steps to a Real Food Diet.

Did I miss an ingredient? I am sure I did…let me know and I’ll add our source to the above list. Have a favorite recipe that you are just not sure how to adapt? Share below and I’ll try my best to offer some suggestions.

Photo Credit

Comments { 79 }

Naturally Battling Depression

I have suffered from depression through various periods of my life, unfortunately as it seems to run in my family, but most recently during my extensive bought of 1 1/2 years with insomnia. I was extremely tired, weary, lazy, and unmotivated. You would often find me lingering in bed in the morning after a pitiful nights rest and desirous of doing nothing else but staying in my jammies all day and watching movies. I felt a darkness hovering over my spirit. A sick feeling in my gut that did not want to let go. Depression went hand in hand with fear and worry about the inability to sleep. Where can we find deliverance and freedom from these feelings?

Cling to the Savior

During periods of depression, there is little to no desire to read the Word or prayer. We are just trying to cope and find little strength there. But we must be persistent. We must wait on the Lord.  “But those who hope in the LORD will renew their strength. They will soar on wings like eagles; they will run and not grow weary, they will walk and not be faint.” This what Isaiah 40:31 promises the faithful, the persistent. Don’t give up even though strength might seem miles away. Press on to know the Lord in your deepest periods of darkness.

“Even though I walk through the valley of the shadow of death, I will fear no evil, for you are with me; your rod and your staff, they comfort me (Psalms 23:4).” This is your true, enduring, and faithful life-line. You will see a light at the end of the tunnel. God does not give more than we can bear (1 Cor. 10:13).

And don’t forget to preach the gospel truth to your soul. Proclaim it from the housetops. Sing and worship with your voice. There is much refreshment and healing as we take our eyes of ourselves and focus on the beauty of our Lord. Read Romans 8:35-39 – no one can separate you from the love of Christ. I often clung to repeating out loud, “Why are you cast down, O my soul, and why are you in turmoil within me? Hope in God; for I shall again praise him, my salvation and my God.” (Psalms 43:5).

Cultivate Thankfulness

It is easy for our eyes to focus on the depressing thoughts and events that surround us and lose sight of the little blessings. Count your blessings. Record them. What gifts has the Lord bestowed on you today? Adopt the recording 1000 gifts challenge and see God transform your thoughts and understanding. It can be the hardest thing to start. But in cultivating gratefulness there is further grace. Colossians 3:15 states, “And let the peace that comes from Christ rule in your hearts. For as members of one body you are called to live in peace. And always be thankful.”

“The greatest thing is to give thanks for everything. He who has learned this knows what it means to live..He has penetrated the whole mystery of life: giving thanks for everything.” - Albert Schweitzer

Do the Next Thing

The worst culprit I found for feeding depression was to linger in bed in the morning or sack out on the couch too frequently throughout my day. This is not to say you shouldn’t rest, but guard against extended periods. Keeping yourself busy is an effective preventative against allowing your mind to wander into depressing thoughts. In these moments when I am struggling with fear, or simply the motivation to keep going, I like to read this poem:

“Many a questioning, many a fear,
Many a doubt, hath its quieting here.

Moment my moment, let down from Heaven,
Time, opportunity, guidance, are given.
Fear not tomorrows, Child of the King,
Trust them with Jesus, ‘DO THE NEXT THING.’
Do it immediately; do it with prayer;
Do it reliantly, casting all care;
Do it with reverence, tracing His Hand
Who placed it before thee with earnest command.
Stayed on Omnipotence, safe ’neath His wing,
Leave all resultings, ‘DO THE NEXT THING.’”
–author unknown

The simple step: do the next thing. This may be just getting out of bed and taking a shower. Or refreshing your soul by reading the word for 5 minutes. Or simply getting off the couch and changing that diaper. God’s grace is sufficient if we are willing to get up, change our attitude, and do the next thing.

Be in Fellowship

The easiest thing for those who struggle with depression is to hide themselves and avoid the company of others. I discovered that there is such healing in being open and honest with your brothers and sisters in Christ. Don’t try to hide it. This will only feed it more. Seek prayer. Seek support. Let others love on you. Take time to laugh with others. I found on many occasions that by just opening up and sharing my personal struggles, that I experienced release and freedom from the weight of it. We need the body of Christ. We need the support and fellowship of the body. This is one extension of God’s grace to us.

“Let the word of Christ dwell in you richly as you teach and admonish one another with all wisdom, and as you sing psalms, hymns and spiritual songs with gratitude in your hearts to God.” Colossians 3:16

Surrender

Ultimately, the place of deliverance and freedom for me has come from the place of surrender. I remembered Paul who graciously adopted his “thorn in the flesh” (2 Cor. 12:7) as the Lord’s means of purifying and maturing him in godliness. The Lord revealed to me that I had been striving for healing and restoration all in my own strength. Yes, I certainly had been crying out for mercy, and depending upon him daily for strength, but ultimately I was looking to the next natural remedy to give me sleep, to release me from depression. I tried every concoction and recommendation possible, offered through meaningful family, friends, herbalists, naturopaths and sleep specialists, and more often then not, they would simply get me more discouraged and depressed because of their uselessness.

I had to come to a place of surrender. If God wanted this to be my “thorn in the flesh” for the rest of my life, then I could choose to embrace that and walk in His joy and grace, or alternatively continue in this path of hopelessness. I knew that if I fully released my efforts, my striving for healing, and let go, there would be peace, whether I was restored or not. And I can testify to that amazing grace. God helped me experience freedom.

Natural Remedies

I have experienced various help from supplementing with these following remedies for helping keep my hormones and feelings in check. But ultimately, we cannot depend upon them for our hope. Our hope must be first and foremost in God alone.

Get Some Fresh Air

Try to get outside for some good exercise each day. Even if it’s just a quick 15 minute walk around the neighborhood while your little ones nap, you will find great refreshment for your soul. Get outside and enjoy the beauty of God’s creation.

Fish Oil

I have found supplementing my diet with cod liver oil or fish oil has been extremely helpful for balancing my hormones. I supplement with Nordic Naturals DHA oil and take two tablets daily. During pregnancy, I am taking Nordic Naturals Prenatal DHA because it has so many good benefits for healthy infant development in addition to mood and nerve support for mommy.

B Vitamins

B vitamins are essential for balancing your nervous system and stress levels. I take 1 tablet of Wild Harvest’s Stress Guard but any B multi-vitamin is very helpful for this. Dark green leafy vegetables are high in vitamin B as well. Green smoothies are an easy way of boosting these in your diet.

Flaxseeds

Flaxseeds are great hormone balancers with their high level of omega-3 fatty acids. Eat them raw, freshly ground in a coffee grinder, over oatmeal, yogurt, or various cereals, in smoothies, etc.

Develop a Peaceful Evening Routine

I have also found it helpful to establish a peaceful evening routine. I stopped getting on my computer or watching any possible intense movie (whether action packed or overly dramatic) that might get my mind going full speed or put my emotions in an upheaval. You just have to be guarded as to what you fill your mind with. Give yourself a good stretch of time to wind down from the day. Avoid staying up too late, as the best hours of sleep are between nine and midnight. Reading myself to sleep with a calm peaceful book, or simply the Psalms, has been most effective for cleaning out my mind and allowing it to rest from the days activities and get a better night’s rest.

Let me leave you with this quote:

“Therefore, depression, regardless of the causes, is a time to answer the deepest and most important of all questions: Whom will I trust? Whom will I worship?” - Ed Welch

Sometimes there will be no answer as to the reasons that you might be suffering from depression. Sometimes God doesn’t clearly define the why. Your struggles and solutions likely will be different from mine. But He does supply the grace to help us acknowledge where we can put our trust. And the only true and lasting foundation is the Lord Jesus. He is a solid rock upon which we can stand.

Additional Reading

For excellent spiritual encouragement on the topic of depression, I highly recommend Depression: A Spiritual Darkness by Ed Welch. For the life of me, I did not want to read this through my various bought of depression, but the Lord really convicted me again not to depend upon my own strength. I read it and found such encouragement!

Treating Depression Naturally by Keeper of the Home

Photo Credit

Comments { 73 }

Evening Primrose Oil: A Mama’s Favorite Remedy

Photo Credit: Alan Vernon

Post by contributing writer, Michele.

Jars of Evening Primrose Oil capsules have been a staple on my natural remedies shelf for years. I have found it to be beneficial during various “feminine” seasons of life. Rich in essential fatty acids, it can assist in addressing a wide range of concerns:

Trying to Conceive

In conjunction with charting your cycle, and drinking lots of water, taking Evening Primrose Oil during the days before ovulation may help increase your “fertile” conditions, as well as providing essential fatty acids needed during pregnancy. (Do not take after ovulation, since it can cause contractions.)

Always start with the lowest dosage, and gradually increase the amount as needed.

PMS/Monthly Cycle Concerns

Even if you don’t get pregnant, those two weeks (approximately) of taking the supplement each month may also help alleviate some of the hormonal challenges of PMS, and even help address irregular cycles.

Evening Primrose Oil is also commonly recommended for relief of painful Fibrocystic Breast Disease, which can be an additional concern of a monthly cycle. (After taking this for several months at the recommendation of my physician a few years ago, the results were very helpful for me!)

Photo Credit: Daquella manera

Pregnancy & Preparing for Labor

Many midwives will suggest dosages of Evening Primrose Oil to help prepare the cervix for labor. I tend toward the cautious side, preferring to begin the supplement around 38-40 weeks of pregnancy, but some women gradually begin (with small doses) a bit earlier, around 36-38 weeks.

Dosages usually begin with one or two 500 mg capsules orally, increasing up to a total of 2,500 mg per day. (The total is usually divided up, to be taken 2-3 times per day.) Other pregnant women use part of the total dosage as a suppository placed near the cervix, as well.

Use Evening Primrose Oil with caution during pregnancy, as it can induce labor in some women. Do not take if expecting surgery, as it may act as a blood thinner. Check with your midwife or care provider to see what is appropriate for your situation, before using.

Postpartum Healing

Some women have found that massaging some Evening Primrose Oil a couple times a day on the perineum has helped with their postpartum healing (such as painful scar tissue remaining weeks after an episiotomy has “healed”). Source: Midwifery Today

Taking this supplement orally during those last weeks of pregnancy as well as into postpartum may also have the benefit of decreasing the hormonal “blues” of postpartum.

(Best results are usually seen after taking it for a month or two; check with your provider. Please note, this is not a substitute for necessary treatment in the event of full postpartum depression!)

Breastfeeding Concerns

Evening Primrose Oil is usually considered safe for breastfeeding mamas, and can be helpful for addressing soreness during ovulation, Raynaud’s Syndrome, and plugged milk ducts. (I experienced all three of those over the past couple years, and have found relief from all of them, following the recommendations of my midwives & lactation consultant!) Source: KellyMom.com

Menopause

Depending on the symptoms you experience, you may find Evening Primrose Oil beneficial, using a daily schedule of dosages (such as this one).

Over the years, I’ve found Evening Primrose Oil to be a frugal & simple solution for many health concerns, and a natural alternative to expensive and chemical-based products from the pharmacy.

Has Evening Primrose Oil worked for you?

Comments { 61 }

Organizing a Natural First Aid Kit

Post written by monthly contributor, Michele.

If you have been working on stocking your home first aid kit with natural remedies this past year or so, you may eventually realize that it’s time for some reorganization! The beginning of a new year is always the perfect time for a fresh start (for anything, really).

Those jars of lovely calendula salve, people’s paste, thrush remedies, homeopathics, juices, and more can get quite jumbled and hard to find as the months go by. Bags of bulk herbs can end up pushed back into dusty cupboards, and forgotten. Bulk ingredients may have melted or crystalized in a back corner.

A hard-playing summer, followed by a winter of sniffles can leave the first aid kit needing some attention. Take some time this week to sort it out, and plan for the year ahead!

This is a wonderful time to jot down notes for your garden planning (add some medicinal herbs to your seed catalog list!), and prepare for special life season/events (such as pregnancy/birth).

Supplies:

  • A clean, sturdy box, ready to use for your First Aid Kit. (Empty out your current first aid kit to reuse the box, or find a new one.) I use a cardboard box (cover it with pretty paper, if you want).
  • Basket and/or clean jars for sorting Bulk Herbs. (Canning jars, reused condiment jars, etc. work well.)
  • A sturdy, clean box (preferably waterproof) or cupboard for Bulk Ingredients.
  • Pen & Paper for listing needed items.

Steps:

  1. Empty out your current first aid kit.
  2. Check all items for expired dates, moldy salves, broken bottles, etc, and discard. (Make note on your list for any items you need to replace!)
  3. Make sure to check the refrigerator, too, for any remedies stashed in there.
  4. Sort items in a way that is convenient for you. (Perhaps by type/category, such as tinctures, homeopathics, salves, etc. or by illness (cold remedies, baby/mama needs, etc.)
  5. Again, make note of needed items on your list. (Is anything running low or missing? Add it to your list.) Consider the needs of the past year, and your plans for the year ahead, and try to prepare accordingly.
  6. Neatly restock your sorted items into your first aid kit box.
  7. Make sure your staple first aid items, such as bandages, thermometers (check the battery!), ice/heat packs, etc. are stocked, as well.

Bulk Herbs/Ingredients:

  1. Clean out your bags of bulk herbs/ingredients from wherever they are hiding in your cabinets/drawers.
  2. Sort out any old or spoiled items and discard. (Make notes on your list of items to replace.)
  3. Depending on the storage space and supplies you have available, make sure your herbs are stored in safe, air-tight containers. You can pour them into clean, labeled jars, or store sealed bags in organizing baskets.
  4. Organize your herbs in a way that is suitable for your use (alphabetical, by type/use, etc.), and neatly restock your cupboards. (Make note of any needed items.)
  5. Look over your supply of bulk ingredients (such as aloe, beeswax, oils, butters, etc.). Check for any leakage or spoilage, or anything running low. Make note of anything that is missing or needs to be replaced.
  6. Pour any leaking container into a clean, airtight jar, and wipe down all containers to remove dust or drips. Bulk items in plastic bags can be poured into jars, too, if desired.
  7. Neatly restock your cabinet/box with ingredients in a way that is convenient for you to use.

Bonus:

At the same time, prepare a small selection of your remedies to keep in the car! Be prepared for the scrapes, stings, and motion sickness that may arrive while you’re away from home.

A small canvas bag works well to store a basic kit. (Use plastic or stainless steel containers rather than glass, to avoid breakage, and some remedies may need to be sealed in a plastic storage bag, just in case of melting/leakage. Reused plastic spice containers work well.)

Final Step:

Review your list of needed items. Could you make any of the remedies? Make a notation by those items, and plan a date for a “remedy-making day!” Add any remaining items on your list to your grocery/seed orders.

Let’s prepare to bless our families, by being ready to soothe the inevitable ‘owies’ and to nurture wellness, ministering to the physical needs of those entrusted to us.

If you’re looking for more natural health remedies, you may want to check out Michele’s eBook, Herbal Nurturing: A Family Healing & Learning Guide. Michele is offering all Passionate Homemaking readers a special discount on her books. Enter: JANPH25 at checkout to save 25%. Sale ends 1/20/11.

Comments { 2 }

Balancing Nutrition with Priorities -Part 2

Photo credit

Welcome back for Part 2 of our discussion on balancing nutrition and priorities. Read Part 1 here.

This past week I was preparing burritos for dinner. I was frustrated and fretting about the need to prepare my own homemade tortillas. I wanted to…but energy was seriously lacking. So I went to the store. I bought white tortillas. And you know what? I felt free! I felt truly free to eat and enjoy this food without fear. Our burritos were delicious filled with home cooked beans, meat, cheese, guacamole, fresh salsa and sour cream! And we all loved it!

There is freedom in Christ, my friends (Galatians 5:1). There is no condemnation for those who are in Christ Jesus, and that includes your food choices (Romans 8:1-2). Fear is slavery. God designed food for our enjoyment. He gave Peter permission to kill and eat. God had made all these food items clean through the blood of Christ (Acts 10:13-15).

This means that when done in a spirit of thanksgiving, we can enjoy the glorious flavors of God’s creation with joy. We love going out to eat and rejoicing in the flavors of Thai and Mexican food. This is part of delighting in the beauty and diversity of God’s creation.

“Whatever you eat or drink, or whatever you do, do all to the glory of God.” (1 Cor. 10:31).

Is God being glorified through your fear and striving? Than food and health is distracting us from this higher calling.

So I often buy canned tomato soup, boxed cereal, small yogurts, and minimal packaged foods here and there. Why? Because it makes my homemaking a bit more simple, makes my husband happy, increasing the joy in our marriage, and I do have more time to enjoy my kiddos. I no longer fret about it. It works for me in this season. My husband and my children are happy. There is peace. I want to keep my eyes on the Kingdom. Investing in the souls of my children, serving and loving on my husband (even if that means white hamburger buns and small yogurts for work that he loves!), and giving first to the Kingdom.

I wanted to include this helpful list of guiding questions that Natalie at Guarded for the Gospel shared. These are invaluable. They should be asked consistently when we feel our heart striving, feeling anxious, or overwhelmed.

These practical guidelines will help guard against health/nutrition becoming wrongly prioritized, over and above loving God, family and friends:

1. How does my husband feel about our family’s health and our current diet? What is his opinion about investing extra time/money in this area?

Listen, and really value his thoughts! Unity is so key.

2. What is our current budget? Am I submitting to it?

Do NOT overspend for the sake of healthy food and in doing so, dishonor your husband! You may have nourished his body by putting a super-nutritious meal on the table, but you might be kinda like a Big Mac to the financial “arteries” of your marriage. (You are clogging it up, slowing it down, and working against him if you are overspending your budget!)

3. Does my hubby have food preferences? Am I being thoughtful toward them?

If your budget + your health agenda = lots of beans…

but your husband does not like beans, then CHUCK the beans!

If he likes meat, figure out how to work meat in your meals! This may be A LOT OF WORK. But if he knows you want to make meals that are enjoyable for him and healthy, he will be more on board with you.

You won’t be gaining any support if you disregard his preferences for a meat-and-potatoes dinner, and serve him tofu served on mixed greens, with flaxseed dressing and pine nuts.

A true story from our house: My husband recently told me, “Spinach is a leaf. It does not belong in my drink. Put it in my salad!”

Yup. Green smoothies are a cool idea to me. Next time I’ll make them during the day! :)

4. Do my eating habits prevent me from spending time with other people, when I will be forced to eat foods that fall outside of my own ideas of health?

Jesus hung out with lepers. He did not think his own health so important as to avoid contact with people who could possibly jeopardize it.

5. Does my family’s spiritual/emotional health ALWAYS come first?

Baking bread and making homemade butter is NO excuse for not teaching scripture to your children, praying with them, playing on the floor with them, or having time to relax and talk/listen to your husband.

6. Am I keeping LOVE as my first priority? Am I always thinking through how to best order my time according to LOVE, not merely our diet?

These are truly convicting and yet so freeing at the same time. I pray the Lord would bless and keep you and allow you to keep this balance through His grace. Pursue health and wholeness first and foremost through Jesus Christ! I encourage you to make healthy food and lifestyle choices, use whole grains, natural sweeteners, and food as close to the original source as possible, but don’t become enslaved to it.

Try not to go to the opposite extreme of abandoning all and making yourself sick, but rather do not worry about non-organic produce, parabens in your body products, or feeling guilty if you didn’t soak your grains, or fretting that every stomach ache or dry skin issue must be linked to a food allergy. Do your best with the resources God has entrusted to you, guard your heart against fear, and enjoy the freedom you have in Christ!

I will end with this sweet quote by Sheri from the comments on Part 1. She put it so well with this illustration:

I just heard Elisa Morgan from MOPS international speak and her key phrase was, “She did what she could,” from the story of Mary anointing Jesus with perfume. To sum up her talk, God only expects us to do what we are capable of doing, not what someone else can do, or doing or giving to the point of wearing yourself to the ground making you useless. Its a good thing to remember in all aspects of life.

Comments { 85 }