Archive | health & nutrition RSS feed for this section

Balancing Nutrition And Priorities – Part 1

Photo Credit

With the bombardment of choices for us mothers to make in regard to our health and nutrition at the table and in our lifestyle, it is becoming more and more difficult to keep a proper balance between our pursuit of nutrition for the health and wholeness of our family and the reality of what we can truly manage. I have been noticing an increased obsession with health and food in my generation that has been concerning, especially among young mothers. We don’t realize that something is being sacrificed at the idol of health.

As I have been part of this real food movement over the last few years, I have come from truly enjoying learning new things about our health and food choices and eager to serve and provide the best for our family, to becoming obsessed with worry (what are these ingredients and what can they do to our body?) and frustration over our food budget and what the long-term impact of our decisions could result in. Now I’ve come to a place of peace. I have freedom because I am letting go of control. After my original writing of Can Natural Living Become an Idol? several months ago, and the positive response received from others going through similar struggles, I wanted to add further help by giving some principles from which we can achieve peace and balance in the wave of food and health decisions.

It can be so frustrating researching every food product and finding such a mix of opinions and research going both ways. Should you soak or not? What products are really safe? With the expansion of the internet, there is just no end to resources saying the pros and cons of every food and body product item in your home.

Reality came home for me when a close family friend died of cancer this past summer. She had been the leading example in my life of the ultimate Nourishing Traditions follower. My eyes were opened. Health will not save you. It truly cannot preserve one day of your life.

We need to be careful that we don’t elevate health so high that we expect it to keep us from the kind of health problems our parents’ generation suffered because it will not save us. Fear is a deadly enemy. It is consuming. It entangles. It takes our focus away from the importance of demonstrating Christ’s love to a hurting world.

As mothers, we are extremely susceptible to comparing ourselves with others standard of health and nutrition. To become overwhelmed because we cannot afford all organic products. To stress because we have so much to learn. Health and nutrition cannot become our “functional Savior.”

Dear sisters, let’s step back again. Let’s review our priorities. What does it come down too? The importance of love. Loving the Lord with all our hearts and loving our neighbors as ourselves. I love how Natalie at Guarded by the Gospel shares it here,

So what should my be priorities be as I shop and cook and eat?

First, and ultimately, our pleasure is in God, in Jesus Christ. Psalm 16:2 says, “I say to the LORD, ‘You are my Lord; I have no good apart from you.’” Jesus said God’s greatest commandment was to “love the Lord your God with all your heart and all your soul and all your mind.” (Matt. 22:39) God deserves his place. Anything that supplants our total and ultimate love toward him is…an idol.

How do I know when I’ve made an idol out of something?

My whole life revolves around that one thing.

I plan around it.

I obsess about it.

I freak out if it’s taken away from me.

I think about it all the time.

My relationships revolve around it.

I think it makes me ok, on track.

And…(Here comes the hard part) …When it causes me to break the second greatest commandment, “love your neighbor as yourself.”

Funny how idolizing something (breaking that first commandment) makes you break the second too!

I have made an idol out of nutrition (or whatever!) when I continually elevate it as a priority above loving the people around me the way I would like to be loved.

Let me say that serving healthy wholesome food for your family is important. We want to be healthy and fit for the Lord’s use. We are responsible as do the best that we can. It is an act of love, but when you are spending so much time in your kitchen, planning, shopping, preparing, that you miss those moments of loving on your little ones, then we have missed the boat. When people start saying that parent’s who feed junk food to their children don’t really love them, we are going too far. What’s more significant in the kingdom? The physical or spiritual food we serve?

When our family dinner times are lacking peace because we are constantly trying to get our little ones to eat this healthy food which they may not enjoy, then something needs to change. I didn’t like my veggies as a child, but did I suffer much? No, I love them now and the striving and fighting isn’t worth it.

“Seek first the kingdom of God and his righteousness, and all these things (food, shelter, the essentials) will be added unto you.” (Matt. 6:33).

Natalie continues, 

Always cooking and eating healthy food will not make you truly healthy. Having a heart full of life-giving, generous, lay-down-your-life love will.

“Do you not see that whatever goes into a person from outside cannot defile him, since it enters not his heart but his stomach, and is expelled?” And he said, “What comes out of a person is what defiles him.” (Mark 7:18-20)

True health and wholeness can only be experienced through Jesus Christ.

Check out part 2 here

Comments { 106 }

Boosting Nutrition in Your Fruit Smoothies – Greens & Herbs!

Do you feel like your diet is lacking good nutrition? Do you have any picky eaters like my kiddos who don’t particularly care for their vegetables? Are you looking for a simple inexpensive way to boost your health without the added expense of supplements? Enter smoothies.

Since beginning my journey on preparing fruit smoothies, I am continually amazed what you can add to a simple smoothie to increase the health and nutrition of this wonderful beverage and get all your supplements for the day in whole food form. In fact, it seems to be the best means of getting good nutrition in your kids diet. I have never seen a child that doesn’t love a good fruit smoothie. It is a refreshing beverage for any day of the week! And they are also a great item for any meal. We’ve had them for breakfast, lunch, snacks, and even a light dinner on those extra tiring days. Lately, I have been starting to add various herbs to our smoothies and have noticed some significant improvements in our overall health.

Here are some of the goodies we add to our smoothies:

1. Kefir

I love using kefir as the base for our smoothies because it is one of the most nutritious probiotic available. Kefir, which means ‘feel good” in Turkish, is an ancient cultured, enzyme-rich food filled with friendly micro-organisms that help balance your “inner ecosystem” to maintain optimal health and strengthen immunity.

Kefir’s tart and refreshing flavor is similar to a drinking-style yogurt, and it contains beneficial yeast as well as the friendly ‘probiotic’ bacteria found in yogurt, but is more nutritious. When used regularly, the naturally occurring bacteria and yeast in Kefir combine symbiotically to help balance your intestinal flora and boost your immunity. Learn how to make your own kefir here.

Whole milk yogurt, coconut milk, coconut kefir, coconut water, or kombucha are also excellent bases for your smoothies, depending upon your needs and preferences. I have used and love all these alternatives as well. I use about 3/4 – 1 cup kefir or alternative for my base.

2. Greens

We have been making green smoothies for some time now. Adding fresh greens can assist in boosting energy, building your immune system, detoxing impurities, and loosing weight. Greens are rich in magnesium and alkaline minerals like calcium and are superb in their Omega-3 unsaturated fat content.  Believe it or not, greens are one of the richest sources of protein. I have used organic spinach (as it is a highly sprayed crop) predominately as it is easy to add without affecting the texture. I can add half of head of spinach and it blends in well with all the frozen fruits.

We also use the Green Magna Plus Powder if I don’t have greens on hand or want to boost it a bit more. I will add 1 Tablespoon of this mixture. Magma Plus contains barley grass juice powder plus 56 other natural ingredients. It provides a full range of phytonutrients including active enzymes, antioxidants, carotenoids, flavonoids, vitamins, minerals, fiber, protein, amino acids, prebiotics, probiotics, and chlorophyll.

3. Herbs

Lately, we have started adding herb powders to our smoothies with excellent results. Adding herbs is like preparing your own vitamins. They are real food and easily digestible. God has provided all the health and nutrition that we need in His creation, and this is beautiful to behold as you study the different kinds of herbs and their functions in our bodies. These herbs may affect the texture somewhat of your smoothies, so start small and build up as you go to get your full dose.

Daily Boost Herba-Smoothie – This product is compiled by Bulk Herb Store and is specifically designed to give you full balance in your health and perfect for your daily smoothies. This mixture of herb powders contains the following:

  • Ginkgo: Brain food, better concentration and improves memory
  • Oat straw: Excellent source of the major minerals
  • Hawthorn: Best herb for strengthening the heart
  • Burdock root: Blood purifier, helps with varicose veins, detoxing, and more

Adding 1 heaping teaspoon of this herb powder is wonderfully nutritious! It blends in so well with fruit and you cannot even notice it is there. I have had increased energy and sleep since taking these herbs.

Spirulina

Spirulina powder is a blue-green algae that grows on freshwater ponds. Spirulina is 55-70 percent protein by weight and considered my many to be the greatest plant source of usable protein and is rich in B vitamins and gammalinolenic acid (GLA). We add 1 heaping teaspoon to our smoothies currently, and hope to boost it up as we go. Spirulina is certainly a superfood!

Kelp Powder

Seaweeds are the richest plant source of minerals, providing 10-20 times the minerals in land-based plants. They contain a more well-balanced and broader spectrum of minerals necessary for the body than any other organism. They are used to promote longevity, prevent disease, and boost a healthy metabolism to those courageous enough to consume them. The easiest to come by and disguise is kelp powder and can be added to smoothies. We add about 1 heaping teaspoon to smoothies and will build up to about 1 Tablespoon.

Slippery Elm Bark Powder

Slippery Elm is a “mucilaginous herb that helps absorb toxins in the bowel. In fact, it is very soothing to the entire digestive system. It is useful especially for diarrhea, bowel weakness or as a mild nourishing food for sick children. Since the herb is slightly sweet, it is one that children will often take readily if it is mixed in some cereal, applesauce or fruit juice.”

We have been adding another heaping teaspoon of this powder with our smoothies.

My cousin Amy introduced me to the idea of adding herbs to my smoothies. I asked her to share her recipes and herb combos. Amy is dairy-free, and offered these helpful recipe suggestions. The liquids can easily be changed out for whatever base you would like (yogurt, kefir, coconut milk, kombucha, etc). Each recipe is prepared for 4 servings.

1 1/2 med. bananas
1 large mango
1 1/2 c. strawberries
1/2 c. kombucha
1 Tbsp flax seed
approx. 1 1/2 c. water

2 med. bananas
1 c. frozen strawberries
1 c. frozen blueberries
1 c. water

1 large mango
2 c. frozen blueberries
1 c. frozen blackberries
1-1.5 cups liquids

3 small bananas
2 c. frozen strawberries
3/4 c. kombucha
1 c. water

2-3 c. frozen blackberries
1-2 bananas
6 TBSP coconut water
1/2 c. kombucha
1 c. water

2 bananas
2 cups frozen peaches
1-2 cups water

To each of the above combos, add any or all of the following (start smaller and gradually increase herbs as desired). Again this is per 4 servings:

1 Tablespoon orange juice concentrate (helps balance it out if a smoothie needs a bit more flavor or sweetener)
1 teaspoon vanilla extract (does wonders for adding flavor!)
1/4 teaspoon stevia powder, as needed
2 tsp ground Daily Boost Herba Smoothie Combo
2 tsp ground slippery elm
1 1/2 tsp ground nettle (increases liver and kidney function)
3 tsp ground kelp powder (this is the strongest flavored one, if I think the smoothie isn’t strong flavored enough to mask it, I’ll reduce the amount I add, or skip it altogether for that day)
3 tsp (or more) ground spirulina
little under 2 TBSP cut leaf alfalfa (rich in vitamins and minerals, chlorophyll, blood purifier)

Our family is currently using the herba smoothie combo, slippery elm, spirulina, and kelp powder and hope to start adding a bit more of other herbs as we go. A great option of getting real food in your smoothies without expensive supplements!

My kids love these smoothies, as you can see in the pictures!

These herbs can be purchased through Bulk Herb Store or Mountain Rose Herbs (with the exception of the Herba Smoothie mix), both of which are companies that I love!

What healthy additions do you like to make to your smoothies?

Please note that this information is shared for educational use. We are not licensed practitioners in any way but love to share out of our own personal experience. As far as I understand, all these herbs are perfectly safe for pregnant and nursing mothers.

Announcement: The winner of our Christa Taylor giveaway was Tara (taraalic..@)! Congrats!

Comments { 59 }

Resources -Holidays, Nutrition & Entertainment Savings!

I have been wanting to share with you some exciting resources that I have stumbled upon recently, and thus here they all are in one quick little post.

12 Week Holiday Planner for the Christian Family – I have shared about this wonderful resource in the past, but am excited to announce that Sheri at Graham Family Ministries has completely updated the planner and offers a new edition! October 1st begins the 12 weeks leading up to Christmas, and this planner is thoroughly organized to make your holidays simple and smooth.

This e-book guide will provide you with practical tools to plan for a fruitful and focused holiday season! This 171 page e-book includes recipes, planning sheets, holiday tradition ideas, healthy menu ideas, memory making ideas, journal pages, and so much more!

We have used this planner for the past two years and have loved it!

Real Food Nutrition & Health for Kids! Want to teach your children about real food health and nutrition? Kristen at Food Renegade is offering an online ecourse adapted for children and teens, ages 12-up. It would be a perfect homeschooling session to take with your children and learn about important health concepts.

Inspired by the same love of wholesome, traditional foods that you find in the cookbook Nourishing Traditions, the work of Weston A. Price, the Slow Food movement, and farmer’s markets everywhere, this course covers all the basics of Nutrition from a decidedly Real Food perspective. This course was developed by a homeschooling mother who wants to make health & nutrition fun for all with no boredom allowed! The course will highlight video footage, fun experiments at the grocery store, discussion questions, and other interactive projects. Check it out! Registration ends on October 1st, so sign up now!

FINALLY! A Nutrition text that gets it RIGHT. Click here for details.

Groupon – have you checked out Groupon yet? If not, I wanted to pass it on because we have found some great local deals through this hot resource! If you live in one of the major cities highlighted, you can subscribe to the daily notifications of a special deal for restaurants, food, clothing, fun activities, and much more. Thus far, I got a 50% deal on a dinner date to my husbands favorite local restaurant, McMenamins, a 50% deal for Gap, and a $10 photo book from Shutterfly for our annual family albums. It’s simple and easy and you can save a lot of money for some fun entertainment!
Find Today’s Daily Deal on Your City’s Best Things To Do at Groupon.com!

Passionate Homemaking is an affiliate of the above companies because we can highly recommend these as helpful resources for our readers. We receive a small percentage of each purchase made through our links, so thanks for supporting us!

Comments { 1 }

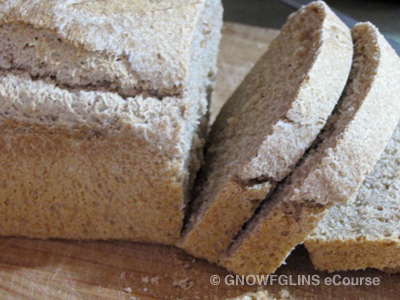
Is Sourdough Really Sour? Deflating 5 Sourdough Myths

Guest post written by Wardeh Harmon from Gnowfglins.

Not long after I began reading about sourdough, working with it myself, and teaching others to embrace it, I noticed a handful of misconceptions that come up again and again. These ideas get around somehow and they’re simply not true.

For instance, have you been told that sourdough is always sour? Do you get the impression that baking with sourdough is too hard for everyday moms who aren’t gourmet bakers? Has someone moaned that it’s super hard to keep a sourdough starter alive? Those are three of the five myths I’d like to deflate today. I’d like to set the record straight about our trustworthy and simple friend: sourdough.

1. Sourdough Is Just For Bread.

Actually, sourdough is one of the most versatile baking methods you’ll ever try. In addition to gorgeous, tasty and soft bread, you can make easy and mouth-watering sourdough pancakes, waffles, english muffins, muffins, donuts, crackers, biscuits, pot pie, gingerbread, pasta, cookies, scones, crepes, pizza crusts, tortillas, cakes, and more! I did go on and on, but you got the point, right?

2. Sourdough Is Difficult.

Not so! On the spot, you can whip up the easiest, tastiest, most nutritious pancakes, waffles or crepes with just leftover starter and a few other ingredients. For many other easy dishes, all that’s required is mixing up some starter, liquid and flour ahead of time. Then about 8 hours later you’ll create cinnamon rolls, biscuits, or pasta much like usual. So tell me, how hard does that sound?

3. Sourdough Is Finicky.

No, it isn’t. A sourdough starter, or a sour dough, has just a few basic, simple needs: oxygen, warmth, and food. And it’s not even too picky about those. Oxygen is a given; leave a loose cover on the starter or dough so it can breathe. For warmth, anything around room temperature will do. The food can come in the form of any flour you’re using at the time. Whole wheat pastry flour, whole wheat flour (red or white) and spelt flour all take turns in my starter; I feed the starter whatever I’m using for baking.

4. Sourdough Is Just For Flavor.

Sourdough foods have complex and compelling flavors, no doubt. Consider the distinctive San Fransisco sour tang, or fluffy Alaskan sourdough pancakes drizzled with pure maple syrup. But I love sourdough for two other reasons.

A gift from God. Prior to this century and the development of commercial yeast, folks used a sourdough starter’s wild organisms for rising and lifting doughs. Leavened bread in the Bible? Sourdough all the way. When I see a warm soured dough rising in my kitchen, I praise God for the amazing and practical gift of sourdough.

More healthful. A sourdough starter is an ecosystem of wild yeasts and beneficial bacteria that work together to add B-vitamins to grains, to break down gluten for better digestion, and to neutralize phytic acid and enzyme inhibitors. In addition, the sourdough starter’s organisms are much more versatile than commercial yeast (with regard to temperature or other conditions) and sourdough bread doesn’t stale as quickly.

5. Sourdough Is Sour.

Sourdough can be sour, but it doesn’t have to be sour. Two chief practices contribute to “sour” sourdough.

Skipped feedings. Ideally, I believe we should feed a room temperature sourdough starter twice a day. A sourdough starter (the active mother culture) contains both wild yeasts and beneficial bacteria. Regular flour feedings keep the organisms fed and in balance. But missing a feeding gives the bacteria a leg up. You see, the yeasts run out of food when the simple sugars in flour are all consumed, and they start dying off. But the bacteria still have food to eat. They eat the expired yeasts, along with the yeasts’ wastes, and continue to produce lactic acid, the main sour flavor. And so the starter gets more sour.

Long souring period. When we create a dough with sourdough starter and let it rest, this is the souring, or fermentation, period. The yeasts and bacteria feed on the flours in the dough, and their byproducts are acids (offering flavor) and carbon dioxide (rising the dough). The longer the souring period, the more sour the flavor. For best nutrition, I recommend a good 8 hours of souring. Unless the weather is very hot, the flavor won’t be that sour, if at all. On the other hand, allowing the dough to ferment for 24 hours or more will yield a pronounced sour end product.

What can we learn from this? First, feed twice a day to keep all the organisms in balance and the overall sourness slight. Second, sour your dough for less time, rather than more.

By the way, have you heard the phrase, “soda sweetens”? It’s true! Many sourdough recipes (including these pancakes, english muffins, or waffles) call for baking soda. Not only does the baking soda react with the starter to give a good rise, but it sweetens the dough or batter by neutralizing some of the acidic taste.

Are you interested in easy sourdough recipes, video demonstrations, and mouth-watering results? I welcome you to participate in the Sourdough eCourse, where I and other teachers guide you in mastering simple, tasty, nutritious sourdough. We are always open for enrollment; you can join us any time your schedule allows. God bless you all!

Wardeh (‘Wardee’) Harmon lives in Oregon with her husband and three children. They raise ducks and dairy goats on five and a half gorgeous wooded acres, which they are in the process of turning into a productive homestead. Wardeh’s passions are healthy cooking and sewing practical wool garments, although she loves to create just about anything from scratch, should the mood hit right. Wardeh teaches traditional and whole food cooking at the GNOWFGLINS blog and GNOWFGLINS eCourse.

Comments { 15 }

5 Natural Medicine Cabinet Essentials

Photo Credit

Fall is definitely arriving here in the Northwest as we welcome rain and chilly weather turning our thoughts towards starting to prepare for the winter and the cold/flu season. Last year I shared about stocking your natural medicine cabinet and found a wealth of information and ideas passed around from our readers. As I look back on this previous year, I realize I collected many items that were truly not necessary. My goal this year was to simplify my medicine cabinet and stick to the items that were most effective when dealing with the everyday cold and flu bugs last winter. Here are my top 5 items that I believe should be in every Mama’s cabinet:

1. Elderberry Syrup

I cannot praise this concoction enough! It is easy and frugal to make your own supply, and it is incredibly healing to the body. As I shared previously, “Elderberry is anti-viral, contains high levels of flavonoids and antioxidants, has cell-protecting components, soothes sore throats, and supports the immune system and respiratory system.” We have found it extremely effective for all colds, running noses, sour throats, flu, fevers and various aches and pains. It covers all your bases and is perfectly safe for adults and children.

Learn how to make your own elderberry syrup and keep it stocked in your fridge all winter long. Take one teaspoon daily to help boost your immune system and prevent illness or 1-4 teaspoons daily during sickness. Check out this helpful video from Mountain Rose Herbs on preparing your own. Mountain Rose Herbs sells dried elderberries for an excellent price.

If you’d rather buy your Elderberry syrup, we have used the Quantum Elderberry brand as well and it is excellent alternative. You will go through it with one cold bug, so that is why I started to make my own because it was significantly cheaper.

2. Papaya Enzymes

We used papaya enzymes regularly when I was growing up and they have always been the most effective natural solution for stomach aches and indigestion – for adults and children. Papaya Enzymes are a chewable digestive aid that is 100% natural – made from papaya fruit. Pepermint and chlorophyll are added to refresh and sweeten breath, so it is also a great breath refreshener! I usually use two for myself and one tablet for children.

3. Epsom Salts

Sooth sour muscles, aches, pain, and relieve stress with epsom salts. They are effective in cleansing open wounds, remove warts, and heal the vaginal area after birth. Sprinkle a handful throughout the bath tub and soak as desired. Add a few drops lavender essential oil for enhanced healing and relaxation.

4. Aloe Vera

Aloe vera is very effective for burns, cuts, skin irritations such as relieving mosquito bits or poison ivy, and general cleansing of skin. You can grow a plant indoors to have on hand for these needs – simply break off a leave and rub the juices on the infected area.

5. Arnica

We love Arnica for all those bumps and bruises, which seem to happen daily at our home. I apply a dab of Arnica and the healing process is enhanced. Helps prevent bruising beautifully. We use Hyland’s Arnica Spray.

These are the top 5 natural healing tools at our home – items I have used consistently over the past few years. There are many other wonderful natural healing on the market, but I have found these to be the top picks for everyday use as a wife and mother. Keep the cabinet simple so your essentials are easy to find when the need arises. My next pursuit is to invest in a aromatherapy diffuser, in order to start using more essential oils in our home for healing and maintaining health and wholeness. I love the idea of fresh healing scents flowing through our home! Any recommendations out there for a diffuser?

What are your essentials?

Comments { 97 }

Homemade Calendula Salve

CalendulaNearing the end of summer, my herb garden is ready for harvest!

This post is written by contributing writer, Michele.

A homemade Calendula Salve is a staple in my homemade remedies box. It is the perfect treatment for chapped hands and faces (such as from winter winds, gardening, or babies’ teething drool), soothing little ones’ scraped knees, or mild burns.

I purchase organic herb seeds inexpensively from Mountain Rose Herbs, along with saving seeds from previous harvests (the most frugal option!) to plant in my garden. If you don’t have access to the fresh flowers, you can also find bulk dried calendula flowers from Mountain Rose Herbs or your local natural food/herb store. If you are harvesting your own flowers, pick the petals later in the morning, after the dew dries, but before the noon heat sets in.

To prepare my Calendula Salve, I have used Hemp Oil, which has a very high percentage of Essential Fatty Acids, and can be especially nourishing for skin conditions, such as eczema or dry skin, while being non-greasy and easily absorbed into skin. However, Olive Oil (which typically has a longer shelf-life) could be substituted instead.

When preparing the salve, make sure not to overheat it! Both the oil and the petals must be kept over low heat to prevent “cooking” them.

This is also a wonderful project for incorporating into learning a home with little ones! They love to harvest the petals, and sprinkle/stir them into the pot, before you turn on the heat. (I prepared my most recent batch along with my own daughter, as well as my visiting youngest sister.)

Salve

Calendula Salve

  • 2 Cups Calendula Petals (not the entire flower “heads”)
  • 1 Cup Hemp or Olive Oil
  • 1/4 Cup Beeswax Pastilles/Pellets
  • 10 Drops Lavender Essential Oil
  1. Pour calendula petals into a stainless steel pot, and add oil. Turn on low heat, and stir to combine. Watch for tiny bubbles in the oil to gauge the temperature- it should not get any warmer than the “tiny bubbles stage!” Continue stirring occasionally over the next 2 hours, keeping the oil gently warm.
  2. Meanwhile, begin gently melting the beeswax in the top of a double boiler (don’t let this get too hot; you’ll want it to be a similar temperature as the oil, when you combine the two).
  3. After 2 hours, strain the petals from the oil. (You can use a fine-meshed strainer, tea filters, or cheesecloth.) Squeeze/press out as much of the oil as you can into a bowl. Then slowly pour the oil into the melted beeswax in the double boiler, stirring to combine. Then stir in the drops of lavender essential oil. (The oil acts as a “preservative,” as well as being a healing and calming ingredient.)
  4. Pour the warm oil into small jars/containers, and allow to cool. Avoid using clear glass, if possible. Choose containers (such as white plastic cosmetic containers or amber/cobalt-colored glass jars) that will help protect the salve from sunlight. (I repurpose containers from purchased shea or cocoa butters.) Store in a cool place.
Comments { 51 }

How to Make Coconut Milk Kefir

Lately I have been exploring in the world of coconut milk kefir! Our family has been consuming regular raw milk kefir for a few years now, but recently, we lost our frugal milk source, and I was forced to rethink and consider some other nutritious options. Enter…coconut milk kefir!

Kefir is typically made from cow’s milk that is fermented with kefir cultures. It is similar in taste and texture to a drinkable plain yogurt with a bit of a tangy flavor to it. It is known for many health benefits including boosting the immune system, stimulating digestion, protecting against the spread of harmful yeast overgrowth, lowering cholesterol, and guarding against cancer. It is a powerful probiotic that helps beneficial bacteria to thrive in the body.

Coconut milk is naturally rich in medium chain fatty acids (MCFAs). Two of the primary MCFAs found in coconut milk, lauric and capric acid, are known for supporting the body’s immune system. Coconut products contains monolaurin, a fatty acid found in human mother’s milk, which has proven antiviral, antibacterial, and fungal properties that support natural immunity. It has a creamy taste and texture that’s similar to cream (with half the fat and calories) or milk (when diluted). It tastes on the flavor of what you mix it with, making it ideal for both sweet and savory recipes. It is completely dairy, gluten, and soy free, making it the most nutritious option and alternative for the dairy intolerant.

When I searched online for information to make coconut milk kefir, I was surprised to see the serious lack of information on this topic. There appears to be two different options. Coconut water kefir and coconut milk kefir. I wanted to make coconut kefir with coconut milk because it is cheaper and easier. I am all for simplicity. Most of my searching and emailing different companies (Weston A Price & Body Ecology) came up with no responses, so I had to venture out on my own with some help from Julie at Cultures for Health.

Coconut milk kefir works beautifully with milk kefir grains yielding a thick and creamy coconut cream topping for your coffee, ice cream, smoothies, or curries with all the healthy bacterial benefits! Check out Healthy Cooking Coaches recipes for Strawberry & Vanilla ice cream using coconut kefir. You can use it as whipped cream substitute on top of pancakes or waffles (sweetening as desired) or use it in replacement of buttermilk or water in many baked goods recipes. There are no end to the ideas for its usage.

For a tutorial on making coconut water kefir, visit The Nourishing Gourmet or Body Ecology Diet.

Coconut Milk Kefir

1 quart glass jar
2 Tbsp milk kefir grains (available through Cultures for Health)
2 cans unsweetened undiluted coconut milk  or 1 quart So Delicious Coconut Milk (It has been confirmed that Native Forest Coconut Milk is canned in a BPA-free can)

Directions:

  1. Place the milk kefir grains in the quart size glass jar and cover with coconut milk. Carefully mix together with a non-metal spoon (please forgive my forgetfulness on this point in the video!).
  2. Cover loosely with a towel or cloth napkin and allow the coconut kefir to culture on the countertop for 12-36 hours.
  3. After 12 hours, check the coconut kefir every few hours so you can remove the kefir grains as soon as it reaches the desired consistency. If you let it sit too long it will become more sour and very thick, making removal of the grains more difficult.
  4. Remove grains and store them covered with a small amount of milk in refrigerator between batches or follow up immediately with another batch.
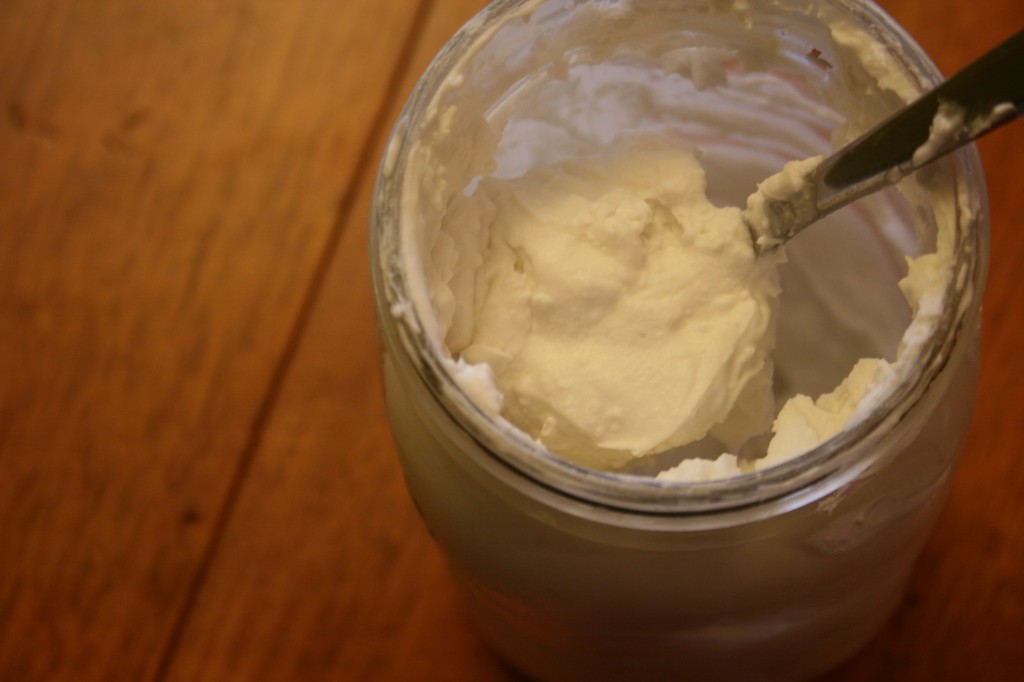
  5. Place a lid over the remaining coconut milk kefir in the jar and store in the refrigerator. Note that it will get significantly thicker in the refrigerator as it cools, so it is a perfect consistency to use as whipping cream and such.

Cultures for Health suggests that it may take a batch or two for the milk kefir grains to adapt to coconut milk but if the milk doesn’t kefir properly during the adjustment period, it is still safe to cook with. They do recommend returning the grains to cow or goat milk periodically to refresh them (and they can adapt back to making raw cow/goat milk kefir).

Here’s my little video tutorial:

httpvhd://www.youtube.com/watch?v=nvOJsEKQlS8

httpvhd://www.youtube.com/watch?v=Hat5DV91fsU

Can I use kefir packets to make coconut milk kefir? What if I am dairy intolerant?

I originally thought that kefir packets would be a better alternative than grains for those with dairy allergies. I asked Julie at Cultures for Health about her opinion and this is what she shared: Powdered packets should work with coconut milk but since they are in a dairy carrier, they’re not really going to be an improvement on the grains and it’s questionable how well they will re-culture (using a small amount from the previous batch to make the next batch) making them potentially a costly option.  It might actually be less costly to occasionally buy more kefir grains than to buy lots of packets of kefir starter. We’ve taken to trying to steer the dairy intolerant to water kefir for their probiotics for this reason. Plus kefir packets aren’t really a natural culture and contain less than 10 probiotic strains compared to the 30 or so contained in kefir made with grains.

So there are options to try and experiment with, but the best option might be to stick with water kefir grains and the coconut juice method if you have dairy allergies. Packets can be used if you do not have allergies but the best results will come from using grains and rotating back and forth from culturing in coconut milk to cow/goat’s milk.

Can I dilute the coconut milk to make it stretch further?

Unfortunately you don’t want to dilute the coconut milk since that would leave less sugar for the kefir grains to eat and potentially damage the grains.

Can I make coconut milk kefir with water kefir grains?

Julie at Cultures for Health shares, Dom’s kefir site claims you can acclimate water kefir grains to milk (but I don’t believe he mentions anything about coconut milk) but I personally haven’t tried it and never heard from anyone who has.  If you happen to have a significant surplus of water kefir grains though, it might be worth trying.  It certainly would be great for people with dairy allergies—normally if someone has an allergy we just steer them to water kefir.”

Is there any benefit of making coconut water/juice kefir over coconut milk kefir?

Julie again shares, “Both coconut water kefir and coconut milk kefir would contain basically the same probiotic benefits so at that point I think it would just be a matter of the nutritional differences in the original liquids.  Coconut water is more of an electrolyte type beverage (I keep some around for when we get sick but beyond that we don’t drink very much) whereas coconut milk is a very concentrated source of healthy fats.  Both are perfectly healthy but I think they just ultimately have different purposes.”

Can I used powdered coconut milk?

A few readers suggested below that powdered coconut milk is a cheaper alternative. I understand that powdered milk products are best to be avoided. “It is manufactured through a spray drying process of raw unsweetened coconut cream. This is very different from the more widely available and coarser desiccated coconut which is made by grating machines that shred the white coconut flesh.

When coconut milk powder is spray dried, this has the effect of mixing oxygen (from the air) into the powder, under very hot drying conditions. As a consequence, coconut milk powder is “oxidized” and will go rancid quite quickly if not refrigerated and consumed within one or two days. This process also has the effect of increasing nitrate levels in powdered milk, whether it be dairy or coconut powdered milk. High levels of nitrates can increase the risk of cancer.” (The Incredible Coconut Book)

Coconut kefir does exist on the market now thanks to the efforts of So Delicious, but it cannot be compared with the homemade variety! Read more about that here. Making it yourself can always save you money and produce the highest nutrient content!

Comments { 136 }

2010 Health Goal: Drink More Water!

Photo credit

What do you, the trees, and every animal have in common? We all drink and require water to survive! One of my most important health goals this year is to simply drink more water! I honestly believe this is the number one step to better health and wholeness. It is the most practical and frugal step we can both take this year to better health. Without water, our bodies will die in a matter of a few days. Water makes up more than half of our bodies. Water is necessary for every part of our bodies to function properly.

Why drink more water? It…

- Increases your energy. Adults lose as much as 10 cups of fluid each day through sweating, exhauling, urination, and bowel movements. Water provides more oxygen which is necessary to burn fat and allow your body and brain to function at their fullest potential.

- Sustains healthy skin. Did you know that water is the single most important element for cellular health? Water moistures your skin inside and out, so the more you drink, the less likely you will have problems with dry skin.

- Regulates the body’s temperature by allowing you to sweat. Water regulates the body’s cooling system.

- Elminates toxins. Water is essential for your digestive tract to function properly. Water helps get rid of excess nitrogen, urea and ketones.

- Moves nutrients and other substance throughout the body. Water is essential for proper digestion, nutrient absorption and chemical reactions. The carbohydrates and proteins that our bodies use as food are metabolized and transported by water in the bloodstream.

- Helps assist in weight loss and balance. Dehydration decreases protein synthesis, the task of building muscle. With water, fat gets burned and converted to energy. Without its presence, fat increases.

- Reduce Your Risk of Disease and Infection. Body cells deteriorate when they are not hydrated and will be susceptible to attack from various diseases: heart disease for one. These cells will try to draw water from other places like heart, which will then have to work harder to pump blood causing additional problems.

Get Well: Water helps restore the body. It can help control a fever, replace lost fluids and thin out mucus.

How much water?

To determine your specific recommended water intake, divide your weight (in pounds) by two. The resulting number is the number of ounces of water you need each day. For example, if you weigh 150 lbs., try to drink 75 ounces of water daily.

In order to form the habit of drinking more water, it is important that you start small. Don’t try to drink 75 ounces the first day! Start by tracking your current consumption and add 8 more ounces each day or so. I regularly drink at least 28 oz a day (which is one water bottle full), but my next step is to bump that up to two water bottles. I will fill my water bottle up in the morning. My goal will be to complete that bottle by noon before proceeding onto the next bottle.

If you need further help, check out the water calculator. The water calculator will also help take into account if you are pregnant, nursing, sick, elevation, etc.

How to drink more water?

– Designate and label a special water bottle for your personal use. Fill it up first thing in the morning. Make it one of your most important tasks to begin the day. Try to keep the bottle with you wherever you go. If you are at home most of the day, you might want multiple bottles to place in different rooms.

– Set a timer to go off every 30 minutes. When the timer rings, drink a glass of water.

– Add lemons to your water to improve the taste, if desired.

– Drink quality herbal teas to increase your fluids.

How to get the kiddos to drink more water?

Children need water to function properly as well. They are more prone to ignore the thirsty signs especially when they are in focused play, resulting in dehydration, headaches, pain and fatigue. Watch out for juices and sodas though. They may add fluids, but they also add sugars that decrease the health of their bodies.

Encourage the kiddos to drink more by:

- Providing them with a special water bottle of their own. Karis has a special green sippy cup that she loves.

- Allowing them to keep the special cup with them in bed or in the car.

- Adding Emergen-C or other special healthy supplement powder to their water. We add Emergen-C to Karis’ water and she calls it her “juice”. Helps increase her vitamin intake as well.

- Set the example! The more water my children see me drinking and enjoying, the more they will desire it as well. Every time I take a drink, I offer my kids a drink. They need reminders and normally drink just fine.

A final caution…

Drink Little With Your Food.

According to nutritionist Lori Lipinski, “…Simply drinking too much water with your meals can affect your ability to properly breakdown your food. Drinking too much liquid with meals dilutes the concentration of hydrochloric acid and enzymes needed for proper digestion. So to get the most out of the foods you eat, it is best to avoid drinking lots of liquids 20-30 minutes before and after your meals.”

My water bottles are filled and now I am off to drink them! Care to join me and keep me accountable? Do you have any tips to share for increasing your water intake?

Comments { 45 }

Baby Steps to Nutritious Eating: 12 Steps to a Real Foods Diet

Screen shot 2009-11-10 at 3.39.12 PMPam asked: I have started to look at some of the stuff you have on your blog in order to change the way that my family eats, I am just so overwhelmed, can you offer any advice about where I should start.  I am not happy with how my family is eating.  And as the wife and mother, it is my responsibility to make sure I am providing the best possible foods for them.

This is one of many similar emails I regularly receive asking: “where do I start?” Yes, entering the whole/real foods camp can definitely be overwhelming and intimidating. Soaking grains? Grass-fed meat? What does it all mean? I want to begin by encouraging you to see it as a work in progress. You will not be able to change your whole diet at one time. Take baby steps. I hope this will be a practical baby steps guide to eating better. This is basically an overview of where we started as a family and from top down in the priority list. You may decide to re-arrange the steps in the order that you feel is a priority. Whatever works for you…just take one step at a time. Start by adopting one change in a month’s time, or whatever time period is suitable without being overwhelming. And just have fun with it! It takes practice and experimenting. It won’t always turn out the first time! But try and try again and you will succeed.

1. Use real butter instead of margarine.

Real butter is not only far superior is flavor, but it is also very good for you. The best choice I have found here includes Organic Pastures Raw Butter (for CA residents). US Wellness Meats sells organic grass-fed cultured butter. Trader Joe’s and other health stores carry Kerrygold Butter that has been made from entirely grass-fed cows milk and cultured, although pasteurized. Tillamook Butter is a good back-up, as it is made from cow’s that are mostly grass-fed, but it has the disadvantage of having being pasteurized. Otherwise, look for rBST free butter (you can learn what it means later ;) . Why Butter is Better? for further reading.

2. Limit beverage choices to filtered water.

Drinking more water is probably the best step towards better health. Get a good stainless steel water bottle and start drinking! Removing pop and other highly sweetened beverages from your diet is huge! You just really don’t want to go near HFCS (High Fructose Corn Syrup). There are no HFCS varieties available at health food stores if you cannot drop the habit…but it is definitely worth it for the cost savings alone. Tea and coffee are good beverages if you choice fair trade versions. Kombucha and water kefir soda are also good nutritiously dense drinks. If you can, purchase a good water filter. Berkey is reasonably priced option. Otherwise, a Brita is better than nothing.

3. Eliminate white flour and white sugar. Throw out the refined!

I began by slowly weeding out white flour and white sugar usage in our house and replacing it with more nourishing alternatives. White flour has been refined and processed, eliminating all nutritious content in the grain. Start by gradually adapting your recipes, cup by cup (equal in replacement with most flours), and replacing with whole grains and wholesome sweeteners. You may want to start out by doing half white and half whole wheat and slowly pumping up the whole wheat to help gradually adapt your family to the change. Look for 100% whole grains on your labels and watch out for the sneaky high fructose corn syrup on your store bought bread products. Sprouted grains and bread products are some of the most digestible options.

4. Use brown rice and brown rice pastas instead of white.

The only difference here is you have to use more water to rice in your measurements and cook it longer. I use 1 cup brown rice to 2 1/4 cup water. Cook for about 45 minutes. If you have a rice cooker, it will it it for you! Use brown rice pastas for their easier digestibility than other whole grain pastas. Tinkyada is a good brand of brown rice pastas.

5. Buy grass-fed and pastured beef, chicken and eggs.

Nina Planck recommends to start at the top of the food chain! This is where the most damage is caused by feeding animals corn and dead chicken carcasses, resulting in poor quality of meat. Feeding corn also results in health issues (e-coli for one) for which they will pump animals full of antibiotics and chemicals which collect in the fat. Find a local farmer that raises them right. You want chickens that have seen the light of day and have freedom to roam. You want grass-fed meat that is fed grass and allowed to roam pastures resulting in a superior product for your health. You want free range eggs from pastured chickens. U.S Wellness Meats is a good online source for grass-fed meats. Trader Joes and other whole food stores offer grass-fed alternatives. Stay away from nitrates as well – sodium nitrate is a harmful preservative, most commonly found in pork products. If you cannot find grass fed, go for an organic version. At least this is free of the chemicals!

6. Use healthy fats in your cooking.

I stick with coconut oil, olive oil and butter for everything in my kitchen! Avoid the processed or genetically modified products such as vegetable oil, soybean oil, canola oil, safflower oil, and sunflower oil. Learn more about healthy fats here. Coconut oil is mainly for all my baking, and some sauteing. Olive oil is for salad dressings and some cooking. Butter is for everything in between! ;)

7. Find a raw milk source.

Raw milk is incredibly delicious! It’s the real thing! If you can, seek out a local farm that offers raw milk. Real Milk has a detailed list, state by state. Or order online through Organic Pastures Dairy, offering raw milk, butter, cheese and other products shipped directly to your door. If not possible, check out the good milk alternatives: goat’s milk, organic milk, hemp milk and coconut milk.

8. Learn how to make kefir and yogurt.

Make kefir with kefir grains. Homemade yogurt can be made with a countertop culture or in the crockpot.

9. Pick one product on your grocery list that you can begin making from scratch.

Breads, tortillas, muffins, dressings, condiments – just a few ideas to get you going. Homemade beans in the crockpot is easy and a great way to safe on canned beans. Make spaghetti sauce and chili from tomato sauce and diced tomatoes. Returning to the whole product and making it yourself is so beneficial! Canned products are highly processed, contain high sodium content and often have BPA (a harmful plastic) in the lining of the jar. You can find lots of homemade recipes here. Just take one item per month and have fun learning! Homemade versions will be free of preservatives and other loads of additives that are added to extend shelf life. Start moving away from processed, packaged foods, and make the real thing at home.

10. Buy organic or spray free vegetables and fruits – and eat lots!

If you cannot afford organic produce, ask farmers in your area if they use sprays (pesticides and herbicides). Try to avoid the sprays if possible. If not, then still eat lots of fruits and vegetables because they are so nourishing to your body. Studies show that  your health is much superior for eating more vegetables and fruits, whether they be organic or not. Check out the Dirty Dozen list for a helpful guide to what produce contains more sprays and chemicals.

11. Buy wild fish.

While not strictly organic, it is important to buy wild fish and avoid most farmed fish, which can contain high levels of contaminants. Look for “grown in the wild” labeling when you buy salmon especially!

12. Begin soaking your grains.

I put this on the bottom of the list because it can be the most intimidating and complicated step. Take your time with this one. This step is the first to go out the window in busy seasons of life at our home. Soaking brown rice and whole grains help make them more digestible for the body.

Again, take one step at a time and have fun with it! Read, learn and explore the world of whole real foods! Here are some other excellent resources to get you going. Above all, start looking for real foods. If the label has tons of unpronounceable words, then it probably is not real food. If it is fortified, refined, or tweaked in some way, it is probably not real food. Unfortunately, it will cost more to eat real food. But I believe you can always afford what you prioritize in your budget!

A few helpful resources:

Baby Steps to Better Health – this is a wonderful e-book by Shari Graham of Graham Family Ministries. This is the best and most simple guide I have found to help the newbies. She start by encouraging you to drink fresh filtered water and lots of it! Then she follows this by encouraging you to start by replacing one store bought thing with a homemade variety. One by one, have fun with learning to make things yourself. She offers recipes, meal planning tips, bread making tips (including her own soaked bread recipe), using healthy fats, making yogurt, etc. She also covers briefly natural cleaning and body care recipes and tips. I highly recommend this guide! She also offers the contents of this book free on her blog, The Nourishing Cookbook, but the ebook includes helpful printable checklist charts, forms and recipes.

Resources for Beginning a Healthy Lifestyle – a few of my favorite book recommendations

Nutritional Eating: What is Most Important?

Getting Real with Food series (from Heavenly Homemakers) – where to start?

The Real Food Revival: Aisle by Aisle, Morsel by Morsel by Sherri Vinton – a helpful beginners guide to learning all the terms and finding the real whole foods in the supermarket.

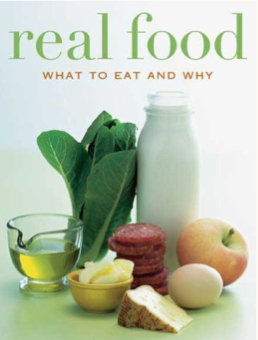
Real Food: What to Eat and Why by Nina Planck – a step up from the Real Food Revival in providing further history, science and knowledge into defining real foods. She details meats, dairy, fats, and vegetables and what to look for. I loved this book!

Natural Living 101 – my compiled list of food sources, article and more on natural living!

Do you have any steps you would add to the list? How do you prioritize real food eating?

Stay tuned…Next we will be taking a closer look at my own food budget, and letting you see what exactly we buy!

Photo above is the cover photo of Nina Planck’s Real Food: What to Eat and Why.
This post is a part of Real Food Wednesdays.
Comments { 88 }

Why Eat Local? Finding Real Local Food

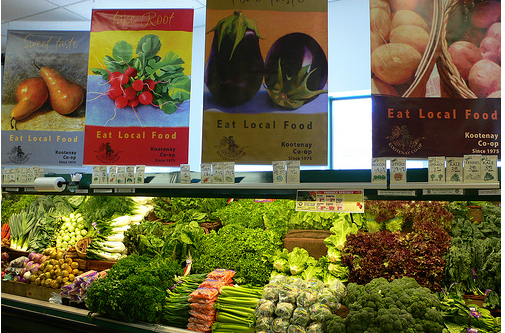
Screen shot 2009-10-14 at 7.26.25 AMPhoto by donkeycart
Originally published on May 21, 2008 under the title Enjoying Local Abundance. Revised and republished.

How spoiled we are when we truly look at the abundance God has provided us within our own communities! Why should I buy food that has traveled thousands of miles at times, when an abundance is available in my own vicinity simply through doing a little research. The more I reflect on enjoying and supporting local agriculture the more I realize that eating locally is the way to go!

1. Buying locally provides you with the freshest food and ingredients.

Local food is fresher and tastes better than food shipped long distances from other states or countries. Local farmers can offer produce varieties bred for taste and freshness rather than for shipping and long shelf life. The average food travels 1,300 miles from farm to table! That means it needs a lot of preservatives and added chemicals to make it last! Refining and processing allow these products to store for months. Supermarket food often travels seven to fourteen days before arriving in your local supermarket. By then, it lacks significant nutritional benefit, making it hardly worth the cost. Make your dollar count!

When trying to find local food that is free of pesticides (to get the most nutrition without the harmful chemicals), make sure to ask! Many local farmers cannot afford the cost to become certified organic, but they make every effort to keep eco-friendly practices. Simply ask them if they use sprays and how they raise their products, and you will know whether it is a quality food source or whether you should look elsewhere.

2. Buying locally is beneficial for the environment.

Local food doesn’t have to travel far. This reduces carbon dioxide emissions and packing materials. When you buy local food, you vote with your food dollar. This ensures that family farms in your community will continue to thrive and that healthy, flavorful, plentiful food will be available for future generations. This is another small way we can be good stewards of the world around us! You are also supporting local farmers and their efforts to provide quality products.

3. Buying locally is often cheaper when you buy in season.

Buying according to the what is in season is definitely cheaper! It doesn’t have to travel very far to your table and thus doesn’t have all those additional costs for transportation and perservation. From my experience, I have found that shopping at the farmers market or local farm stand is a very frugal option. From March-November, our farmer’s market is open, offering us quality produce for just around $15-20 per week, and we eat a lot of produce!

4. Buying locally is so much fun!

Getting to know farmers in the area is quite enjoyable! It is refreshing to know where your food is coming from, knowing how farmers go about producing their goods, and to get to knows them in the process is a great joy. The commercial food industry has fallen short (read more in my review of In Defense of Food), resorting to inhumane practices, harmful pesticides and preservation techniques, so it is growing more and more important to know where your food is coming from!

Even if you do spend more to buy locally, you can be assured that more often then not, the quality is superior, meaning you are getting more nutrition for your dollar.

Where to find local food?

Eat Well Guide -is an online directory of sustainably raised meat, poultry, dairy, and eggs. Enter your zip code to find healthful, humane, and ecofriendly products from farm, stores, and restaurants in your area. This guide includes listings for US & Canada. It is awesome!

Eat Wild -lists local suppliers for grass-fed meat and dairy products.

Local Harvest – helps you connect with local farmers, CSAs, and farmers’ markets.

Pick Your Own – find local farms with fruits and berries. Make sure to ask if they spray. You want to avoid those pesticides!

Check out restaurants in your area through Eat Wild (select your state, and then click on the right side bar “Beyond the Farm” for a full listing of restaurants) & Chef’s Collaborative.

Another recent find has been Edible Communities which is a network of excellent local magazines on local food. Edible Portland is for me!

What foods are in season?

Check out these fun resources: Epicurious offers a table that includes what is in season by state and then provides shopping guides and recipes for using those items. You can also find a seasonal guide at Sustainable Table.

How to find the best deals on local food?

Look outside the city. I have found I can get far better deals if I look to communities outside of the city. Just a few miles north of us can provide me with a significant discount of berries each summer. Or buying meat from Tillmook, a few hours drive south of us, provides us with $2 per pound grass-fed meat, versus the $4-5 per pound cost in town.

Find local farm stands. Local farm stands are one of the best providers for our seasonal produce. CSA’s are a great option, but they are usually significantly more expensive than buying at a farm stand or farmer’s market. Plus, you usually can get more for your money than through a CSA’s and still be supporting the local farmers.

Local Food Sources & Restaurants – NW Washington & Portland

If you live in close proximity to us, you are in luck! I have compiled a huge resource of local food sources, restaurants, CSAs & markets in the area. You can check it out at my Local Resources page.

Further Resources

Food Routesa national nonprofit dedicated to ‘reintroducing Americans to their food – the seeds it grows from, the farmers who produce it, and the routes that carry if from the fields to our tables.’
Animal, Vegetable, Miracle by Barbara Kingsolver the story of one families journey to eat locally!
Local Flavors: Cooking and Eating from America’s Farmers’ Markets by Deborah Madison
Coming Home to Eat: The Pleasures and Politics of Local Food by Gary Paul Nabhan
Holy Cows And Hog Heaven: The Food Buyer’s Guide To Farm Friendly Food by Joel Salatin

Check out your packaging! Where are these items coming from?

Have fun exploring the bounty that surrounds you! Every little step is making progress! We started with CSA, then we began visiting our local farmer’s market, and now I am starting to check out my labels for other items! You would be surprised how far things can travel before getting to your table! While shopping at Costco, I found organic salsa produced in Eugene, OR which is just two hours south of us. I also found raisins grown and produced in Oregon as well. It’s surprising what you can find when you look a little closer!

Find more helpful resources at Real Food Wednesday.
Comments { 24 }