Our Top 10 Classic Christmas Movies

It’s not too late to enjoy the joys of the holiday season with a fun family Christmas movie. This is one of our favorite things to do during the holidays. Snuggle up with some yummy white chocolate peppermint popcorn (yes, this was sooo yummy!), or maybe a cup of hot chocolate stirred with candy canes. We love adding to our Christmas movie collection with a new title each year and pulling them out for the holiday seasons. Here are some of our favorite classics (in no particular order):

1. The Bishop’s Wife - A sweet Christmas story emphasizing the importance of treasuring the gift of family (Watch instantly through Amazon rental here).
2. Christmas in Connecticut - I love this one for a good laugh! A young woman writing about her made up farm and family life has to entertain for Christmas without any true. experience. (Watch via Amazon Instant Video here).
3. Going My Way (watch via Amazon Instant Video here) – Bing Crosby plays a bishop seeking to minister to poor boys.
4. Belles of St. Mary’s (sequel to Going My Way)
5. White Christmas (watch instantly here) – another great Bing Crosby film full of fun, singing, dancing, and a sweet story line.
6. The Nativity Story (watch instantly here) - Enjoy the story of the birth of Jesus in a beautiful realistic way/
7. Holiday Inn (watch instantly here)
8. A Christmas Carol - this Patrick Stewart version is by far the best rendition and most accurate to the original story of Charles Dicken’s Ebenezer Scrooge. Use caution when watching with little ones because of the spirits.
9. It’s A Wonderful Life (this one is surprisingly not available to rent instantly, but I have seen it available to watch on YouTube.) – What would Christmas be without this sweet family film?
10. Miracle on 34th Street (1947 edition) (Watch instantly here)

What’s your favorite Christmas movie?

Comments { 27 }

Helping Give Other Mommies the Day Off

1 Peter 2:17 calls us to “Love the brotherhood.” I was recently praying for a practical way that I could serve other sisters in Christ in my church and community without taking me out of my home and away from my primary responsibility of nurturing and discipling my own children. I want to be intentional with every moment that the Lord gives me without over taxing myself by dragging my little ones here and there.

One of my personal favorite birthday events is to have a mommy’s day off. This means I drop off my children at the grandparents and just have some alone time to plan and prayer over the upcoming year, do some fun shopping, or whatever my heart desires. I am so thankful to have relatives close by that enables me to do this. But I know many of my friends, sisters, and neighbors, do not have this blessing. So…why couldn’t I offer to watch their little ones so these Mommy’s could get out for a little while and even get a date in with their hubby’s?

So this is exactly what I decided to do. When a friends birthday comes around (and thanks to Facebook syncing with my calendar, I always have these birthdays on my calendar), I will look for the opportunity to watch their little ones for a few hours so the Mommy’s can have some personal or date time (whichever they choose). I’ll invite the children to come over after our nap-time and stay through dinner time. I’ve done this on two separate occasions now, and it has been such a simple way to serve and a fun way to bless the recipients. It doesn’t require too much extra work because the children play together with my own. It’s also easy to let them watch a little movie if things get a little too wild or read books together or organize a little craft.

I just want to make my home available to serve and love on the lives of others! Are there friends and neighbors in your community that could use a day off? Invite these children into your home and serve in this simple tangible way. This could be a powerful way to reach out to an unsaved family in your community as well. Of course it may take time to build trust in the relationship, but it is worth the effort to share the love of Christ.

Matthew 5:16 states, “In the same way, let your light shine before others, so that they may see your good works and give glory to your Father who is in heaven.”

Comments { 25 }

Fun Educational Gift Ideas for Little Ones

My goal this year was to focus on simple educational resources for my little ones that would be fun, could be enjoyed together or independently, and would help stimulate their brains and critical thinking skills. We have more than enough toys in our house and find they get old very easily. I grow tired of the clutter of toys anyway, so even with gifts from the grandparents, we ask for family memberships to a local museum that could be enjoyed again and again, or gift certificates to local children’s plays or musical performances. These are some of the best gifts that I have discovered that really build the thinking skills but are tons of fun at the same time, most appropriate for 2-6 years of age (although many are suitable for older children as well)!

LOGIC / BUILDING TOYS

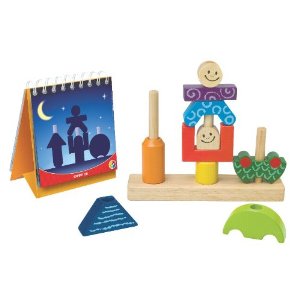
Day and Night - this is a great little smart games toy perfect for 3-5 year olds in which you try to copy the picture by using the included blocks in a stacking pattern on the stand included. It has two different levels so can easily extend its use as your child gets older. I got this for my 3 year old son this year for his quiet time learning bins time.

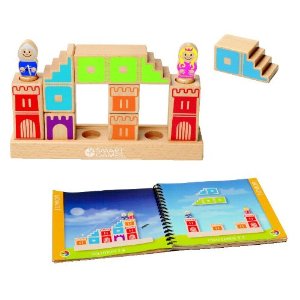
Camelot Jr - another logic puzzle similar to Day and Night in which you build different road patterns to join the knight and the princess together but more advanced for ages 4 and older. Both are appropriate for boys and girls!

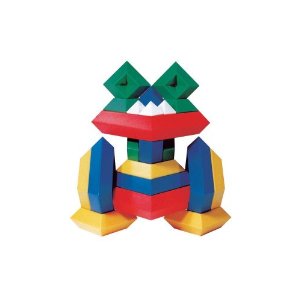
Wedgits - We bought these blocks for our learning bin time and the kids have had a blast creatively nesting, stacking, and linking these blocks together! This 30 piece set has a wealth of different creations you can make! Tons of fun! You can also get Wee Wedgits which are suitable for 12 months or older.

PUZZLES

You can’t go wrong with a good collection of puzzles! We enjoy the huge collection of Melissa & Doug wooden puzzles with 12 to 24 piece collections. While recently studying the solar system, we bought the Solar System floor puzzle and had hours of fun and learning time building it together. The GeoPuzzle collection (pictured above) is a wonderful resource for teaching geography and have fun assembling these continent puzzles at the same time.

GAMES

Candyland and Chutes and Ladders are fun but not very stimulating in my opinion. Here are some really fun games that are educational as well!

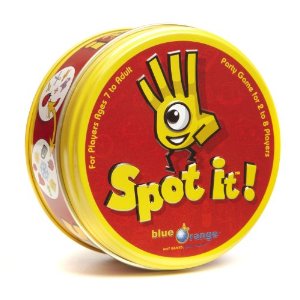
Spot It! - my kids loves this simple game in which you have to find the matching items between each card. There are many different variations to this game, but its fun to know that every two cards have some similar item to spot. Once you find it, you yell, “Spot It!” My daughter is actually quite superior at this game then myself.

Hiss – this is a new game to our collection this year! As the description states, as each Hisss snake slithers its way across the playing area it introduces color identification and visual logic: Does it make sense to have a snake with two tails and no head? Are those two colors the same or not? Even elementary counting skills come into play during scoring at the end of the game.

My First Uno – a fun stocking stuffer! Learn color and number identification with this fun and simplified version of Uno for ages 3 and up.

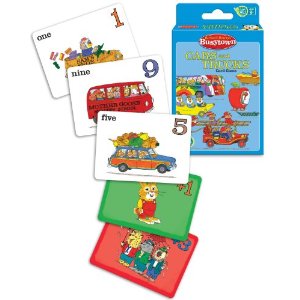
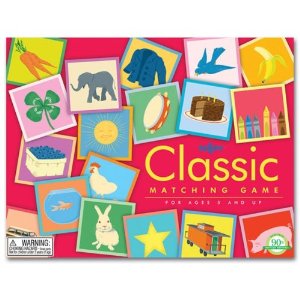
Richard Scarry’s Cars and Trucks Game - another fun stocking stuffer game for your little guy that reinforces numbers and counting with a favorite book theme that we all love! Classic Memory Game – you can’t go wrong with the fun game of Memory in this classic and beautiful edition. Eeboo makes multiple different memory games that are all colorful and of high quality. My 3 and 5 year olds both love this game and I have been amazed at how well my little guy does at it!

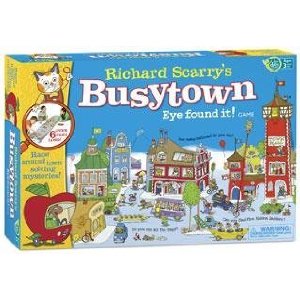
Richard Scarry’s Busytown - Before we take our annual vacation every year, our tradition is to buy a new board game that we can enjoy together on the trip. This year we picked up this Busytown game (because we love the book!), and had a blast using the magnifying glasses to find all the items hidden throughout the town. Great teamwork, matching, and object identification game!

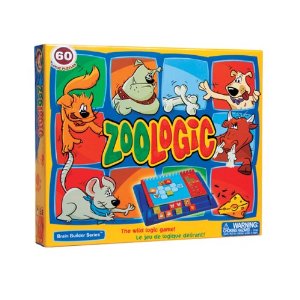
Zoologic - An addictive game of deduction and logic. Players fill in the grid with the animals and food tiles, while avoiding chaos. Can be played together or independently.

Brain Quest - these learning card stacks are a favorite at our house! I love cuddling up with my little ones and looking at the pictures and answering the questions of each set in this collection that teaches essential learning skills advances with their age. I’ve been using the My First Brain Quest & Brain Quest for Threes as part of our preschool one on one time with my 3 year old son and the Kindergarten set with my daughter. Great stocking stuffer!

For other ideas, check out our Tools Instead of Toys post for a collection of wonderful real life tools and resources to invest in for your children’s development and education.

This post includes affiliate links to products that we use and love. Know that we do receive a small percentage of each sale made through these links. Thanks for supporting this site and our family ministry!

Comments { 16 }

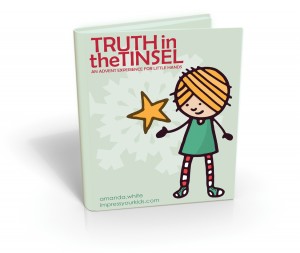
Truth in the Tinsel: Advent with Little Ones

Spending December in a meaningful way with my little ones is a passion of my heart. I want to prepare their little hearts to love and treasure the true meaning of Christmas. Celebrating Advent has been a tradition in our family every year, but finding a resource that is appropriate especially for little ones has been a challenge. Truth in the Tinsel is a new resource that fabulously meets this need! This little ebook has 24 daily activities including Bible readings, talking points, extension activities, and craft ornaments for the advent season (all for just $7.99). Each craft is simple, hands-on, beautiful, and ties in wonderfully with the theme and goal of preparing our hearts for the Savior’s birth. They all can be hung on your Christmas tree or a separate dedicated tree displaying the story of the birth of Jesus from beginning to end. Most of the crafts are easily made with just simple things around your home.

I am super stoked about this book! And even if you don’t have the time or energy to make a craft every day, you can also get the paper ornaments set that can be purchased along side the Truth in the Tinsel ebook that can be simply colored and cut out. I highly recommend this resource! It is appropriate for all ages, not just the young ones, as the ornaments are not cheesy in any way, but truly elegant! I am going out this weekend to collect my supplies!

Click here to visit Truth in the Tinsel.

Comments { 9 }

Practical Ways to Reach Out to Others During the Holidays

I treasure the holidays as a unique time of year to really reach out to others in simple practical ways and display the love of Christ to a watching world. Many are lonely or wrapped up in the busyness of the holidays. One of my passions is that we would seek to be intentional with every opportunity to be a light, especially working together with our children and cultivating hearts of generosity. This is our number one priority when planning our holiday schedule. These are all different ideas that our family has participated in over the years and helped keep our priorities on serving others rather than just gift buying for ourselves. It definitely takes a little thought and planning but the results are well worth it.

1. Make a special treat for your neighbors.

Pumpkin bread, cookies, etc. I love making mini pumpkin bread loaves and sharing with the neighbors. I like to make them in early November, put them in the freezer for a couple weeks (which helps increase the flavor), and then deliver during Thanksgiving or before Christmas. Helps reduce the stress during the holiday rush. Whatever you are making for your family, make an extra batch and share with your neighbors or co-workers.

2. Make a little thank you gift for your mailman, trash collector, etc.

Leave a plate of cookies and a Christmas card for these service providers.

3. Host a Christmas party and invite your neighbors.

This year, we are focusing on reaching out to 3 young families in our neighborhood. So we decided to invite them all over for a Christmas party with warm soup, salad, bread, and have a meaningful fellowship time. I’ll have the kids recite their memory work of Luke 2 in a light weight but intentional way of sharing the true meaning of Christmas, and then facilitate some meaningful conversation around the question: “What’s your favorite Christmas memory?”

4. Go caroling!

Whether it be to your neighbors or to an elderly care facility, this is a simple way of sharing the joy and true celebration of Christmas.

5. Share a gift.

Operation Christmas Child, Angel Tree, donating gifts (using their Christmas gift catalogs) through Compassion International, or Samaritans Purse, are all easy ways to join with your children in ministering to the needs in your community and around the world. I am helping to facilitate an Angel Tree project at my church to provide gifts to children of incarcerated parents in our community. It’s so simple and yet meaningful. You even get to deliver the gifts to the children within their homes and share about Jesus. Pretty special.

6. Adopt a family in need.

One of my favorite Christmas memories was the year as a child we adopted a family in need in our church who was going through a serious health crisis, and we bought gifts for all the children and surprised them by delivering the goodies to their door. It has stood with me for memory years and inspired many more ventures to give some Christmas joys to needy families in our church.

These are just a few ideas we have found helpful to keep the focus on serving others and giving our children opportunities to serve as well and cultivating a greater picture of the true meaning of Christmas.

How do you  enjoy being a light during the holidays?

Comments { 11 }

Our Thankfulness Wreath

I am passionate about being intentional during the holiday season to cultivate simplicity and special family traditions in order to tune our hearts towards our Savior and focusing not upon ourselves but upon the glorious gifts that we are blessed with each and every day. It is easy for the holiday season to get incredibly busy with activities, outings, and gift shopping, and miss out on the more important work of preparing our hearts for the Lord’s coming. I am certainly guilty of this. I am thankful for the grace and strength that God freely gives to help us stop the madness, search our hearts, and begin to make practical steps towards refocusing our hearts.

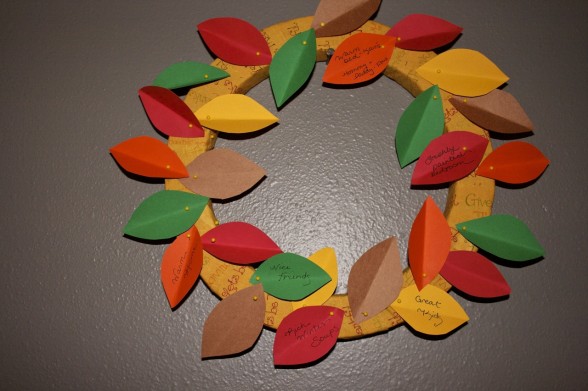
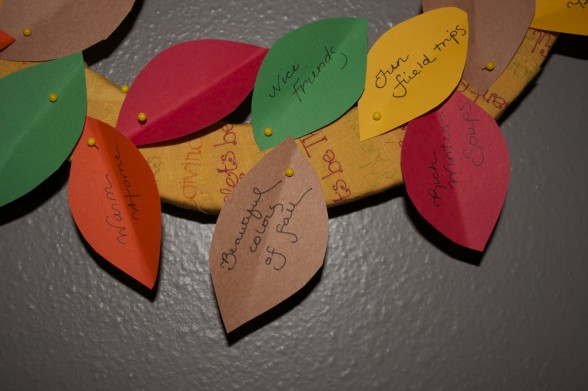
This year I came across a cute thankfulness wreath pictured in a recent edition of Family Fun magazine that I was inspired to make for our own use. It was super easy to make. You only need a 12-inch styrofoam wreath, fall colored cardstock (or construction paper works too!), and about 1/4 yard of fabric cut into thin strips (about 2 inch strips works best I discovered). I took each strip of fabric and wrapped it around the wreath and secured it with straight pins. Then, I cut out leaf shapes on the cardstock and folded each leaf in half for added dimension and pinned them around the wreath with more straight pins. Each night as we prepare our hearts for thanksgiving, we will take our wreath down from the wall and write on a leaf the things each of us our thankful for.

To take just a few moments on a regular basis to think upon what we are grateful for during this month of preparation for Thanksgiving is really precious, especially as you hear the small voices of little ones whispering their thanks and recording it upon our wreath. Oh to keep our hearts focused on the goodness of a Mighty God who loves us. I need grace each and every day to keep my eyes upon the Lord rather than my failures and problems. This simple practice is just one way to get our eyes off ourselves and on One far more worthy of our gaze.

For further inspiration, visit: 5 Meaningful Things to Do In Preparation for Thanksgiving. Looking for a quality picture book read aloud for Thanksgiving? Check out our favorite: Squanto and the Miracle of Thanksgiving.

Comments { 9 }

Pumpkin Oatmeal

We eat oatmeal at our home about two to three times each week because it is cost effective, filling, and nutritious. But it can often get a little old without some fun variety here and there. With the fall season, pumpkin is a favorite flavor that adds a scrumptious taste to traditional oatmeal. It’s yummy, simple, and healthy!

2 cups rolled uncooked oats
3 1/2 cups coconut milk (or combination with water or other milk of your choice)
1 cup pumpkin puree
1 teaspoon vanilla
1 teaspoon pumpkin spice (or 1/2 tsp cinnamon, 1/8 tsp ginger, 1/8 tsp nutmeg, dash of cloves)
Candied pecans/walnuts
Maple syrup or honey, to sweeten

1. In a medium saucepan, combine rolled oats, coconut milk, pumpkin puree, vanilla and spices. Mix till well blended.
2. Place saucepan over high heat on the stove and bring to a boil. Turn down to a simmer and allow to cook for about 5 minutes, stirring frequently.
3. Remove from heat and transfer to individual bowls and top with chopped nuts and sweetener of your choice. You may want to add a bit more milk to your taste.

Enjoy!

Yield: 4-5 servings.

Comments { 25 }

It’s That Time Again! Operation Christmas Child

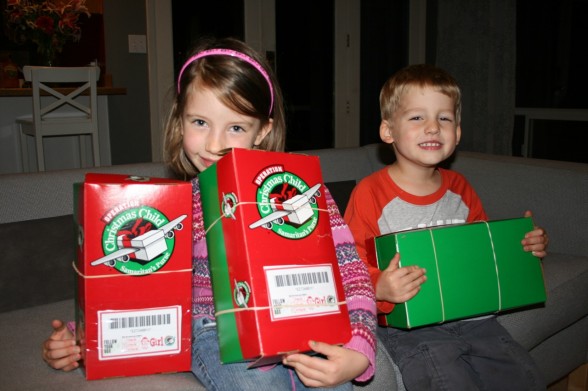
Operation Christmas Child is one of our favorite Christmas activities every year! It is such a fun and tangible way to minister to suffering children around the world alongside your children and family. It is a practical way to get the focus off ourselves and see the great neediness in the world around us. It is a simple way that we can extend God’s love to the nations. And our kiddos can participate each step of the way, from picking out gift items, to writing cards and letters to the child, to wrapping, to praying, and finally to seeing the destination of the boxes. You can track your gifts and see what country your shoe box went to, which provides fun interaction and educational experiences with your children as you can discuss the country, the needs, and geography. This is one way to give your children a heart for the world. Watch the promo videos together and all your hearts will be touched.

Operation Christmas ChildI cannot encourage your family more to participate in this awesome project! Last year, I shared how I heard back from a child I had sent a shoe box to nearly ten years before. I got to see firsthand the impact of that gift. Read more of Meryl’s story here.

Collection week is November 12-19, 2012. Find out more information, drop spots, how to track your gift, and more here.

Need some ideas of what to package in your shoe box?

Check out this post: 101 Operation Christmas Child Shoe Box Ideas

Here are the items we packaged in our boxes this year during our trip to Target:

Boy (2-4 years)- small monster truck, small bouncy balls, crayons, coloring pad, short sleeve t-shirt (these are all on clearance now, so a great time to get something nice for a great price), slinky, toothbrush, toothpaste, soap, washcloth, candy

Girl (5-9 years) – hair bands, my little pony, small stuffed animal, crayons, coloring pad, candy, short sleeve t-shirt, fingernail polish, toiletry items (as listed above)

Girl (10-14 years) – barbie doll, coloring pencils, sketch pad, short sleeve t-shirt, cute head band, hairbrush, fingernail polish, cute socks, toiletry items

And the kids loved drawing a picture and writing a special message to each of the children which adds a personal touch from our heart to theirs.

Will you join us in bringing the love of Christ to children around the world?

Comments { 18 }

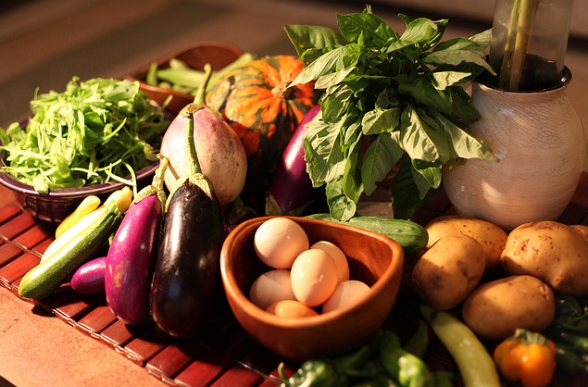
How to Make Your Perishable Food Items Last for Two Weeks

After my recent post on menu planning and sharing my current two week grocery shopping routine, I had several readers ask how I made my produce and perishable items (like dairy & bread) last for a two week period. Here are a few tips I have learned to make it work!

1. Use the more perishable produce items during the first week and save the more hearty produce during the second.

For example, we will use the softer produce, green beans, cucumbers, pears, grapes, etc during the first week and use more of the coniferous vegetables squashes, broccoli, carrots, potatoes, apples, oranges, and such for the second week. Pears and bananas usually take a week to ripen anyway, so they can be consumed later as well, depending upon their ripeness at time of purchase.

So in my menu planning, we will usually eat fresh salads, green beans, zucchini, carrot sticks, and such during the first week, with grapes, pears, bananas, and such for lunches, and then once that is consumed, we will eat squashes, broccoli, steamed carrots and other veggies with our dinners during the second week, and more apples and oranges for breakfasts and lunches. I also occasionally purchase some frozen produce (such as spinach, peas, and corn) during the second week as needed for fillers to throw into many meals. Many vegetables can be blanched and frozen to preserve them. This helps preserve the most nutrients. If you store the lettuce properly, we usually can still have fresh salads in the second week as well.

2. Store produce in airtight containers.

A general rule of thumb is that you can rinse and prepare your produce and store in airtight containers in the fridge to extend their life. For a full extensive list on this practice without using any plastic bags, check out: How to Store Vegetables & Fruit without Plastic. This helpful article explains how many vegetables can be stored wrapped with a damp towel or paper towel. I also have found green bags to be very effective in preserving produce in the past. They can be rinsed and reused many times.

Another effective method is storing a paper towel in a ziploc bag with your produce items (lettuce, cucumbers, zucchini, etc) and that helps absorb the extra moisture from the produce and prevent early spoilage.

A few tips on specific items:

Lettuce – I recommend buying lettuce in airtight sealed bags or plastic 1 lb bins, as this prevents the lettuces from perishing quickly. Many stores carry organic spring salad mixes in these bins, and I have found they last at least two weeks in the fridge, if not longer. Also, many stores sell lettuce in sealed bags that you don’t have to open until needed, which keeps them dry and preserved for much longer than just buying a head of lettuce.

If you choose to buy by the head, you can also rinse and dry your lettuces with a salad spinner. Allow to sit at room temperature for an hour or so until lettuce is completely dry before transferring to the fridge. Store in the airtight container until ready to use.

If my lettuce begins to spoil, I will simply throw it into a green smoothie, and nothing goes to waste!

Bananas – I find it best to purchase bananas in various stages of ripeness so they can be used throughout a two week period. If they start to fade and I cannot get to them, I will simply open them up, cut into small chunks, and stick in a ziploc bag in the freezer to use with smoothies on another occasion. This works really well.

Pears – I store pears on the countertop until they just start to get ripened and then I transfer them to the fridge in a paper bag to preserve them until they can be consumed.

Apples & Oranges – These store well in the same drawer together in the fridge. Apples do give off a gas that can cause other fruits to spoil more quickly, so it is best to keep one drawer for just apples and oranges, since oranges are not affected in the same way.

Berries - I buy all my berries in bulk during the summer time and then freeze them in ziploc bags to use throughout the year for smoothies. The key is not to rinse them until they are ready to be used otherwise they perish quicker in the fridge or clump together in a frozen mess in the freezer.

Onions – I keep these together with potatoes, winter squashes, and other vegetables and fruit that take time to ripen on a shelf in my kitchen. These can also be stored in the fridge to preserve them longer. I try to keep one or two in the fridge at all times, as the refrigeration process seems to eliminate the watery eye syndrome that is common with onions.

Celery - This can be stored upright in a jar with a small amount of water in the bottom to keep them fresh. Cut off the ends and store them by individual stalks. More often then not, I just keep in the original bag and it lasts just fine.

Mushrooms – I usually buy mushrooms by the pre-assembled package to help preserve them. Otherwise, store in a brown paper bag.

Bread- (Obviously, not produce item, but someone asked how I extend the life of my bread) Since we eat a fair amount of bread, I buy a dozen loaves of bread at a local discount organic bread store and store in the freezer and pull out as needed. This prevents any bread from getting moldy.

Milk – We go through about three gallons of milk every two weeks (we certainly could use more but we are also on a budget ;) . I usually buy raw milk for the first week and a half (since that is about as long as it lasts before going sour) and then a gallon of organic milk for the last portion. We just have to make sure we use it slowly but surely and not overindulge to make it last the full two weeks.

Cheese & Butter- These two dairy items freeze very well, so I will buy my cheese in a 5 lb block and cut it into 1 lb chunks and place in ziploc bags in the freezer until needed. Butter can be stored in the original box and pulled out also as needed.

All other dairy products seem to last just fine for the full two week period.

Remember, it will take a bit of trial and error to figure out how much you will consume to make a twice a month shopping excursion work for your family. I know personally, it took me two or three tries before I really figured out how much we needed to eliminate quick trips to the store between the two week cycle. And that’s perfectly normal and okay. I also find it useful to make sure to plan in a extra buffer meal or two (sometime quick and simple (baked potato bar, cans of refried beans for quick burritoes) and dessert, for those impromptu guests and evenings when I just don’t feel up to making a big dinner.

For a complete guide on how to store all your produce, check out this excellent list.

{Photo Credit}

Comments { 39 }

Beef Bourguignon w/Slow Cooker Adaption

Hey friends! My goal this year is to adapt one of our favorite family recipes each month to a more simplified slow cooker version! Here is one of our favorites that I am sharing today while republishing the original recipe from the archives. You won’t be disappointed!

After watching the film Julie & Julia on the life of Julia Child awhile back, I was determined to learn to cook a few of Julia Child’s recipes, starting with her Beef Bourguignon, since it was so emphasized during the film (and I have the very same Le Creuset french oven as well!). After several attempts, I have come up with a fabulous adaption of the recipe that is so much simpler than the original and still ever as delicious! This meal is absolutely fabulous – especially for the meat loving husband. It is certainly a special treat for us on a budget, but it makes the man very happy, so I make it once a month or so. It is also a excellent dish for hospitality and has received rave reviews wherever we have served it. We serve over creamy garlic mashed potatoes or noodles for a delicious comforting meal. Unfortunately, I really failed in my photography on this one…but it is truly my favorite meal!

Ingredients:

  • 6 strips of bacon
  • 2-3 pounds stew meat, cut into 1 inch cubes
  • 2 carrots, chopped
  • 1 onion, chopped
  • 1 teaspoon sea salt
  • 1/4 teaspoon pepper
  • 2 Tablespoon arrowroot powder or cornstarch
  • 3 cups red Burgundy wine (pretty much any cheap red wine works as well. I recommend sticking within the french wines for best results.)
  • 2-3 cups beef stock
  • 2 garlic cloves, minced
  • 1 teaspoon thyme
  • 1-2 crumbled bay leaves
  • 2 pounds mushrooms, quartered
  • 1/4 cup butter

Directions:

  1. In a large 9-10 inch fireproof casserole pan, cook bacon over medium/high heat until tender and browned. Remove bacon from pan, while leaving the bacon grease in the pan.
  2. Dry the beef in a paper towel before placing in the casserole and saute it on each side until nicely browned.
  3. Add the carrots, onions, and 1/2 cup beef broth and saute until tender.
  4. After bacon has cooled, chop into small pieces, and then add back to the pan with stew meat and vegetables.
  5. Toss with salt, pepper, and arrowroot powder and mix till well combined.
  6. Add the wine, remaining beef broth, garlic, thyme, and bay leaf. Add enough liquid so that meat is barely covered. Bring to a boil.
  7. Turn oven to 325 degrees. Cover the casserole and place in the lower third of the oven. Regulate heat so liquid simmers very slowly for 2 1/2 to 3 hours.
  8. While the beef is cooking, prepare the mushrooms. In a large skillet, melt 1 Tablespoon butter and 1 Tablespoon olive oil. As soon as you see that the butter foam has begun to diminish, add the mushrooms. You may want to do them in two separate batches to prevent overcrowding, which will prevent them from browning nicely.
  9. Toss and shake the pan for 3-5 minutes until mushrooms are nicely browned. Remove to a large bowl.
  10. After the meat has cooked for 2 hours, add the mushrooms. Return to oven for the remaining 1/2 hour to 1 hour.
  11. The meat is done when a fork pierces it easily. Serve immediately or cover and refrigerate. The taste improves with age! Simply reheat to serve.

Enjoy!

SLOW COOKER ADAPTION:

Yes! I am all about simplifying and making life easier for myself, so my recent adventure was adapting this recipe to make in the slow cooker. And it works beautifully

Simply throw all the ingredients into your slow cooker. The only changes you will want to make include eliminating the beef stock (as it will make it too wet) and doubling the arrowroot powder/cornstarch. You do not need to precook the meat in anyway. I like to throw the bacon in whole and then after it is cooked, I will remove and chop it up. You can saute the mushrooms as the recipe above describes for extra flavor before adding, or you can simply toss them in as well without any advance preparation. Cook on low for 6-8 hours for best results. You can cook it on high for a shorter period of time, but if you want the stew meat to be soft and tender, it is best to cook low for the longer period. Yum!

Comments { 55 }