Archive | frugal & simple RSS feed for this section

Simple Steps to Declutter Your Home

Stuff, stuff, stuff! Are you struggling to keep your head above water in maintaining your home in a simple and peaceful manner? It takes a bit of persistent effort to maintain a simple home, but it is well worth it, as you can turn your focus towards the more important things in life – relationships and hospitality.

I feel like I am always in a mode of decluttering, because I hate things not serving a purpose in my home. As I have been packing some of our goods in preparation for a potential move, it has helped me further declutter and seriously evaluate what do I want to take to another home. If it can stay in boxes for several months, is it really needed? Do I need ten cookbooks? No, I only use two of them.

For every item that gathers dust, it takes time to clean, maintain, or clear out of the way to accomplish another task. Let’s join forces in taking an aggressive attack towards clearing away the clutter!

1. Keep Your mission at the forefront

Decluttering is only successful when I keep the right mindset. What is the purpose? So that my home can be a more peaceful place for the rest and refreshment of my family and those God has called us to serve in our community and church. I don’t want to be spending hours each day housecleaning. Decluttering removes that need. Use the opportunity to teach your kids about giving generously to bless others with your stuff. Include them in the process.

2. Work room by room

Start decluttering by working room by room throughout your house. Start at the door and do a full sweep of the room, top to bottom. Empty drawers, cupboards, and closets. Ask yourselves these questions as you evaluate each item in your home:

Do I use it?
When was the last time it was used?
Do I care about it?
Is this item beautifying my home?
Could someone else use it more?

3. Work quickly and be aggressive

Make sure to work quickly and don’t think too hard about each item. What is your first instinct? The more you think about it, the more you will be able to justify keeping the item.

For clothing, reverse the direction of the hangers for any items that you are unsure about. If they don’t get worn in the next month, you will know for sure that they need to go. For children’s clothing, eliminate what clothes you don’t care for or stained. Limit the numbers to 6-8 outfits. For toys, reserve a few toys per child and remove the rest or rotate them in storage. Kids don’t want or need tons of toys. It is overwhelming to them.

4. Persevere for the end is worth it!

The initial re-haul may take some time. It took me a solid week, taking one room each day. After the initial re-haul, maintaining a simple clutter free home is so much easier, and takes a bit of time here and there – often taking place with the changing of the seasons in my home. I like to take about 30 minutes each week to declutter one area of my home.

When you seek to intentionally declutter your home, it makes it so much easier to be a peaceful and joyful homemaker. It is like a weight is taken off your back. Your spouse will benefit from a refreshing place to come home to. Your children will be more content. And your home will be more prepared to minister to others through hospitality. It’s a win win situation!
Comments { 57 }

My Simple & Natural Housecleaning Routine

Photo credit

As I have pursued the art of learning how to maintain my home simply and naturally, my methods have changed and adapted to the seasons of life. I started out with the all frugal natural method of vinegar for most housecleaning, but found I didn’t care for the way the homemade concoctions always seemed to clog my spray bottles or go bad. Then I adapted to using more of the commercial natural products, but didn’t care for the expense and complexity of such a variety of products for your every need. Does it really have to be that complicated?

I have finally concluded that all of these homemade recipes and commercial products are truly not necessary. You don’t need 10 different products to clean your home. You really only need water and a little soap on occasion. I personally have found my  favorite tool is the Norwex Microfiber Enviro Cloth (this link provides my full review). With one of the Norwex Enviro cloth and one Norwex Window cloth (buy in a set here), I am practically set. These cleaning clothes are quality and do the job well. They kill any bacteria through the silver particles in the design. I accomplish all my housecleaning with these two simple tools.

When it comes down to it, it is really not worth it to stress over germs. Consider that the chemicals are likely more harmful than the germs. Keeping a simple maintenance method is key. It makes natural homemaking possible and stress free. It makes it easy to keep my home maintained and prepared to be a welcoming place of comfort and rest to my family and the community that God has desired for us to reach out to.

Here’s our current natural housecleaning routine:

MondaysLaundry (I wash all the laundry over the weekend and fold on Monday and put it away so we are covered for the week)
Tuesdays - Toilets – I take my damp Enviro cloth and wipe down the sink, mirror, toilet, and tub. I use the dry Norwex window cloth to polish and dry the mirror and counters, and it does a beautiful streak free job! I then use my toilet brush to scrub out the inside of the toilet with a little oxygen bleach or castile soap and occasionally a stainless steel scrubby for any tough dried scum. Wipe bathrooms floors as needed with enviro cloth.
Wednesdays – Dust & Vacuum (upstairs every other week, downstairs every week) – I use the Enviro cloth to dust as well, and simply rinse out with a little soap and hang to dry between uses.
Thursday - Kitchen – wipe down kitchen counters, floor and appliances with damp enviro cloth. Polish appliances with dry window cloth.
Friday – reserved for any larger monthly or quarterly chores – such as cleaning out cupboards, spot cleaning carpets, decluttering a closet, etc.

Does it stay the same every week? Hardly. In fact, many weeks I only clean the bathrooms and vacuum the floor. But that’s okay. It a guideline and its simple. I don’t stress over perfection, because with two littles ones, I don’t have time for that. We have time to cultivate beauty and simplicity. We have time to keep things picked up and light cleaning maintained. Beyond that is another season.

My encouragement to you…don’t stress over the perfect maintenance schedule or what cleaner to use for every little job. Keep it easy. Soap and water will honestly accomplish most any task. Put some Dr Bronners organic castile soap or your favorite natural soap diluted in a spray bottle with a basic rag and get to work. And if you use the Enviro cloths, no spray bottles, only water is needed! How frugal is that? No chemicals…just pure simplicity.

Have you learned any tips for simplifying your routines?

Comments { 75 }

Plan a Declutter Party!

Photo Credit

Summer is a great time for visiting with friends, as well as tackling projects around your home. Combine the two, and invite your friends for a “Declutter Party!”

A “Declutter Party” is a wonderful opportunity to simplify your home by clearing out unnecessary items, as well as providing a frugal option for obtaining some needed things. (Plus having fun with friends at the same time!)

I have enjoyed participating in a few of these events over the years. In pursuit of wise stewardship, it is nice to be able to “recycle/reuse” items when possible.

In essence, a “Declutter Party” functions as a swap. You can bring/take home any number of items. Participants will “shop” through all the items for free. Any leftovers can be donated to charity.

Event Ideas-

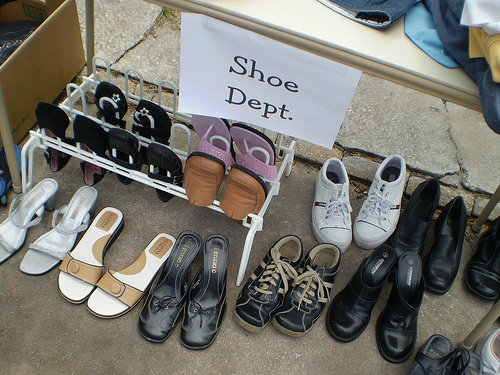
  • Women’s Clothing Swap- Set up tables with spaces marked for the various sizes. Provide changing areas for trying on clothes. Make sure to invite women of different sizes; as guests bring too big/too small items, there will be enough for everyone. You can include shoes, purses, and accessories in this swap, too.
  • “Anything Goes”-  A “garage sale style” event; neatly set out items in “categories.”
  • Craft Supply Swap- This is a great opportunity to simplify your sewing/craft cabinet, reevaluate your hobbies, and find some new creative inspiration for the kids. (Have a project that’s been unfinished for the past 10 years? Let someone else have the joy of competing it!)

Planning Tips to Consider-

  • Guests: Is it just for women or will it be a family event?
  • Theme: You can have a specific focus for your items (such as a women’s or children’s clothing swap) or an “anything goes” garage-sale style event. Clearly communicate the swap guidelines in your invitation.
  • Focus: Do you want to highlight a charity or have a ministry emphasis? A clothing swap can feature modest wardrobe ideas or a devotional on modesty for young ladies. A crafty swap can make/sew items for local or international ministries (such as baby items).

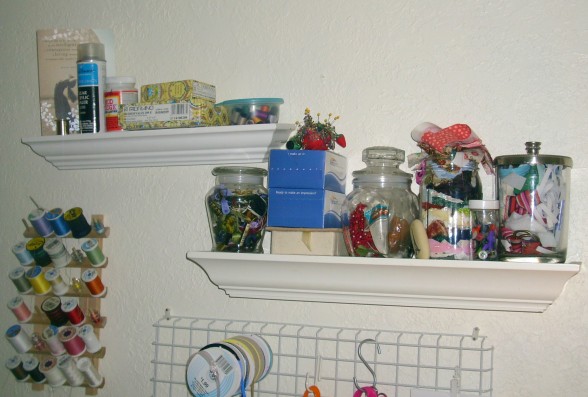
In a swap with friends last year, I was able to pick up some wall shelves and more cute glass jars to use for my sewing storage! (I organize the supplies for my sewing business in attractive glass jars at my sewing area in our living room.)

It was so nice to put these unused items (my friends’ “clutter”) to good use in blessing my family with a tidy home. At the same time, I cleared out a large bag full of unused items from our closets!

Have you participated in a similar swap? I’d love to hear if you have, or if you’re planning one!

Comments { 19 }

Green & Simple Birthday Parties for Kids

Carina asked: I was wondering if you have any tips for a frugal, eco-conscious birthday party for a baby.  I thought that would be a great discussion topic, and since your kids are older than mine, you might have some good ideas!

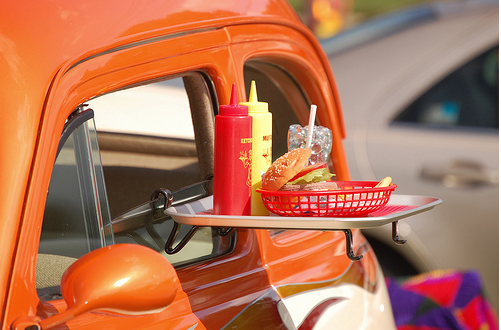
Birthday parties can definitely be a source of great waste from wrapping paper, to disposables plates and such, and it is wise to consider your options more carefully. For one, what are your goals in throwing a party for your child? Personally, I want my child to feel special, loved, and appreciated, but at the same time I do not want it to be focused on the presents. I want it to be simple, relaxing, and refreshing for all parties, but especially me as the mother and planner! For the first two years we have kept it extremely simple by making cupcakes, or a bear cake, and had family over for dessert. That’s really about it. Here are some other simple ideas for those who want a bit more:

Invitations – Use the online options of invitations to keep it simple and free. Evite.com is my favorite method for email invitations.

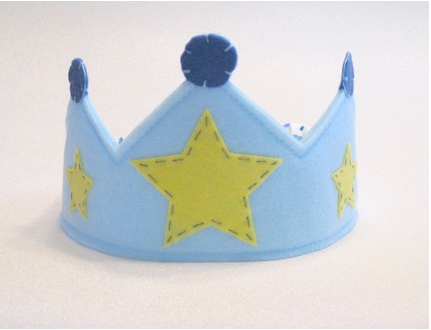
Decorations - Make a simple homemade “Happy Birthday” banner than can be reused time and time again. This can be made out of colored paper or felt. Buy or make a felt party hat for your child that can be passed down to others in the future. Make a princess birthday hat for the girls, and a birthday crown for the boys (skip the number so it can be reused, or attach velcro to the back of the number so that could be changed). If you want to use crepe paper for decor, choose a biodegradable option. Beeswax birthday candles are the perfect natural candle for your celebration.

Tableware – Rather than using disposables, check out the compostable bamboo plates and bamboo silverware or reusable plastic options. We have a plastic picnic set from IKEA that works perfectly for these occasions. Cupcakes eliminate any need for tableware!

Dessert – When the children are really young, we keep it simple with delicious cupcakes. Make it a fun activity to decorate your cupcakes together at the party. As they get older, I definitely want to make them feel extra special by giving them the opportunity to pick out a special cake that we can make and decorate together. I keep a favorite birthday cake cookbook on hand for them to select their favorite.

Activities

Field Trips – Invite your guests to a field trip to the zoo, science museum, fire station, swimming pool, library story time, or park. This helps cut down on any mess in the home and makes it a fun frugal outing for all. For Karis’ birthday this year, we went to the Children’s Museum in Portland and then provided a sandwich lunch and cupcakes for our guests. It was delightful and simple, and she had a blast!

Games - If games are on the schedule, stick with the old classic games that do not require any waste – hopscotch, musical chairs, capture the flag, and charades.

Give to Others - make something together with your guests that could be given to bless others in your community. Make cookies and decorate for the neighbors, elderly, or the homeless. Help teach your children the value and blessing of serving others rather than focusing on ourselves. You could also make cards to missionaries or those in prison, or simple crafts (knitted, sewed, or crotchet) for the Pregnancy Resource Centers.

Gifts

Gifts can easily be kindly declined and stated clearly in your invitations, but when it comes to grandparents and close family, this can be a different story. Our solution has been to request family to chip in together on a bigger gift item. We compiled a dress up box for Karis for her birthday and everyone purchased an item or two for it. If a friend wants to contribute, it makes it easy for them as well. The previous year we bought a wooden kitchen set and others contributed food items and such. This helps keep birthdays simple without too much extravagance and focus on the gifts. The child receives a special gift that will last and can be shared among others. For their first birthday’s, we honestly only buy them one small gift (Karis received a drum, Titus a sock monkey, and books and clothes from the grandparents). Less is more!

A Time of Appreciation

We want birthdays to be a time of love and appreciation for the child. We want to focus on celebrating the child and commending them for the good qualities that are being exhibited in their lives. Going around the table and sharing one thing we appreciate about the birthday person is a family tradition and always an encouraging time for the recipient. We also like to write a letter to each child on their birthday reflecting back on the previous year and the Lord’s goodness in their life, highlights, and what character qualities we see demonstrated in their life. I received these from my own daddy while I was growing up and they meant the world to me! We keep these in a special journal for our children to be given back when they grow up.

So overall, my vision is to keep things simple and yet special through the decorated cakes, and expressing our appreciation to our children. Limiting gifts and cultivating opportunities to give to others so our children grow up with a heart to serve and bless others.

Further Resources:

How to Throw a Green Birthday Party
Simple, Frugal Birthday Parties for Kids
by Simple Mom

Photo credit

What are your favorite green and simple birthday party ideas?

Comments { 26 }

Simple & Frugal Road Trip Fun

This is part 2 in response to Amy’s request for suggestions as she embarks upon a 16-day traveling adventure with her family brought to you by Passionate Homemaking’s monthly contributor, Michele Augur.

A road trip is a great opportunity for new experiences and family bonding. But it can also be a potential for sibling bickering and boredom. Here are some suggestions for a more pleasant trip, with a frugal price tag.

  • For small children, a “surprise bag” of items you pull out gradually throughout the trip is especially effective for preventing boredom. I stock up through the year for travel activities at thrift stores and bookstore sales, typically purchasing books and craft items for around 10 or 25 cents apiece.
  • Schedule plenty of times to “get the wiggles out” and picnic stops for everyone’s sanity. Run races and play games at rest stops or find a park/playground to explore!
  • Encourage creativity and teamwork by passing around a project of “drawing prompts” such as from Ed Emberley or Taro Gomi. Take along some “non-messy” art supplies (don’t forget the pencil sharpener!) and clipboards for holding your papers.
  • Keep everyone looking out the windows, with games like The Alphabet Game, the Cow Game, or Travel Scavenger Hunt (you can glue magazine pictures on index cards ahead of time for non-readers, instead of writing a list of things to find). “Interactive” games such as Sweet or Sour can be especially hilarious, as passengers attempt to get other passersby to smile!
  • Memory games, such as “My Father Owns a Grocery Store” or “Grandma Went to Market” are great group activities. Travel versions of board games, such as Scrabble are also fun. (Check thrift stores and garage sales for these. Or you can often find them during Christmas board game sales. Stock up and stash them away until travel season!)
  • Pack some special homeschooling subjects, such as focusing on a foreign language (which can be used in your destination), such as French or Spanish. Nature studies in new environments can also be fun; pack your nature journals to sketch new flora & fauna.
  • Stop by a thrift store or used bookstore to pick up a bag of 10 cent paperbacks. You can often find some entertaining classic literature to enjoy on the trip. Mysteries (such as the classic Sherlock Holmes books by Sir Arthur Conan Doyle) are fun to read aloud and try to solve together.
  • If you are taking electronics along, books on tape/CD are perfect for road trips. (Take turns who gets to choose the story.) Focus on the Family Radio Theatre’s productions, such as the Narnia series are entertaining for both parents and children.
  • If you have a video camera, assign the “task” of documenting the trip. (Many cell phones now contain this feature.) You will enjoy your teens’ creativity as they conduct interviews, narrate, and ham it up for the camera! You can also give them a hilarious “scavenger hunt” project list to find and record along the way (such as two siblings standing on their head in a hotel elevator!).
  • Worship together. Pack along some favorite worship CDs (check your teens’ collection, or pack “Wee Sing” for the little ones) to enjoy in the car. Don’t forget “campfire sing-a-longs” if you’ll be camping!
  • Pray together. Keep a routine of family prayer and devotions to stay connected, just as you would at home. This can easily be done after you grab some breakfast and pile into the car, before you drive off. Dinner time can be an opportunity to share about the day’s experiences and address any negative attitudes that might be cropping up in weary travelers. A road trip is a great time to work on Bible memory verses, too!
  • For larger families, institute a “buddy system” or “helper of the day,” to help address sibling issues and keep the trip going a bit more smoothly. (This is a good way to incorporate helping each other, prevent losing someone, and designate who gets the “popular seat by the window” for the day.)

I hope you have a joyful trip! Let us know how it goes, Amy!

What are your favorite travel activities? Please share!

Photo Credits: superhua, jimmiehomeschoolmom

Comments { 15 }

Healthy & Frugal Travel Meals

Photo credit

This post is brought to you by Passionate Homemaking’s monthly contributor, Michele Augur.

Amy asked: “My children are older (11,13,14,15), but many tips will apply to all ages. We are heading out on a 16 day summer road trip in August. I have filled our trip full of parks, factory tours and many many other free or low cost activities. I am planning on preparing home cooked food throughout the entire trip. Normally, I can manage this, but our trips are usually a week or less at a time and we aren’t continuously moving. On this trip, we won’t be in any one place longer than two nights. I would love any tips from you and your readers on food ideas, entertainment in the vehicle, etc. I am spending 5 months planning!

P.S….we are taking a small travel grill, a cooler and in most rooms we will have a fridge and microwave only. I also plan on taking my large electric griddle for pancakes, etc. That is a about all I have to work with!”

I am so excited for you, Amy! Our family loves adventures like these.

Preparing home-cooked food while traveling is usually the most frugal and healthy option for meals on the road. Some advance planning certainly helps, though! Here are some tips to make the trip go a bit smoother for you (and feel free to jump in with your own suggestions!).

Before a long road trip, I usually write out a flexible meal plan to work from as I make my preparations. You can adjust this as you travel, but it helps to make sure you don’t forget anything. Plan for plenty of finger food picnics!


Right before our departure, I schedule a baking day. I prepare items such as cookies, granolagranola bars, breads, and muffins for snacks & meals. (These likely won’t last two weeks, but it gives you a head start.)


When packing your cooler, use “leak-proof” containers; otherwise your food will get soggy when the ice melts! Here are some staple items we like to pack:

  • Dried & Fresh Fruit
  • Containers of Veggies (already cut into finger food pieces)
  • Homemade Trail Mix (When traveling in hot weather, be wary of carrying chocolate, which can melt!)
  • Shelf-staple treats, such as Peanut Brittle
  • Jars of Peanut Butter
  • Eggs (Hard-boil some ahead of time, and pack raw ones in an egg holder; cardboard egg cartons dissolve in a cooler full of ice!)
  • Nitrate-free Hot Dogs, Pepperoni SticksSmoked Salmon, Jerky, etc. from a local meat market
  • Cheese (already sliced, and stored in a container in the cooler, or containers of Feta)
  • Quick-Cooking Grains (such as oats, quinoa, or millet) for hearty “one pot” meals boiled on a camp stove (or you can microwave quick-cooking oats).
  • Beans (You can cook some ahead of time, or pack dry or canned beans. Lentils and Split Peas are especially quick-cooking.)
  • Tortillas (These are your space-saving foods for the end of your trip, when the baked goods run out, and are a lightweight option for packing on a day hike.)
  • Canned Fish (Choose a healthy & sustainable option, such as wild Alaskan salmon.)
  • Lots of Pancake Mix (Prepare your own homemade “mix” ahead of time! When your bread runs out, make a big batch of pancakes at breakfast, and make sandwiches out of them for lunch.)
  • Jars of Homemade Yogurt (You can use this in salads, dips, or for breakfasts with fruit & granola.)
  • Popcorn (Pop a big batch to take with you, or pop some over a campfire/camp stove.)
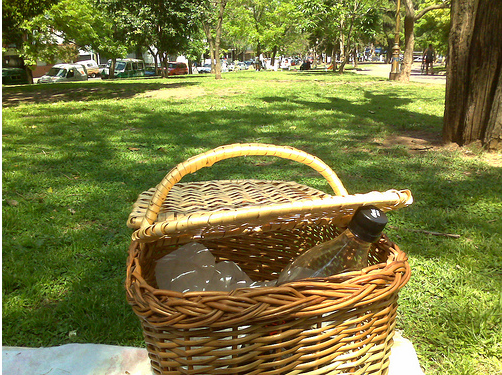
  • Water (Make sure everyone has their own water bottle for the car, and fills them up before heading out for the day.)

Photo credit

Meal Ideas:
  • Grilled Meats & Veggies (You can take along Shish Kebab sticks for a great “finger food” meal! Try eggplant, zucchini, mushrooms, bell peppers, or onions)
  • Campfire Roasted Potatoes or Sweet Potatoes (Wrap in foil, and tuck into the coals. Stuff with beans, cheese, & veggies after roasting)
  • Wraps (Our favorites are a combination of Salad Greens, Pear Slices, Feta, and Dried Cranberries in Whole-Grain Tortillas, or Black Bean Wraps.)
  • Veggie & Cheese Omelets (You can even do “breakfast for dinner.”)
  • Fish Cakes (on the griddle)
  • Grilled Fish or Chicken at dinner can be transformed into salad sandwiches for lunch the next day.
When packing your kitchen supplies, take the bare minimum you need to prepare and wash up quickly, so that you can get back out on the road!
Kitchen Staples/Utensils:
  • Knives (Find ones with their own cover, so they can travel safely.)
  • Can Opener
  • Cutting Board
  • Biodegradable “All-Purpose” Soap (such as castile soap) & a scrubber for washing your utensils
  • A set of dishes for each person (Wash immediately after use, so you’re not carrying dirty dishes!)
  • A few favorite spices: Cinnamon, an Herb Blend, and Salt & Pepper are usually sufficient
  • I like to take a heat-resistant silicone spatula/scraper/spreader, which works for almost everything!
  • While you’re at hotels, remember to restock your cooler with ice (so you aren’t buying ice as often).
  • A cooking pot and/or frying pan
  • A small jar of oil, container of butter, and a container of sugar/honey
  • Leak-proof containers for restaurant leftovers (to put in your cooler)
Shopping:
Before you head out, check Local Harvest (or area tourism information) to see if there are any Farmer’s Markets or produce markets near your destination. It is a delicious treat to pick up local produce for your meals, instead of eating something that has been sitting in your car for a week! Doesn’t a fresh cucumber, vine-ripened tomato, basket of berries, bag of salad greens, or a juicy peach sound nice?


So, what are your favorite travel tips? Did I forget anything?

Stay tuned for part 2 as Michele shares frugal and fun travel activities!

Comments { 27 }

Frugal & Natural Pest Control: Fruit Flies & Ants Be Gone!

IMG_6140This post was originally published July 24, 2009. We have recently been attacked again with large ants around our house, so I knew it was time to bring out our successful ant trap and share with you all our success again!

We have been attacked by an abundance of fruit flies lately in my kitchen. AHH! Don’t you love those little flying insects that seem to find every bit of food in your kitchen and around your trash can? Here is our simple, frugal, and effective solution!

Fruit Fly Trap

1 quart jar
1 piece of paper, rolled up into a funnel
tape
apple cider vinegar
small slice of banana

Fill a quart jar with a 1/2 inch of apple cider vinegar and a small piece of banana. Roll up your paper into a funnel shape (larger at the top) and tape it in place. Place the funnel into your jar and make sure all the edges are secured shut with tape. You may have to adjust the size of your funnel to make sure it fits nicely into your jar. Place the jar where the fruit flies are flying around and let it go to work. You will be amazed at how well this trap works. The fruit flies will smell the fruit and climb inside, but for some odd reason they don’t fly back up the funnel to get out. When you have caught a good supply, place the entire jar in the freezer. After a short time that flies with die and you can remove the jar from the freezer and use it again without even removing the old contents. Use repeatedly until your fruit flies are eliminated.

As you can see in my picture, this easy trap is amazingly effective!

Ant Trap

We are often plagued with ants in the summer time as well around here. We have various sorts of carpenter and sugar ants. This little concoction does the trick! Last year we had huge carpenter ants all around our kitchen. Many were coming out of our electrical saukets in our kitchen. We were blown away by how quickly they were eradicated with this recipe.

1 tsp. borax (borax is an natural laundry boosting powder available in the laundry section of the store, normally on the top shelf)
2 cups hot water
6 Tbsp sugar
folded paper towel
small shallow cup (like a creme burlee dish)

Disolve borax in hot water. Stir in sugar. Dip the folded paper towel, using tongs, in the solution till completely saturated with solution. Cram the paper towel in the dish. Place in location where you have seen the ants. This solution will be eaten by the ants and taken back to the nest to share with the other ants and thus eradicate the entire nest. Keep away from children by placing on a countertop or cupboard, if possible.

Comments { 35 }

Stainless Steel Scrubber: A New Favorite Tool

For the past few years in my pursuit of natural living, I have been stumped by the ever increasing toilet bowl ring stains and water/soap scum buildup in my shower. Natural cleaners just were not working real effectively for me for these issues (and I tried vinegar, oxygen bleach, hydrogen peroxide, etc). I wanted to avoid chlorine bleach or comet, but that seemed like the only solution, otherwise, just live with it, I thought.

I also have had difficultly finding an easy, natural, and effective means of scrubbing my stainless steel cookware clean. And lastly, the stove top loves to accumulate dried food particles that get caked thoroughly on.

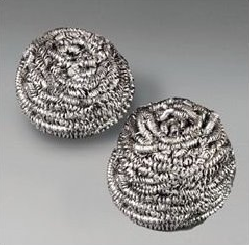
My solution? Enter…Stainless Steel Scrubbers. They do not rust or splinter, are frugal ($2.50 for 2 on Amazon), can be easily disinfected (throw them in the dishwasher or laundry), and do not accumulate food particles like so many other scrubbers. With a little elbow grease, these scrubbers rid me completely of toilet bowl stains and shower scum, leaving me with sparkling clean results. My husband was absolutely thrilled. I had no idea how these things had annoyed him so, and yet he patiently endured all my experimenting.

I now keep one scrubber by the kitchen sink for all my dish washing, and one in the cleaning bucket. They will not last indefinitely, but so far mine have held up very well after three months of daily use. I understand they also work well for scrubbing BBQ’s and cleaning garden tools, shop tools, etc. I am sure you can come up with some more ideas. I did not experience any noticeable scratching on my porcelain, but use with caution and test a small unnoticeable area first.

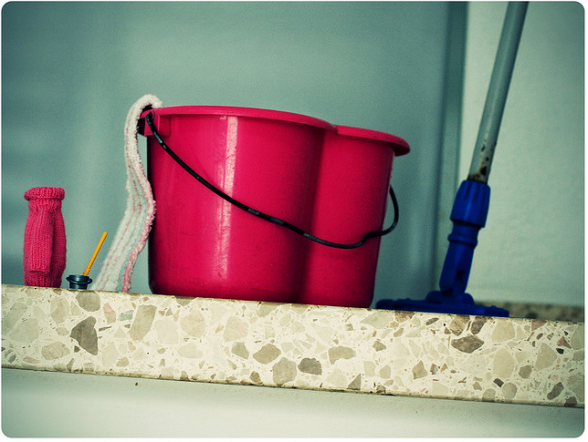
My cleaning bucket has really simplified as of late. A stainless steel scrubber, my enviro cloth, oxygen bleach (for disinfecting the toilet), an old toothbrush (for those nooks and crannies) and a toilet bowl brush. Ahh! Simplicity…

What frugal tools have you found for effective natural cleaning?

Comments { 50 }

4 Items You Don’t Need In Your Bathroom

Photo credit

Here are four standard bathroom products that you can eliminate rather easily. Yes, the market tries to persuade you that you need this and that for the best look or feel. But are they truly all necessary? Here is your opportunity to fight back!

1. Shaving Cream

What is the purpose of shaving cream? Supposedly, it is to protect you from cutting yourself while shaving, correct? So I thought, until I really evaluated whether or not it served its purpose. Maybe 50% of the time. The other 50% of the time I would get cut, scratched, or hurt in some way. Both my husband and I shared this experience. Then I decided there had to be some way I could just live without it.

Alternative #1: Hair Conditioner. Conditioner is a perfectly useful alternative to shaving cream, and yet it clogs the razor and dulls the blade quicker. And as you will see in #2, we’ve eliminated this product, so its no longer an option at our home.

Alternative #2: Bar of Soap. Yes, the simplicity of a bar of soap does the trick! Scrub yourself down and shave in the process and you just eliminated another purchase for your bathroom. Guess what? My husband prefers this method too. We both agree that we cut ourselves far less, our skin remains soft and moistened, and we get a perfectly clean shave. My technique in order to avoid extra waste is to lather up one leg with soap, and before washing it off, I shave immediately, and then wash down. This works to help use the least amount of soap possible for both jobs of washing and shaving. We recommend a good natural bar of soap such as Dr Bronners.

Alternative #3: Nothing. Some would argue that you can use a little water and go for it (but I personally prefer the soap). :)

Save yourself a few dollars each month and take it off the list. It works.

2. Hair Conditioner

Hair conditioner is a nice product to have. It does help produce that silky smooth appearance. But is it necessary? We’ve lived without it for quite some time.

Alternative #1: Apple cider vinegar (Approximately 1-2 Tbls. cider to 1 cup water). If you don’t mind the fragrance, try a squirt of apple cider vinegar in your hair for its natural de-tangling ability. Or add a bit of essential oils to balance out the scent.

Alternative #2: Coconut oil. Applying coconut oil after showering as a leave in conditioner is very effective. It can be used as a curling gel for my hair, or a smooth gel for my husbands hair. Just remember…a little dab will do you. Too much and you can have a greasy look. It is wonderfully nourishing for the hair.

Save yourself a few dollars and use something you already have or skip it altogether.

3. Make-up Remover

Alternative #1: Soap and water. Yes, it works quite nicely.

Alternative #2: Coconut oil. Apply a little coconut oil to a cotton ball and apply to eyelashes to remove mascara and all other products on your face. Moisten your skin while removing make-up at the same time.

4. Aftershave

Alternative #1: Shea Butter / Coconut oil Combo. Check out our homemade aftershave recipe. (The hubby thinks this works the best!)

Alternative #2: Coconut oil (surprise!). While not as soothing as the combo above, coconut oil makes a great alternative in a pinch.

I could go on to share how you can also make your own shampoo or go the no-poo/baking soda route, how to make an effective homemade deodorant, and so on, but we’ve already been there before. Check out all the wonderful uses for coconut oil that we have compiled for further inspiration.

This post is part of Fight Back Fridays.

What items have you eliminated in your bathroom? What creative alternatives have you discovered?

Comments { 105 }

Enviro Cloth: A Simple, Frugal & Natural Cleaning Tool

If you have been around here for long, you know that I love simplicity, multi-purposing, and natural living all-in-one. I love finding items that will help simplify my homemaking to help preserve time and energy, but also good for our health and the environment as much as possible, on top of accomplishing these things without breaking the bank. It is a tall order. So you would imagine my surprise when I stumbled upon Enviro Cloth…and it appears to be the ultimate in meeting these criteria.

The Enviro Cloth is produced by Norwex, a company committed to preserving quality of life while reducing chemical expose in the home and on the body. It is made out of microfiber cloth with an innovative design that uses anti-bacterial silver particles integrated into the synthetic microfiber, ensure (according to their website):

• Single-celled micro-organisms such as bacteria, fungi, yeast, and viruses cannot survive or adapt in silver exposure
• Surface-to-surface cross-contamination is eliminated
• Rapidly drying cloths prevent bacteria growth in the cloth itself

This material can hold up to 7x its weight in water.  Unlike many other types of cloth that smear dirt across the surface you are trying to clean, the MicroFiber cloths act like bionic sponges removing dirt and bacteria, to leave a highly polished and clean surface. And all this can be accomplished with just the simple use of water. You don’t need any other all-purpose sprays, window cleaners, etc. Sound too good to be true? It sure did to me. According to the company, Laboratory tests have proven that Norwex antibacterial microfiber reduced bacteria by 99.99% in 24 hours! With this simple tool, which can be used dry or damp, you can clean walls, tiles, bathtubs, counters, metal surfaces, car interiors and more. Dry for dusting and damp for all other uses.
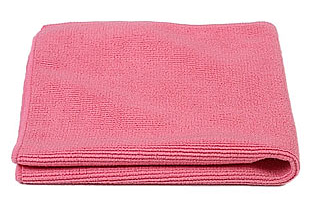
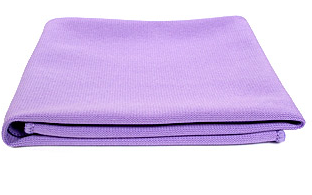
I purchased the Basic Cleaning Package which included one Enviro Cloth and one Window Cloth (pictured left). I have used the Enviro Cloth for all my basic cleaning. I even had success spot cleaning carpets with it. I have loved it! The Window Cloth (which is smoother in texture to the Enviro Cloth) especially blew my husband and I away. It produced a beautiful lint-free and clean window with just water!
To clean, simply spray a little water on the surface and polish with a dry window cloth. I found it most effective to wipe down a surface with the damp Enviro Cloth and then dry and polish it with the Window Cloth, especially for windows, mirrors, stainless steel appliances, etc. I never imagined I could get such clean polished streak-free windows. There is absolutely no residue remaining. We have used it successfully for all our windows, mirrors, laptop screens, piano surface, and windows in the car. Pretty impressive for one little cloth. So these basic clothes can replace practically all your cleaning supplies. Simplicity in action! I loved just taking one damp Enviro Cloth and wiping down all our household surfaces so easily and know that they were clean. The only thing I need beyond these closes is a toilet brush and some oxygen bleach for the toilet bowl.

How to clean them?

Clean these cloths by simply wringing them out and hanging to dry. Very fast drying. For slightly dirty cloths, hand wash with a little dish detergent under warm running water. Wring and hang to dry. They also may be laundered with other lint-free laundry. Washing with other items will destroy their lint-free properties.

Where to Buy?

Norwex is a multi-level company, so unfortunately they can not be purchased in store, so you have to purchase through independent consultants.  I recommend purchasing through The Urban Homemaker, a Christian family run business.
At just $14.50 per cloth that can be reused indefinitely, this cleaning tool could save you a lot of money! Norwex offers many other cleaning solutions from mopping, to innovative toilet cleaning tool, in addition to natural body care products. Check it out! All their products come with a 60 day money back guarantee and have a two year warranty. I’m tempted to host a party to see more of these products in action.

Any one else tried these clothes yet?
Comments { 47 }