Archive | natural & green RSS feed for this section

Homemade Natural Diaper Cream & Lotion

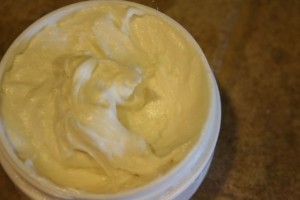
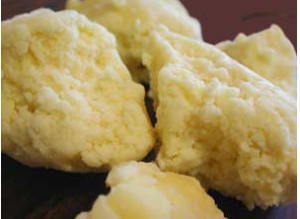
Raw shea butter - Photo courtesy of Mountain Rose Herbs

Raw shea butter - Photo courtesy of Mountain Rose Herbs

Coconut oil and raw shea butter are the perfect combination for a safe, natural and simple diaper cream or hand lotion. Shea butter is wonderful for its natural healing and moisturizing properties. It is rich in Vitamins A, E, and F, which help to soothe, hydrate, and balance the skin. Make sure to select raw shea butter, because many companies use bleaches, deodorizers, or chemicals to alter the scent and appearance of shea butter. These processings deplete the product of its healing and medicinal properties, and also destroy the vitamins and minerals present. You will know if it is raw by its distinguished nutty smell. Coconut oil is also very nourishing and moisturizing to the skin and has great anti-bacterial and anti-fungal properties.

This is definitely a powerhouse for defeating yeast infections as well. We love it now! I used to have to switch my babies over to disposables when a rash hit, but with this salve, it heals wonderfully even when wearing cloth diapers. I recommend using a thick doubler/liner when applying this salve if you use cloth diapers to protect their warranty. My dipes are out of warranty, so we use it directly on their bum with the diaper and it has not caused any repealing issues. It washes out beautifully. This recipes works for a awesome natural lotion as well, helping to sooth dry and cracked skin. You may want to add some lavender (or other) essential oil for fragrance for use as hand lotion because shea butter gives it a nutty smell and may not be preferred if you like a real fragrant lotion.

IMG_6459How to make your own?

1/8 cup coconut oil (extra virgin is preferred)
1/4 cup raw shea butter
3-4 Tablespoons talc-free cornstarch or arrowroot power (optional, to thicken) -Learn more about avoiding talc here.

Combine coconut oil and shea butter in a small bowl with a hand mixer or stick blender. You may have to soften the shea butter just slightly over very low heat in order to incorporate them well together, but it should combine well with a mixer. Add cornstarch or arrowroot a tablespoon at a time until you achieve the desired thickness. It will look similar to a whipped icing.That’s it! Transfer to a small covered container and place at your changing station. Keep a small portion in the diaper bag as well. Apply liberally with each diaper change as a preventative and rash salve. There are many more complicated homemade varieties out there, but this simple recipe has done the trick for us! Makes about 1 cup.

We buy our extra virgin coconut oil and raw shea butter from Mountain Rose Herbs. You can use refined coconut oil on the skin as it is a cheaper variety. Unrefined is preferred for eating.

This post is a part of Fight Back Fridays.
Passionate Homemaking is an affiliate of Mountain Rose Herbs and will receive a small percentage of sales purchased through our links. Thank you for your support!
Comments { 129 }

Basic Cloth Diapering Supplies

What supplies do you need for cloth diapering? Here are my recommendations.

Cloth Diapers - I recommend anywhere between 18-24 diapers in a rotation. I believe we have 24 diapers and that has worked for diapering two little ones at a time (with diaper changes every 3 hours unless we have a poopy – pockets hold it all in!).  This will enable you to wash every 2-3 days.  We already shared how we love the one size pocket diapers.

Detergent – There are many different recommendations for natural detergents, but make sure you choice one free of any additives, softeners, whiteners, brighteners, and the like. We use Charlies Soap for our diapers. Other popular brands include Allen’s Naturally & Country Save. Check out a recommended list here.

Cloth Wipes – 2-3 dozen wipes. I recommend flannel wipes, but don’t go for the cheap ones because they wear out quickly. Try making your own.

Screen shot 2009-09-10 at 2.40.20 AM

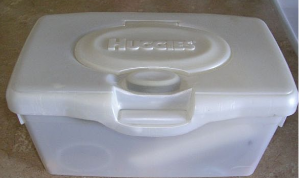
Wipe container at the changing table

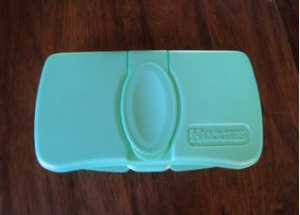
Old Wipes containers – We use a large plastic wipes container at the changing station and a small one in the diaper bag.

Wipe container for the diaper bag

Wipe container for the diaper bag

Diaper pail & liner – A basic large plastic trash can will do. You don’t need anything fancy. Just makes sure it has a lid! Two washable liners are very useful for keeping the smell in the pail and you can dump all the contents into the washer at once with the bag. For small places, another excellent option is the Doorknob Diaper Pail.

Doublers - These are nice to have on hand for overnight use. Just stuff the diaper with an extra insert. We love the hemp/fleece doublers or BabyKicks Hemparoo because they help keep the moisture away from the bum, are super absorbent, and are rash resistant (when you put the hemp side directly against their bum). We also like to stuff the inside of our diapers with an extra infant prefold diapers or micro terry inserts for doubling at night.

1-2 Washable Wet bags – This are wonderful to keep in the diaper bag for diapering when you are out and about. We have a Planet Wise wet bags or you can make your own (Michele made me a wet bag as pictured and we love it!). It’s nice to have two to rotate when one is in the wash.

That’s all that is in my diapering collection. Simple and basic!

Additional tool (convenient but not necessary)…Diaper Sprayer. If you don’t like the thought of dunking your diapers, check out the diaper sprayer. I have not used it myself, but it looks useful. I personally leave the infant stools on the diaper and they are sufficiently cleaned out in the washer. When they begin solids, I do a bit of dunking or let the stools roll off into the toilet. Another alternative is Flusable Liners. We have used them on occasion ourselves and liked the convenience but not the extra cost. These tools make cloth diapering a breeze! No more excuses. ;)

For an excellent selection of diapering supplies, including all the recommended items above, I highly recommend Kelly’s Closet. Excellent customer service and they reward you with points from each purchase you make towards future gift cards!

What diapering supplies do you have or recommend?

Comments { 40 }

One Size Pocket Diapers Reviews

My two little ones all dressed in cloth

My two little ones all dressed in cloth

Pocket diapers? Prefolds? AIO’s? There are many diapering options on the market today and it can be a bit confusing to decide which method to choose. I have been using cloth diapers for over two years now and have experimented with all of the different systems of cloth diapering. I am hoping to save you some time and effort by giving a little review on my findings.

I absolutely love one size pocket diapers! The one size pocket diaper is an easy means of maintaining a simple cloth diapering system. They are easy to use and adjust to different sizes for growth. You simply stuff an insert inside the diaper and away you go. They rarely if ever leak! I would consider it also to be one of the most frugal systems of cloth diapering, because you only need one diaper to carry you through to potty training (See cost comparisons below). If you have two in diapers, you don’t have to fumble around for different sizes because one diaper works for both of them. They are easy to use and are very similar to disposables. Most one size brands can be worn from 8 lbs-35 lbs.

Continue Reading →

Comments { 93 }

Natural Housecleaning Carnival

Picture 3Welcome to our Natural Housecleaning Carnival! Do you desire to remove toxic chemical cleaning supplies from your home and need some help getting started? I am so glad you joined us today. Did you know that homemade natural alternatives are not only safer for your family and the environment but they are also far more economical as well! That is one of the reasons I love natural cleaning…it can be done with a few basic and simple ingredients, most of which you already have on hand.

Did you know? The average American uses about 40 pounds of toxic household cleaning products each year. These cleaning products contain dangerous ingredients, including neurotoxins, carcinogens, allergens, central nervous system depressants, heavy metals, and other agents that cause or contribute to cancer, respiratory problems, reproductive abnormalities, allergic reactions, and behavioral problems, among other issues.

Today the floor is open for you to share all your tips and tricks for getting rid of the toxins and filling out home with fresh natural housecleaning!

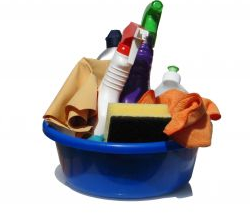
My Simple, Frugal & Natural Housecleaning Bucket

I am all about simplicity and frugality, so if I can clean the entirety of my house with a few basic tools, I am thrilled! My housecleaning bucket includes the following items: Two shakers, three spray bottles, and three tools.

Baking Soda – I keep this in a small shaker (reusing an old spice container) for dusting in my toilet bowl.
Oxygen Bleach Powder (learn about this natural replacement to chlorine bleach here) – I also use this in a small shaker to dust into my toilet bowl or tub and allow to sit before scrubbing down.
All-Purpose Cleaner – Currently, I use soap nuts liquid & vinegar with a bit of tea-tree oil (details here). Love it!
Window Cleaner - I use club soda and that’s it! Other alternatives or boosting agents: half vinegar & half water, lemon juice & water or soap nuts liquid.
Hydrogen Peroxide – keep this in the original dark container (otherwise it loses its effectiveness) and simply replace the lid with a spray nozzle. I use this to spray down my tub in accompaniment with vinegar or oxygen bleach, and to remove stains in the carpet (read more here).
Toothbrush – for all the small spaces around the toilets, sinks and for cleaning grout on my tile counter tops.
Toilet Brush
Scotch Brite Scrubby
– for giving the toilet bowl, tub and tile a good efficient scrub!
Olive Oil - this of course I keep in my kitchen but use it with a soft cloth (t-shirt) for cleaning the smudges off my stainless steel appliances.

What if you want to skip the whole homemade route? Check out the Mrs. Meyer’s line of cleaning products. These are wonderful natural products that I have used and loved in the past. Many products in this line are also sold by the case at Amazon and you can get 15% off with the subscribe & save feature.

Here are some previous posts on the topic:

Housecleaning on A Budget – Part 1 – all basic frugal housecleaning recipes!
Housecleaning on A Budget – Part 2
My Favorite Frugal & Re-purposed Housecleaning Tools

Using Soap Nuts for Household Cleaning
Natural Housecleaning Book Recommendations
Natural Stain Remover & Cleaning Agent: Hydrogen Peroxide!

Natural Bleach Alternatives
Natural Laundry Detergents: Homemade, Charlies & Soap Nuts
Natural Dishwasher Detergent

Let’s seek to be good stewards of the environment and our health by adopting some new practices. Just remember, natural alternatives may not clean as effectively as their chemical counterparts, but I don’t mind a little toilet bowl ring stain if it is not going to cause anyone any harm.

Now it’s your turn…

1. Homemade “Clorox” Wipes (Emily)
2. Washing Windows (Amy)
3. How To Clean Your Stovetop & Oven the Simple, Safe & Frugal Way (Katie)
4. Elbow Grease: The Most Natural Cleaner of All (Meghan)
5. Frugal & Natural Laundry (Vanessa)
6. Frugal & Natural Bathroom Cleaning (Vanessa)
7. Earth-Friendly Laundry for 10 Recommendation (Sarah)
8. Natural Cleaning Round-Up (Jackie)

To participate, post your tips & tricks on your blog. Link to this post and leave a comment with the title of your post and the link address below and then I will add them to the post manually. Make sure to submit a direct link to your post. If you do not have a blog, please feel free to share your tips in the comments. Have a question or problem in your housecleaning routine? Please share it below and let’s help each other out!

What’s in your housecleaning bucket? Do you have a favorite cleaning brand to recommend? How do you solve stubborn stains? Mold? Mildew?

Comments { 67 }

Natural Housecleaning Book Recommendations

For those of you who are new to natural housecleaning and looking for some more information and recipes or you have been at it awhile and need some further knowledge, I wanted to highly recommend you check out the following resources. These may very well be available at your local library, but they are very worth having as references in your home, so I recommend purchasing your own copies.

Picture 6Easy Green Living by Renee Loux – This is my favorite resource on green living and educating yourself on the various harmful and safe replacements for all arenas of your home. It is the ultimate resource! She also supplies an abundant list of recipes for safe household cleaning that are very useful. She also reviews all the popular brands on the market.

Clean House, Clean Planet by Karen Logan – This book focuses specifically on natural housecleaning and addresses every Picture 7chemical and safe homemade replacements for your home. I love the wit and charm in this book. Karen makes housecleaning actually sound like fun as you learn to make your own frugal natural substitutes. From natural car wash cleaners to an emergency cleaning kit in your car, Karen Logan thoroughly covers every need you may have!

Home Safe Home by Debra Lynn Dadd – This book is an excellent resource on eliminating toxins from your home. She provides over 400 tips, including do-it-yourself formulas for every area of your home. She compats every chemical with a thorough knowledge of its harmful effects and an easy solution. This book has little pictures and is more textbook in style. This has more educational material than recipes but there as definitely many helpful hints in there. Clean House, Clean Planet has more of the recipes over the educational aspect…so both resources are a great balance!

Green Clean: The Environmentally Sound Way of Cleaning Your Home - A thoroughly current guide to natural and safe housecleaning. She reviews all the standard and eco-friendly brands on the market in addition to various homemade recipes. The author proceeds through every room of your home to supply you with safe solutions and helps you to make a green cleaning plan.

Picture 10Vinegar: Over 400 Various, Versatile, and Very Good Uses You’ve Probably Never Thought Of by Vicki Lansky- A helpful little guide that supplies you with all the knowledge you need on how and where to use vinegar (the cheapest natural solution out there!) in cleaning your home. I love how this little guide makes natural cleaning so frugal!Picture 11

Baking Soda: Over 500 Fabulous, Fun, and Frugal Uses You’ve Probably Never Thought Of by Vicki Lansky- I think these two books truly prove that you don’t really need chemicals in your home. These frugal alternatives completely do it all!

Do you have any recommendations?

Comments { 8 }

Using Soap Nuts for Household Cleaning

Picture 5

Soap nuts are an effective cleaning agent that grows on trees! If you haven’t heard about soap nuts, learn more here. They are as natural as you can get! They are safe for your family and the environment. No chemicals. No waste. Not only have I found them very useful for cleaning my laundry, but I also have found them to effectively clean my dishes at the sink and in the dishwasher. You can make your own liquid cleaning detergent from raw soap nuts by following these simple steps:

1. Place 12-15 raw soap nuts in a pot with 6 cups of pure filtered water.
2. Bring to a boil and then turn to a simmer for 1 hour.
3. Allow the mixture to cool completely.
4. Strain the nuts from the liquid. Compost the nuts and use the liquid for your housecleaning!

If you make a large batch as described you will want to refrigerate it between uses to preserve it. It is recommended to use within 3-4 days. I store mine in a glass 1/2 gallon jar in the refrigerator. As it is completely natural, it can go bad without preservation. A few ideas for helping to preserve it include: freezing it in ice cube trays, adding essential oils, vegetable glycerin or citric acid. All of which are natural preservatives. Experiment and see what works for you. You will know when it goes bad when it develops a pugnet bad smell. If storing in the refrigerator, make sure to label your product. It looks a lot like apple juice!

Here are all the wonderful housecleaning uses:

All-Purpose Cleaner: Fill a small spray bottle with full strength soap nut liquid (you can dilute it if desired, but I found it to be more effective in full strength). Add a few drops of tea tree oil or lemon essential oil. Use for spraying down countertops and floors and other general cleaning. You can also keep this cleaner by the kitchen sink for dish washing. I like to add 1 Tablespoon of lemon juice for more grease cutting effectiveness. Add white distilled vinegar for more disinfectant jobs.

Windows & Glass: Combine 1 cup of water with 1 Tablespoon soap nut liquid and 1 Tablespoon white vinegar. Place in a spray bottle and spray your surfaces and wipe clean.

For Dishwashers: Fill the dishwasher soap dispenser with soap nuts liquid – about 1/8 cup. Wash as usual. Tip: For extra sparkle, add a half-ounce of vinegar to the rinse dispenser or during the rinse cycle. This works amazingly well! It is in a tight race with my homemade dishwasher detergent/dishwashing soap.

For the Laundry: Use 1/4 cup soap nut liquid in cold or hot water, as desired. I have found using the liquid version is the best way to thoroughly clean your clothes, especially cloth diapers. The raw nuts didn’t seem to agitate enough to clean my diapers thoroughly so I tried making the liquid soap and my problem was solved. Wonderfully clean diapers!

For Steam Cleaning Carpets: According to NaturOli, Soap nuts work exceptionally well in carpet cleaners because they are so low sudsing and odor reducing. Add about a quarter cup of soap nut liquid to hot water in the portable cleaner. Great for urine stains!

You can also purchase the Liquid Extreme 18X version of soap nuts and use that in replacement of the homemade soap nuts liquid above. That is a bit more expensive but definitely makes it easier! You will be able to use a lot less as well because it is a concentrated liquid.

Soap nuts are definitely simplifying my life over here for all their usefulness!

For the best deals on soap nuts, visit NaturOli.

Please note: Passionate Homemaking is an affiliate of NaturOli and will receive a percentage of each purchase made through our links. Thanks for your support!

Stay tuned for our upcoming Natural Housecleaning Carnival this Friday!

Comments { 70 }

My Favorite Frugal & Re-Purposed Housecleaning Tools

Picture 3This week we are focusing on natural housecleaning in preparation for the Natural Housecleaning Carnival this Friday! If you haven’t heard about it, check it out and prepare all your tips and recommendations.

I wanted to share with you three different frugal and effective housecleaning tools. I am always looking for ways to re-purpose and reuse items after their original purpose been spent. Two of the three ideas accomplish that to the fullest extent!

Scotch Brite Scour Pads

Picture 1 Scotch Brite Scour Pads are very useful when you need a good scrubbing for various housecleaning tasks. I keep one at the kitchen sink for all my dishwashing needs. I have used many different scrub brushes over the years specially designed for the task but they don’t work as well. The Scotch Brite (or green scratchy as I call it) works so well on scrubbing all the leftovers off both my stainless steel cookware and my favorite hard anodized non-stick pan and everything else. I use it to scrub all the gunk off my stove top as well. When you have some dried food product on a glass or plate, the green scratchy saves me so much more time and energy because it scrubs effectively. No intense elbow grease needed here! I also keep one in my cleaning bucket for those tough water stains in the toilet or bathtub.

Make sure to get the variety that has the green heavy duty scour pads on both sides for ease of use and effectiveness. I have found the blue softer side on the other variety to be pretty worthless. They are very cheap and are available everywhere. Tip: You can wash them in the laundry multiple times before they start falling apart, thus stretching your dollar. Also, just make sure to wash the dishwashing pad from the cleaning bucket one. ;)

Re-Purpose an Old Toothbrush

Picture 4When your toothbrush has seen better days, before throwing it into the trash, consider adding this useful tool to your cleaning bucket or by your kitchen sink. A toothbrush is a good instrument for getting into all the crooks and crannies of housecleaning. Scrubbing around the toilet or sink, drain and cover, faucets, in the tracks of sliding shower doors or windows, tile grout, or any small hard to access places. Keep one in the kitchen for cleaning the wheels on your can opener, baby bottle lids or sippy cups,

Handy Dandy T-Shirts

When your old t-shirts have pass their prime, re-purpose them for cleaning your house! My husband’s old cotton undershirts are my favorite housecleaning rag! I just cut or tear each shirt into four rags. They work great for all my needs including windows. I have completely eliminated paper towels from my house because I didn’t like the waste, so t-shirts is my substitute. Surprisingly, they leave very little lint behind.

Those are my favorite tools. What are yours?

This post is a part of Kitchen Tip Tuesdays.
Comments { 26 }

Safe Paint for Your Home

Picture 3I love how a fresh coat of paint is such a simple way to transform your house more into a home. Whenever we have painted rooms in our home in the past, we have always been overwhelmed by the intense smell of fresh paint, to the extent that you just knew it was bad for you. Did you know that while adding color to a room, you are also slapping on lead, formaldehyde, benzene, toluene and xylene-all potentially hazardous to your health? These neurotoxins are powerful enough to vaporize into the air you breathe. After automobiles, paint and its companions are the second highest source of VOC (volatile organic compounds) emissions. The smells tend to stick around upwards of a week as the paint dries but can last up to three months. That is three months of exposure to toxic chemicals!

We recently painted our children’s bedroom and were thrilled to discover that there are several high quality chemical free paints on the market that are safer for your home and the environment. We were also pleasantly surprised to find these alternatives to be comparable in price to the conventional brands. Now that it is finally painted (it has been white walls for three years now!), we truly feel more settled in to our home and I love it!

What to Choose & Understanding the Labels

  • Natural paints and finishes: Using a paint that is made from natural raw ingredients will produce a paint that gives off no smell. This is the ideal and safest choice if you have access to it (see sources below), but will be more expensive than the other options. Ingredients include: plant dyes, oils and resins; minerals such as clay, chalk and talcum; natural oils and waxes such a bee’s wax; milk casein and natural latex.
  • Zero-VOC (volatile organic compounds) : This paint meets the EPA Standard of 5 g/L (grams per litre) or less. It appears that it can still have some chemicals though (learn more about this debate here). Pigments will increase the VOC ratio.
  • Low-VOC: This paint meets the EPA minimum requirement of no more than 250 g/L and no more than 80 g/L for oil based paint to be consider low-VOC. These paints, stains and varnishes use water as a carrier, contain no petroleum-based solvents and have very low levels of heavy metals and formaldehyde. So it can still have an off-gassing effect, just not as significant as conventional paint. Look for paints with the Green Seal Standard (GS-11) certification or the Green Guard Air Control label. Pigments will increase the VOC ratio.
  • So next time you are considering doing a little redecoration in your home, check out these safer alternatives.

    Safer Paint Alternatives

    Acro Pure by Miller Paints (Oregon & Washington) is described by the company as being “free of anything inappropriate, contaminating, extraneous, polluting, or impure.” A buy 1 get 1 free coupon is available in the Chinook book, which was an incredible deal, saving us $30.  Acro Pure is green seal certified and contains ZERO-VOC. The label says absolutely 0 g/L. There was a very slight smell when originally applying but it went away within a few minutes. I was told the smell would be a result of the pigments but not the base.
    Horizon
    by Rodda Paint (Alaska, California, Idaho, Oregon & Washington) – A buy 1 get 1 free coupon is available in the Chinook book as well.
    Old Fashioned Milk Paint – All natural milk casein based paints with earth pigments. Completely natural option that I will be trying next time.
    Green Planet Paints – Another mineral based paint.
    Homestead House Paint Company (Canada)

    For a complete guide on 35 eco-friendly paints, visit Eco-Friendly Paint, The Complete Guide.

    Have you used any of these alternatives? What were your results?

    Comments { 19 }

    Setting Up & Harvesting Your Own Worm Composting Bin

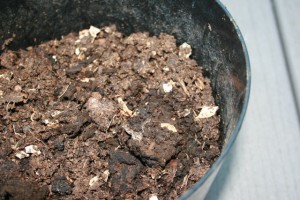
    My good rich compost!

    My good rich compost!

    I began my own composting bin this past February using the helpful starting kit offered through Azure Standard. It is actually a very good deal and an easy way that kicked me into gear to start saving my food scraps and turning them into lovely new nutritious soil. But, you can easily set up your own bin with a few basic supplies. I have finally gotten around to figuring out a simple method of harvesting my bin as it was definitely overdue. I wanted to share a few tips with you that I have learned in the process.

    Why Worm Compost?

    1. No waste! You can use the majority of your food scraps (no meat or dairy) and put them to good use. Composting is all about re-using and recycling! Since beginning composting, we have decreased our garbage quantity significantly. Previously we would fill up the kitchen garbage in one week, but now we can easily stretch it to every two weeks. So it saves money!

    2. Turn your food scraps into rich organic soil. If you don’t have a garden or can’t use it all yourself, this rich soil can be a great gift to a neighbor or local farmer. Your offer will not be turned down.

    3. Worms are fast, efficient, and odorless. The only cause of odor in your bin will be if you add meat or dairy scraps. Avoid these products, bury your scraps well, and your bin will be perfectly odorless!

    4. Worms are self-propagating. You only need to purchase worms once and then they will multiply on their own! You will have a continual supply of good rich compost.

    Continue Reading →

    Comments { 20 }

    Container Gardening: My Favorite Resources

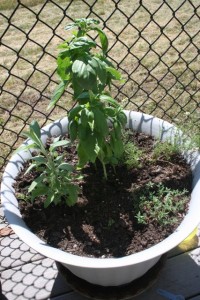
    My herb garden: basil, sage, thyme & chamomile

    My herb garden: basil, sage, thyme & chamomile

    I have been enthralled in the world of container gardening. I am in my second year of gardening, trying to put to good use the limited space I have right now on my back patio deck. I have had failures and successes…but it definitely requires some perseverance and patience. Gardening is such a rewarding experience. Being out in nature, digging in the dirt, watering, and seeing food growing for our nourishment is delightful. I also love watering the garden with my little Karis. She loves helping me pour the watering can into the pots. What a fun way to get her involved in valuing the production of our own food. I wanted to share a few pictures of my garden to date with a few resources I have found very helpful this year.

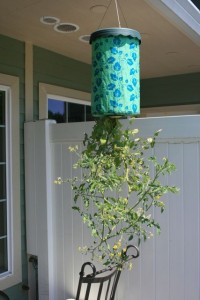
    Topsy Turvy Tomato Plant

    Topsy Turvy Tomato Plant

    Hanging Tomatoes - So far I am delighted to see the success of my Topsy Turvy hanging tomato plant. It is growing an abundance of cherry tomatoes right now. I can’t wait to enjoy them! My tips: water daily as it is quickly evaporates compared to a potted plant. Cut the bottom off a plastic milk jug and puncture small holes in it. Place in the top of the turvy to allow for slow drainage when watering. Keep in full sun. Use water retaining granules.

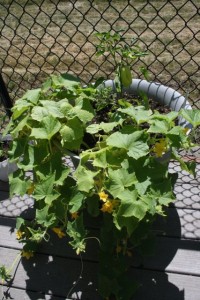
    What else is in my garden this year? Several varieties of lettuce, a herb garden, stevia, cucumber, and three varieties of pepper plants.

    IMG_6148

    Cucumber & Pepper Plants

    Why I love container gardening?

    1. You rarely have to deal with various pests. In my experience, I have not had a single bug problem to deal with.
    2. You rarely have to do any weeding!
    3. Your crops are nicely contained and will not take over. Since some crops can easily dominate your fields, container gardening is nicely self-contained. The crops can only grow as big as the container you supply them for their abode.

    A few books that I have found extremely beneficial for container gardening:

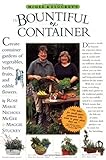
    The Bountiful Container – this resource is the definitive guide on container gardening. It gives detailed instructions on how to grow all varieties of vegetables and flowers in containers. It lacks good pictures or very clear planting instructions, but offers ongoing tips for successful gardening in pots.

    Organic Crops in Pots - this book is awesome! It provides you with easy step by step pictorial instructions on how to plant many different varieties of vegetables in containers. It details what are the best crops to grow in pots with beautiful pictures. This is the best book I have found for beginners that guides you through the potting process so simply. I also love how the author supplies you with creative container ideas. You don’t have to invest in expensive containers. Find old wine barrels, washtubs, baskets, olive oil metal jars, metal buckets, and even canvas bags to do your planting.

    Your Backyard Herb Garden: A Gardener’s Guide to Growing Over 50 Herbs Plus How to Use Them in Cooking, Crafts, Companion Planting and More by Miranda Smith – a very helpful guide for growing herbs! This book describes growing herbs both in the ground or containers. I love the helpful pictures and specific details for growing over 50 herbs and their nutritional and culinary benefits. Also includes details on preparing herbal vinegars and teas for health and healing. Love this book!

    For more ideas and tips for gardening in small spaces, visit here.

    Do you have a container garden? What tips do you have to share?

    Comments { 9 }