Archive | July, 2011

3 Mission-Minded Family Dynamics

by Passionate Homemaking’s monthly contributor, Ann Dunagan.

God has a destiny for you and for your family. He has an individual plan for each member, as well as a “corporate” purpose for you as a family unit. As a mom, God will help you to train each child toward God’s mission for his or her life, and He will help you to focus your family toward making a strong impact for His kingdom — in your community, in your church, among your children’s friends, and in the world.

In a mission-minded family, there’s a God-infused energy. There’s a focus on God’s worldwide purpose. There’s a passion for the lost. There’s a spiritual depth and hunger that reaches beyond the maintenance mode of cultural Christianity. A mission-minded family emphasizes leadership, calling, and destiny. There’s a prevailing attitude of self-sacrifice. And there’s an unmistakable and contagious joy.

I believe these qualities can be identified and summarized in three powerful dynamics.


Dynamic #1: A mission-minded family lives in SUB-mission.

A mission-minded family is totally submitted to God and to His purposes. Like a submarine advancing to its underwater target, it’s under the surface that counts.

It may sound more important to board an overseas-bound 747 or to have the opportunity to influence a huge crowd of people, but these activities may not be God’s best plan for this particular moment (or season) in our lives. We’re all called, as believers, to be a part of God’s worldwide plan; but His expectations for us, as individuals and as a family, may be much smaller, yet possibly even more challenging to obey. Today’s mission-for-the-moment simply may be to open our Bible and read a few chapters or to take a minute to pray for a friend. Maybe right now all God wants is for us to snuggle up on the couch with a little one and read a fun storybook. Or perhaps God’s perfect will is merely for us to quit procrastinating, turn off the computer, and go finish those loads of laundry!

Living in SUB-mission to God involves every area of our lives: our personal maturity (spiritually, mentally, physically, and financially), our attitude toward our marriage, our family priorities, our disciplines in home management — along with our ministry callings. As we allow God to refine those sub areas in our lives, we can trust that He will fulfill all of His mission promises to us, in His timing.


Dynamic #2: A mission-minded family is focused on eternity.

Mission-minded families have a focused purpose for life.

It’s good to consider the godly legacy we will leave for the next generation and important to realize that our day-to-day decisions can leave a lasting example, for good or for evil. But as Christians, and as members of mission-minded families, our godly legacy is not the end. Our ultimate life evaluation will not be determined by the opinions of those we leave behind. Instead, our life will be judged by the One we go to meet—our almighty God in heaven.

A mission-minded family keeps God’s focus in mind. A powerful dynamic is present when you raise your children to walk daily in the fear of the Lord. It’s not about preparing kids to be successful, or to get into a good college, or to make a lot of money to give to missions, or even to do something “famous” for God. Our mission is to love and please God—to live every day in complete obedience.

How this plays out for each mission-minded family will be different. God has unique purposes and callings. But we begin with the end in mind. As we’re raising each of our children—from cuddling our babies, to disciplining our toddlers, to teaching and training our school-age children, to encouraging and motivating our teens, to aiming and releasing our young adults to God’s call for their lives—we keep the target in focus.


Dynamic #3: A mission-minded family is strategically aimed.

Each person in your family has specific gifts and callings, and you also have a destiny as a family.

God has placed you together as a powerful mission-minded unit, so it is important to seek the Lord for His purpose for you as a team.

Our goal is not to raise kids to be popular, famous, or wealthy. The goal is not to somehow get our teenagers to “survive” their youth without tasting a drop of alcohol, puffing on a cigarette, or experimenting with illegal drugs. It’s not enough to “hope” that each child will turn out okay or “trust” that they won’t be “too bad.” As we influence tomorrow’s world changers, our vision must be infinitely higher.

Instead of focusing on the “NO” side of human legalism (emphasizing our never-ending rules), it’s much more fulfilling and productive to challenge young people to live on the “YES” side of God’s life (emphasizing His eternal plans).

As we keep each of our children focused on God’s long-term goals, today’s short-term decisions will make sense. And today’s temptations, by God’s grace, will be easier to withstand.

As mission-minded families, we can seek God’s direction and then begin to serve as God’s facilitators and motivators. If we can encourage our children to discover God’s plans and want to develop specific God-given abilities, it will totally change everything. Instead of dealing with surface issues, we begin to train our children’s hearts and to focus on staying aimed toward God’s purpose. A change at this root level alters everything, from grades in studies and success in activities to confidence in leadership and a spiritual desire to develop God-glorifying friendships.


Mentor Families for World Missions

The post is adapted from my book, The Mission-Minded Family. Right now, our mission outreach, Harvest Ministry, is running a special on my two-book-set (The Mission-Minded Child & The Mission-Minded Family — at our COST!). We also have a new FREE 30-page study guideusing these books (to mentor your family or small group in a 4-week study).

If you’re interested in learning more, please CONTACT me through our website, and put “MM-FAMILIES SUMMER SPECIAL” in the subject line, and I’ll send you more information (with no obligation). My heart is to motivate families for missions — right now, right where you’re at!!!


Missionary David Livingstone said, “The mission of the church is missions.”
I say, “God’s mission for the family is expanding His family!”

Blessings to you and yours!!!
Ann

Comments { 8 }

5 Simple Steps to Freeze Summer Berries

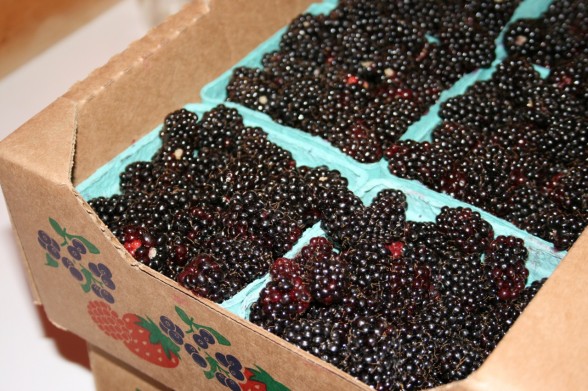
What a blessing to be finishing up stocking my freezer with good produce for the upcoming year! It is so important to our family. We love having an assortment of frozen berries for smoothies, berry sauce, berry desserts, and more. We find local sources of fresh berries when in season that have not been sprayed with various chemicals to preserve. I usually get an assortment of strawberries, raspberries, blackberries, and blueberries for our freezer each summer. Our methods for preservation are very simple. I don’t worry about layering them all out on individual cookie sheets to freeze as it requires too much space and time.
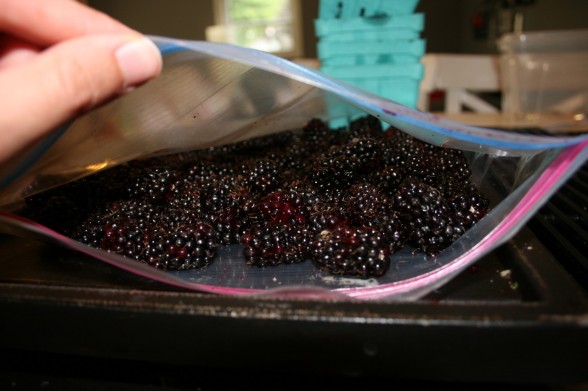
1. No rinsing required! I buy non-sprayed berries so there is no worry of chemicals on them. I will only rinse if I noticed excessive dirt on the berries, but having dry berries is key to preventing them from sticking together in the freezer.


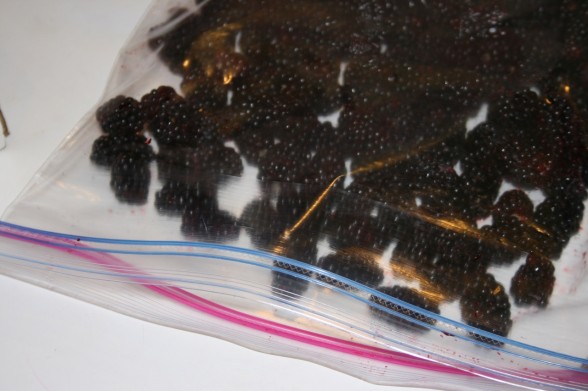
2. Layer the berries in individual gallon size freezer Ziploc bags. Chose the quality brand that are specifically designed for freezer use because you want them to protect your investment of fruit! I empty two pints of berries per Ziploc and gently spread them out in a thin layer. I want to avoid them sticking together, so make sure not to overcrowd them. One to two layers of berries is most effective.
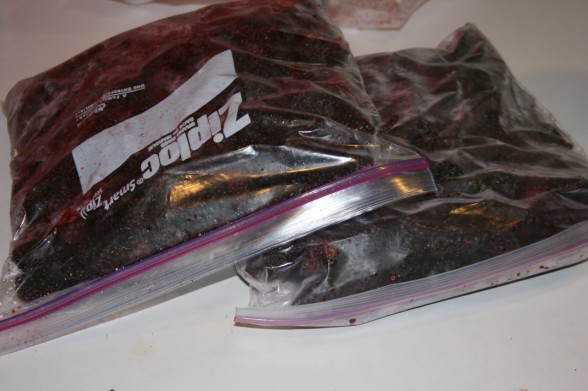
3. Place them on various shelves of your freezer. I simply put one bag on top of each shelf. Try to avoid stacking bags until they are completely frozen. This will again help to prevent sticking berries.

4. When frozen, I like to combine two bags together. I gently break the frozen berries apart so they are only individually frozen. If you didn’t put too much in each bag, then there will only be a few stuck together that easily will separate. I add two bags into one which helps consolidate and save bags. I like to rinse out the other Ziplocs and use them for another purpose.

5. Make sure to press out all the excess air from the bag before sealing. Consolidating bags makes this much easier as well especially after the berries are frozen. A helpful tip for getting all the air out is to place a drinking straw at the very edge of the bag and suck out the air before sealing completely in a quick fashion. Lastly, label the exterior of your bags with a permanent marker to highlight the date that you put them in the freezer. This helps you know which berries need to be used up first, especially if you have leftovers from the previous season (like me!).

Frozen berries should be consumed within 12 months for best results.

Comments { 18 }

Preparing for A New Baby: Essentials?

Our little nursery in our bedroom

I have humored myself by all the things that I have bought and sold on craigslist in preparation for each of our kids. I’ve tried this swing, and that stroller, and this bouncer. There is this certain hype and excitement about having a baby that leads you to want to find the best of everything that would be suitable to meet your needs. Just enter a baby store and you will likely be overwhelmed by the walls of stuff that claim to sooth that colicky baby, or is essential for a peaceful nights sleep, etc. It has finally taken me to this third little one when I have finally figured something out…your baby doesn’t really need much at all. I’ve known it in the back of my head…but I still wanted to all least try it all. You think it would be obvious. But its fun. It’s exciting to do the research for the best stroller, car seat, bassinet, etc. But in reality. Your baby only needs a little tender loving care. And we have to be on guard against wasting too much time in this preparation and planning stage.

So as we welcome our third little one, we have narrowed down our baby supply list significantly…

1. Changing Table on Top of Dresser

I have found this to be the best idea ever! It can change from room to room as needed or removed to the floor. It saves space as it eliminates any need for an additional changing table.

2. Bassinet

A simple Moses Basket will honestly suffice for a baby bed for quite some time. They are easy to transport, bring traveling, and save space. We use the Contours Classic Kolcraft bassinet (thanks to craigslist once again!) that has the removable Moses basket with additional storage beneath which stores baby clothes, blankets, cloth diapers, and burp rags. Simple, cute, and serves us very well.

3. Swaddling Blankets

I loved swaddling my babies for the first several months of their lives. The best choice here is the Aden & Anais Muslin or Bamboo swaddling blankets. They are simply a large piece of wonderfully soft material that wraps snugly around your little one for swaddling. Baby sleeps so much better in this fashion.

4. Burp Clothes

We have found the best option for burp clothes is some simple indian/chinese prefold diapers. They are the most absorbent, useful, and durable. Chose in a premium/toddler size for the best coverage.

5. Baby Carriers

I am a huge fan of the ergo baby carrier! This was the best investment we have made. We tried the standard bjorn and found it extremely uncomfortable to the back. The ergo provides more significant support and works in three different positions (front, back and side). We also love the Moby Wrap as a snug comfortable hands free fit for the early months of life.

These are a few additional items that all our baby’s have really enjoyed, but certainly not essential:

6. Travel Swing

This item is compact and easily movable! This works especially well in small places and can be easily transported upstairs, which was a very nice feature. We also took this with us on a few vacations. It doubled as a bouncer. Worked well from 0-6 months.

7. Johnny Jump-up

I remember the days my younger siblings entertained themselves for long periods of time in this jumper! Great for developing the strength in their legs, small, and lots of fun! I have seen them for $10-15 on craiglist or garage sales. We borrowed a Graco one with a basic tray, which works well for snacks or to give them small things to play with. Works well from 6-10 months or so.

8. Walker

This was a borrowed hand me down from my family. This worked very well as both my kids learned to walk. They both used it for several months, followed by standing up on the edge and using it as a push toy. It worked well on both carpet and hard wood floors. Works well for us from 10-15 months, or until they start walking.

9. High chair

We choice a portable space saver booster seat that secures on top of a chair. This works well especially for small places. It is portable which made it wonderful for bringing on vacation or when invited to other friends’ homes. Made feeding times so much easier! You certainly don’t need a huge high chair that takes up half your dining room! Plus it works great as a transitional seat.

10. Nursing Cover.

This is a handy tool for nursing discreetly in public. Making your own is a fun little maternity project.

Beyond your basic clothes, diapers, basic car seat (whether you choose an infant or convertible style), simple stroller (I don’t recommend the huge trailer ones, as we have found more often than not, that a simple umbrella stroller does the job the majority of the time), and eventually a crib of some sort, you don’t need anything else. Also, always buy these bigger items used on craigslist! You can save so much money in this manner.

Diaper bag? My favorite has been such a simple large hand bag. My current hand bag doubles as a diaper bag.

Nursing pillows? Nice for the first week but ultimately, you figure it out pretty quickly.

Baby bath? The best place to bath your little one is the kitchen or bathroom sink, just like our mommy’s did.

Bath toys? They get moldy. My kiddos are perfectly happy in the bath with just a little toy matchbox car.

Baby toys? Babies will enjoy holding and sucking on practically anything. One or two soft toys is all you need. Sophie the giraffe is the only one on my wish list.

Things we borrowed or bought but then later sold because we found to be nice but ultimately unnecessary in our opinion and mainly adding to clutter were an exersaucer, play mat, car sun shades, and bouncer (the swing covered any need for the bouncer, accomplishing the same purpose).

Overall, I have been amazed how much money you can save by utilizing craigslist! I always recommend that you never buy new. And more often then not I actually made money when reselling various items. It is certainly possible to have babies on a budget!

And of course, feel free to take my recommendations with a grain of salt. This is just my little whisper of experience from my trial and error.

Comments { 69 }

Practical Preparation Tips for Postpartum

Postpartum baby blues affect 50-70% of women recovering from the birth of a child. It is a reality that is important to acknowledge and prepare for. It is important to realize that dealing with a large range of emotions after birth is very common. There are extreme changes happening in your body from various hormones (estrogen, progesterone, oxytocin, prolactin, and thyroid hormone) that occur after birth.
Postpartum blues can include mood swings, crying, insomnia, irritability and other symptoms. Postpartum depression is the second level of baby blues that affects 1 in 10 women. It includes more extreme signs of the symptoms above and may include lack of interest in baby, memory loss, extreme fear, etc. I am one that is very susceptible to postpartum blues. I also struggle with fear of depression from my past experience with it and because it runs in my family. With having a baby in the midst of summer, I struggle with the thought of being trapped inside when everyone else is enjoying the summer. This is a new adventure for me as my previous little ones were born in springtime. How can we together be wisely prepared to deal with these varying emotions?

We want this period to be full of joy and delight as we celebrate the newness of life! It is a beautiful season of life. It is a celebration! A party. It is important to safeguard this special period by taking a few preparation steps…

Get Help.

We need to acknowledge that it is foolish not to seek help from others in advance. I confess I can easily think that I can do it all on my own. I am a perfectionist. I like it done my way. It is my sinful nature that tries to handle struggles on my own strength. But that is not how God intended it to be. He designed our need for others. We need to come along side on another, using our various giftings, to make the transition a peaceful one. It is humbly to acknowledge a need, but we must seek it. In this way God is most glorified as well as we don’t foolishly depend upon our own strength. So humbly ask for help.

Ask family. Ask friends. Hire help if necessary. Ask for freezer meals. Sign up for Meal Baby. Or a casserole shower. Hire a postpartum doula.

Continue Reading →

Comments { 57 }

Scripture Memory with Toddlers

KJV BibleWritten by monthly contributor, Natalie Didlake

Hearing my children reciting scripture sometimes takes my breath away. Their little sing-song voices echo verses back to me as they repeat words they sometimes don’t even understand…”O Lord, you have searched me and known me…” Breathtaking!

But actually buckling down to work daily on scripture memory with little ones…it’s daunting! I used to idealize we’d learn scripture together, but I had no idea how to actually make it happen!

Here are some tips that have really helped scripture memory become a day-to-day reality at our house.

Start small.

To me, the important thing is to do something, no matter how small. It obviously isn’t a good idea to make them sit still for 30 minutes for memory drills right off the bat. We started with about 3-5 minutes of memory work each day. Read the passage in small portions and have your child repeat after you phrase by phrase.

Be expressive. (In other words, sound like you enjoy it!)

Vary inflection of your voice. This really seems to help my kids remember the words. I have noticed that when I accidentally change up our regular sing-song pattern while we’re practicing, they won’t remember it!

Think of it as giving auditory cues to boost their (and your) memory power. The Jews have a long history of chanting and singing the scriptures…and it sure works for them! Historically, it has not been uncommon for them to memorize whole Old Testament books. Phew!

Repetition, repetition, repetition.

Now that my kids know the drill, they actually love repeating the phrases over and over again! Children love repetition, especially when they are engaging and sharing it with others!

I have learned over time how much their brains can retain at one time, usually about 4-6 words. So, for example, I say a few words/a phrase, they say it. I say another one, they say it. And so on. Before long, they know it by heart!

Vary environment.

In college, I used to memorize on my 45-minute commute. It was a nice, long chunk of time, but unfortunately, I couldn’t remember much unless I was in the car! I had conditioned myself to only recall those scriptures during mindless driving. Odd, but true. Hopefully, I won’t set my kids up for this mistake.

Some places we do scripture memory are: lined up on the kitchen counter. Swinging. Snuggled up on the “big bed.” On a blanket in the yard. Riding in the car. On long walks.

This could be a great way of training children that they can interact with God and his Word anywhere, anytime. (See Deuteronomy 6, God’s instruction to parents to teach their children about him all throughout the day!)

Note: When I know my kids will struggle to focus, they sit on the couch, our “usual spot.” Having a neutral, routine environment to fall back on helps us work on memorizing even when they aren’t in an optimal mood.

Stop to explain the scriptures.

I have one child in particular who just loves to know why! How could I possibly turn down all those precious questions and comments when we’re memorizing?

I would never trade all the hours I’ve spent explaining, teaching, answering questions, giving examples, talking, and doing more explaining…for those little “lightbulb” moments when it clicks for them. It’s amazing to realize it actually might be sticking! God’s word really is like a seed! All we do is plant, and then wait and water and watch, and wait some more. (Luke 8:11)

Plus, it helps them remember! I would hardly enjoy memorizing German, why expect them to memorize verse after verse of what’s practically a foreign language to them?

Another note: Sometimes I have to cut off the questions and just plow through memorizing. I have had to accept they won’t “get” everything now. But they can still store it away for later!

Learn long passages.

I know this sounds hard. But it’s really not. It’s like eating a big steak…one bite at a time!

One “bite” at a time, we’ve managed to learn long Psalms, poems, blessings, and parts of the Epistles. It’s been the easiest approach we’ve tried by far!

I prefer to learn longer chunks over individual verses, so that I can keep the context and flow of argument in mind. I’m sure my kids aren’t benefiting from such things as context, at the ripe ages of 3 and 5…but they will later!

Also, it is easier for me to just use my Bible for review. No papers or cards, just a list taped inside the cover. With small children, simpler is always better. Soon, I’d like to have my Bible on our Kindle and work from that!

Explain why we are memorizing.

I periodically remind my kids all the reasons we do Bible memory. It really helps them to hear why, rather than me just “making” them. They are small, but they are human. Why not clue them in?

I reminded them:

Scripture can help prevent them from sin.

I have stored up your word in my heart, that I might not sin against you. (Ps. 119:11)

Scripture can teach them about Jesus, who holds out their hope for life.

You search the Scriptures because you think that in them you have eternal life; and it is they that bear witness about me, yet you refuse to come to me that you may have life.(John 5:39)

Scripture can help clarify their hearts.

For the word of God is living and active, sharper than any two-edged sword, piercing to the division of soul and of spirit, of joints and of marrow, and discerning the thoughts and intentions of the heart. (Heb. 4:12)

Addition from Lindsay:

Take advantage of fun Scripture memory CD’s set to music. Here are some of our favorites:

Songs for Saplings
God’s Word from A to Z

Steve Green’s Hide Em In Your Heart Vol 1
& Vol 2 (I love this version because it comes with the DVD adaption as well)
Seeds Family Worship (a whole series of songs with multiple CD’s for the whole family based on Scripture)

Where should you start?

We have always found it helpful to start with the ABC’s as our guide for memorizing Scripture to begin with toddlers and preschoolers. You can use one of the lists provided in the CD’s above. It helps reinforce the alphabet but also a good review reminder tool.

Otherwise, use simple passages that are meaningful to your family during this time of your life. Is your child struggling with lying? Fear? Obedience? Then, start with doing some word searches to find simple Scriptures that they could memorize to address these struggles.

Other easy lists to begin with:

10 Easy Bible Memory Verses (this list has a fun little coloring page that accompanies each memory verse)

30 Easy Bible Memory Verses (a follow up list to the one above)

My ABC Bible Verses: Hiding God’s Word in Little Heart – this book is an easy place to start as it includes a Bible verse and character story to accompany it.

I do recommend memorizing the entire portion of the verse and not just shortening it as some of these portions do above. I think you will find that a child can learn a lot more than you might give them credit for, as long as you work in smaller portions. I just prefer to give them all of Scripture for their instruction and memory work.

What tips or ideas do you have to incorporate and simplify scripture memory into your family? Can’t wait to hear your ideas!

Photo Credit

Comments { 39 }

Hosting an Ice Cream Social & All the Health(ier) Recipes!

Aaron and I had a blast hosting our first ice cream social this past Sunday evening as a way to reach out and befriend co-workers and other folks we’ve been getting to know in the area. I didn’t want to take on too much this summer while being late in my pregnancy (37 weeks!), but still wanted to take advantage of the lovely backyard we’ve been blessed with and all the sweet friends the Lord is sending our way! So we decided to host an ice cream social. It was a great success and was relatively simple to coordinate. If you don’t have a lot of time or energy or financial resources, but still want to reach out and be hospitable this summer, I highly recommend this idea!
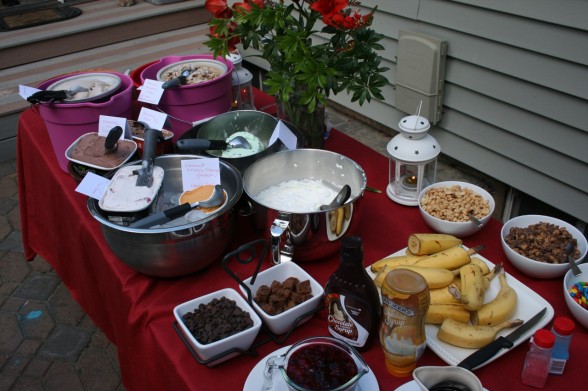
The menu was simple: vanilla, strawberry, and varieties of chocolate ice cream (cookies & cream, mint chocolate chip). I also added my own homemade concoctions of coffee ice cream and banana ice cream (recipes below) with healthier ingredients to meet the needs of those health conscious among my guests. And who doesn’t like homemade ice cream? And lastly, I had a dairy free coconut water sorbet available. For toppings, I assembled bananas, fresh whipped cream, nuts, reese’s peanut butter, m & m’s, and homemade berry sauce and chocolate sauce. We also asked our guests to bring their favorite topping to share, so we had a plentiful supply!

It was so much fun and the ice cream was scrumptious! Did I say that my homemade versions turned out splendidly? Here are my recipes to get you inspired for your own homemade ice cream makings this summer!

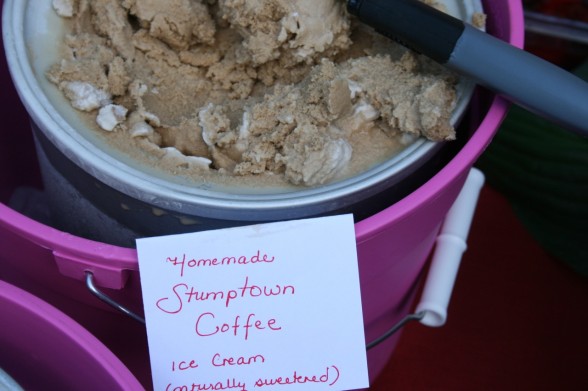
Stumptown Coffee Ice Cream

I made this with our locally roasted Stumptown coffee beans, but you can definitely use any coffee beans. This tasted like a Starbucks frapaccino without all the junk and would make a great summer coffee beverage as well if you cut out freezing process. Yum! You can replace all the milk with all cream for a more creamy texture on any ice cream recipe. Homemade ice cream is also best made the day of within a few hours of serving so it maintains a more creamy texture. The longer it sits in the freezer the more icy it will become.

2 cups strongly brewed coffee, cooled (decaf was my choice in case anyone was sensitive to caffeine)
2 cups whole milk
2 cups heavy whipping cream
2 teaspoons vanilla extract
1 1/4 cup sucanat/rapadura (I used sucanat, but you can experiment with any natural sweetener here!)

Combine ingredients together in a blender until smooth. Transfer to your ice cream machine and follow the manufacturer’s instructions. You can also place in a freezer safe covered container and freeze for several hours till frozen.

Yield: 2 quarts.

Banana Ice Cream

Do you like something fresh and flavorful, yet light and relaxing? Try this banana ice cream. It will satisfy that sweet tooth and still be naturally healthy for you.

2 cups whole milk
2 cups heavy whipping cream
5 bananas
1 teaspoon vanilla extract
1/2 cup raw honey

Combine ingredients together in a blender until smooth. Transfer to your ice cream machine and follow the manufacturer’s instructions.

Yield: 2 quarts.

Want some healthy toppings?

Chocolate Syrup

1/2 cup cocoa powder
1 cup water
1 1/2-2 cups sucanat/rapadura
1 teaspoon vanilla extract
dash of salt

In a medium saucepan, whisk the cocoa powder, water, and sweetener until well blended. Bring to a gentle boil and boil for 6-10 minutes, until mixture becomes thick. Store in an airtight container in the fridge if not consumed in one setting.

Yield: 1 cup.

We use and highly recommend the cuisinart ice cream maker! It has served us so well in preparing more healthy treats for our family with real food ingredients! It whips up a batch of homemade ice cream in 20 minutes!

Fresh/Frozen Berry Sauce

This topping is a favorite at our home from pancakes, waffles, to ice cream! It can be used as a berry syrup for your breakfast topped with some fresh whipped cream!

1/2-1 cup water
2 Tablespoons arrowroot powder or cornstarch
2-4 Tablespoons honey (raw is preferred)
2 cups berries (fresh or frozen raspberries, blackberries or blueberries)

Blend 1/2 cup water, arrowroot powder, honey, and 1/2 cup berries. Cook and stir over medium heat until thickened and clear. Gradually add the remaining berries and enough water to reach the consistency you desire.

Yield: 2 cups.

There is nothing like hospitality to get you motivated to get cleaned and organized. I was amazed how much we were able to get done this weekend in preparation for our party!

Take advantage of the wonderful summer weather and invite a few friends, co-workers, neighbors, or family over for an ice cream social! You won’t regret it!

Other homemade Ice Cream Recipes from my kitchen:

Chocolate Peanut Butter Ice Cream
Coconut Ice Cream
Strawberry Ice Cream

Comments { 32 }

Eating Well While On the Road

Written by monthly contributing writer, Trina Holden.

Summer means road trips and adventures in our family, but along with the fun and change of scenery is the challenge of eating well while away from home. Did you know you can  enjoy the comfort and nutrition of home cooking while traveling with just a little bit of planning? Here are my tips for real food on the road, actually written from our campsite in PA. while attending Creation Festival Northeast. We’re saving money and enjoying delicious, home-cooked meals the entire trip, thanks to these menu ideas…

While on the Road…sandwiches get old fast. I like to packed hearty salads and pepperoni rolls to spice things up. Try these quick and tidy meals for in the car or at a rest stop.

  • Taco Salad To Go: Layer seasoned meat, shredded lettuce, grated cheese, and chopped veggies and beans of your choice in a bowl with a lid. Pack sour cream, salsa, and chips on the side. When you get hungry, throw the toppings on, put the lid on and shake it to mix.
  • Rice Salad: Combine cooked rice, cooked and chopped chicken, sliced avocados, slivered almonds, chopped celery, and dried cranberries. Make a simple dressing of mayonaise, yogurt and a bit of curry powder. Store in the cooler. Refreshing and filling!
  • Pepperoni Rolls: Roll pizza dough out into a wide, thin rectangle. Spread sparingly with pizza sauce, then sprinkle with grated mozzarella cheese, basil, and chopped pepperoni. Roll up jelly-roll style and slice into 1 inch thick sections. Place cut-side up on a greased baking sheet. Brush with beaten egg, sprinkle with Parmesan cheese, and let rise for 30 min. Bake at 350 degrees for 25-30 min. Enjoy fresh and hot OR cold and packed in the cooler – great for passing to kids in the back seat!

At Your Destination...The secret to nourishing, tasty meals on vacation is doing the work before you leave and planning meals you can heat and serve with minimal effort. I begin filling my freezer weeks in advance of a trip by doubling a night’s dinner and freezing half for the trip. Meals that work great for this include:

  • Sloppy Joes: Sauce and Rolls freeze well, and the rolls won’t get crushed as easily if they’re frozen!
  • Pizza Dough: Thaw the dough while you’re hiking or at the pool, have everyone pitch in with toppings for a great family dinner when you get back.
  • Meatloaf: Season and shape meatloaf in advance. Throw it in the oven with a few baked potatoes and serve with fresh, local produce.

Roughing It With Real Food…Camping may be the most challenging place to attempt real food, but again, planning ahead gets you there. Frozen meats and other foods will keep several days in a sealed cooler, so use one cooler as ‘fridge’ and one as ‘freezer’ and only open your ‘freezer’ once a day to pull out dinner.

  • Hamburgers: Make your own hamburger and hotdog buns ahead of time, freezing them to keep them from getting crushed on the trip. Season and shape, and freeze hamburger patties ready for the coals.
  • Marinade: Freeze chicken or steak in your favorite marinade so it’s all ready for the grill.
  • Chili: Don’t overlook the simplicity of a good pot of soup. Choose something that doesn’t burn easily (vegetable beef stew, chili, or goulash). Make ahead, freeze, and it will help keep the rest of your cooler contents cold.

I hope these tips help you realize that “Bon Voyage” doesn’t mean “Farewell” to good, home cooking. You can take your diet convictions and comfort food with you on vacation and get the best of both worlds.

What are your favorite travel-worthy menu ideas? Please share!

For more tips for travel, check out Healthy & Frugal Travel Meals.

Comments { 15 }

Fun Early Learning Resources for Summer or Any time of Year

With summer upon us and the quickly approaching arrival of our third child, I was trying to plan some fun simple activities that my preschool daughter could work on that wouldn’t require much time or energy on my part. I wanted something educational but different from the normal schooling routine. I wanted some activities that could be self-directed while mommy might be busy with a new little one. I came upon these few resources that I have been absolutely thrilled with. And did I mention my daughter loves as well?

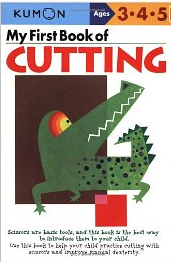
Kumon Workbooks -  I recently stumbled upon this series of hands on workbooks, and my daughter has been making her way through the My First Book of Cutting workbook and absolutely loves the various cutting exercises. They are simple and yet have really strengthened her eye and hand coordination. They are an easy tool for basic childhood development while being very self-directed for the most part. These workbooks range in skills from cutting, drawing, mazes, tracing, pasting, to basic math and language skills, all for a 3-6 year old level. They even offer a First Steps series for as young as 2 year olds with basic cutting, pasting, and coloring practice. We plan to use these this fall with my toddler while sister is working on her own school, along with this cut little pair of first scissors. These workbooks could easily be used alone for a solid start on preschool.

Brain Quest -We started the Brain Quest preschool question pack and what a fun little hands on learning tool. Most of which were pretty easy for my four year old, but still offered fun review and helped solidify some concepts she is weaker in. It’s great for the car or just a simple self directed activity. With full cover pictures and self-checking ability, it has been lots of fun to do together or on her own. We look forward to picking up the Brain Quest Kindergarten as well!

Taro Gami Coloring books -These coloring books are pretty unique. Taro Gomi is a Japanese illustrator that inspires kids to color, draw, imagine and create from unfinished picture prompts. They are also huge, with each volume having somewhere around 400 pages. They inspire imagination in a fun way. Rather than having all the pictures ready to be drawn, the child is encouraged to finish the drawing on their own, such as draw the apples on this tree, and now draw you eating the apples, or draw clothes on the child, etc. These books are certainly suitable for older children as well and may be slightly advanced for a young child.

What Your Preschooler Needs to Know – This book is packed full of fun poems, short stories, classic read alouds, simple history and science stories. It has helped me learn how to dialog more effectively with my daughter through our reading experiences to increase comprehension, retention, and narration with lots of helpful teaching tips or question prompts at the side of the page. There is a thorough article at the end about reading aloud to your children with practical tips on making your read aloud time most effective. My little ones love all the sing-a-long poems with simple hand motions or dancing movements. Each day they pull out the book and asks me to read this or sing that. Lots of fun interaction together (with both toddlers and preschoolers)! You can also purchase activity guides that accompany this book.

Thanks to FBS Books for the sampling of some of these products!

What are your favorite early learning resources?

Comments { 5 }

Basking in Beauty – the Joy of Prayer Walks

There are two things that have been most difficult for me to accomplish as a mom. In my physical needs, exercise is most lacking, and in my spiritual walk, prayer has often been limited to the dinner table. Exercise for one because I don’t care for it. It’s really last on the “to-do” list, and that’s not because it is not important, but rather because its very difficult to do with little ones in tow. How fast can I really walk with two little ones that desire to walk or ride their bikes beside me?

I also passionately desire to grow in the area of prayer. I understand the importance and power of walking in God’s presence throughout the day and desire to grow ever more in lifting up the cares and concerns of others and the world around me through it. I know that as women we can accomplish much for the kingdom through prayer. I want to be known as a woman that is a passionate prayer warrior. But when to do it?

After much prayer over the last few months trying to figure out a means of accomplishing both of these goals, the Lord gave me a little idea. Why not kill two birds with one stone? Let’s take a prayer walk.

Ahh…what a glorious idea. Get out in the beauty of His creation, get walking (or jogging, whichever suits you) at a good aggressive pace, and pour out your heart to the Lord. So I started getting up a bit earlier two days a week, Tuesdays and Thursdays, before the kids were awake and before my hubby left for work, between 6:30-7:00am, after my personal devotions. I get dressed, get bundled, and go out, rain or shine (a trusty umbrella is a useful tool), and head out on a 30 minute walk. No one is out to hear me. No one really cares. It’s just me, the Lord, and my trusty Ipod that enables me to read Scripture (you can’t go wrong praying Scripture), memorize Scripture, and provide little prayer reminders as needed (jotting down prayer requests in it as I hear them). And its completely free!

I am so much more motivated to exercise in this way. Being out in creation serves as a reminder to help draw me into a spirit of worship. You can go as long or short as your schedule allows. You don’t have to go in the morning either. Mornings work best for getting me spurred on for the day, but you can certainly do it in the evenings as well.

If your spouse is not around at a doable time, don’t let that hinder you. Lock up the house and circle laps around it or in close proximity to it. Carry a monitor if needed. ;) I honestly have done this, because these two things are important to my body and soul.

Being in the fresh air is glorious for the soul. It strengthens the weary heart. It renews the energy. And it reminds us what it is truly all about…the magnificence of our Creator. Pouring out my soul before Him provides such grace for the day. He cares about every little thing, concern, or fear on my heart. He has open ears.

This is the confidence we have in approaching God: that if we ask anything according to his will, he hears us. And if we know that he hears us—whatever we ask—we know that we have what we asked of him. (1 John 5:14-15)

Photo Credit

Comments { 37 }

Simple Homemade Gift for Cherishing Little Hands

Post by Contributing Writer, Michele Augur.
Those little hands grow so quickly!

Capturing children’s hand prints is always a fun way to cherish precious childhood moments, and share them as gifts with others, too.

For Father’s Day, I embroidered my children’s hand prints, and framed them as a gift for Grandpa.

It didn’t involve any special embroidery techniques; just a straight backstitch. No sewing machine was needed; I did most of the hand stitching in the car on a short road trip!

My small project (with just 2 hand prints) only took a couple hours, and was much less messy than a previous paint project.

I cut a small scrap of unbleached muslin fabric to fit the frame, and each child chose what color thread he/she wanted their hand print to be.

Then, using a pencil (scraped from the bottom of my daughter’s book bag), I traced each child’s hand onto the muslin fabric.

[Ideally, you may want to iron the fabric first, but I was in the car. Guess the wrinkles give it more of that child-made look?]

Then, I just embroidered onto the pencil tracings. I also embroidered the year onto it, since the years fly by so quickly! It’s ok if you’re not an “experienced,” proficient sewer. Those lines can be a bit wiggly; just like those children’s hands!

I added the completed project to a $1 frame, and packaged up the gift. Total cost: Less than $2!

Comments { 14 }