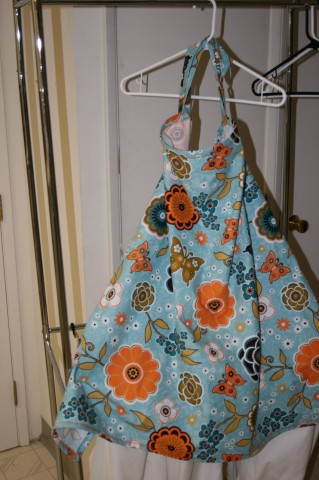
 A nursing cover is a huge asset to have as a new mom as you begin exploring the world of breastfeeding. I have been making my own for several years now. I love to give them as gifts to new moms because they are so nice to maintain privacy and comfort on the go. Nursing covers can be relatively expensive and easy enough to make in the comfort of your home with some basic supplies and simple sewing skills. I usually spend no more than $8-10 for all the supplies necessary for this project. Here is a little tutorial of my most recent cover for your use. This is a large nursing cover, measuring about 42″ x 30″ in the completed product. Most of the standard nursing covers on the market are far smaller and make it more awkward to keep yourself fully covered. I purposefully made this latest one significantly larger to test. The recipient shared that it was a huge improvement! You can certainly adapt the pattern to your own needs by adding extra or decreasing in size as desired.
Supplies:
1 1/4 yards fabric of your choice
19” inches in length of 1/2 inch wide boning (the same material used in bras)
2 D-rings
1. Wash and dry your fabric to pre-shrink it. Iron as needed.
2. Cut out a rectangular shape of roughly 45 inches in width by 33 inches in height.
3. Cut a 3 inch by 42 inch strip of fabric for the neck strap from the base of your fabric.
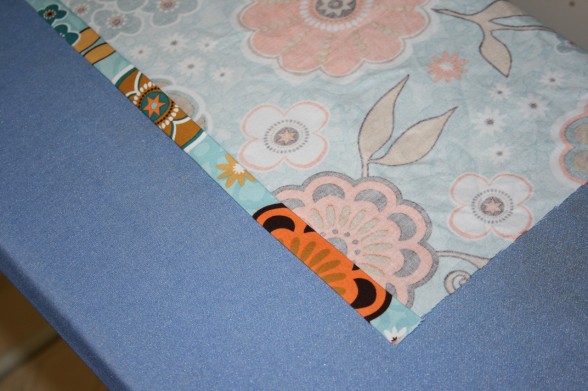 4. Now you will begin to sew around the circumference of the fabric for the nursing cover. I find it easiest to fold over the edges of every side by about 1/2 inch (tucking the bare edges under twice for security, a double fold). No need to be perfect. I iron the seam as I made my way around the fabric so that it is secure and ready to be sewed. For the top edge (where the neck straps will go), make it more of a 3/4 inch fold, which will allow sufficient room to sew in the boning and neck strap.
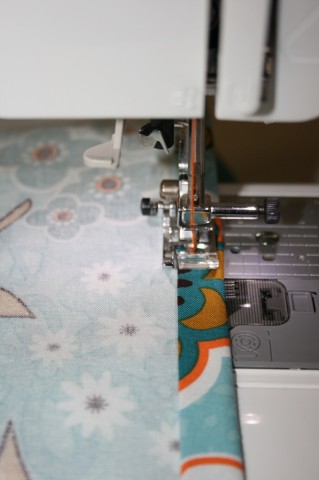 5. Take the nursing cover and sew a 1/2 inch seam around the 3 sides. You can do a zig zag pattern if desired for fun. Do not sew the top side!
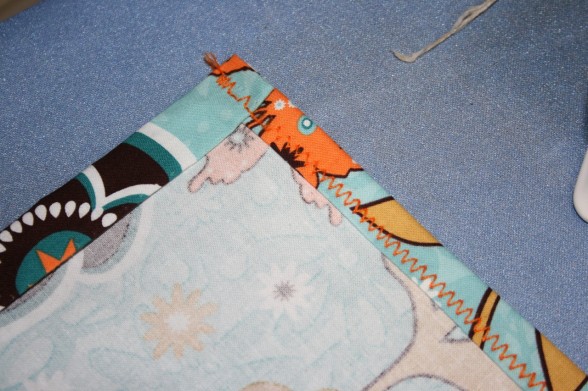
The top edge remains unsewn until we add boning and straps
6. For the neck strap: Take your 42 inch by 3 inch strip and fold in half lengthwise with the right sides together. Sew a thin seam at the very edge of the fabric for the total length of the fabric. I like to swerve the line inward at the end to make a point for easy tying. Leave a little freedom at the beginning for easy reversal of the fabric. Trim any excess fabric. Then tuck the fabric through the opening at the bottom (using a loop turner or a safety pin attached to the open side) to reverse the fabric and bring the right side to the front.
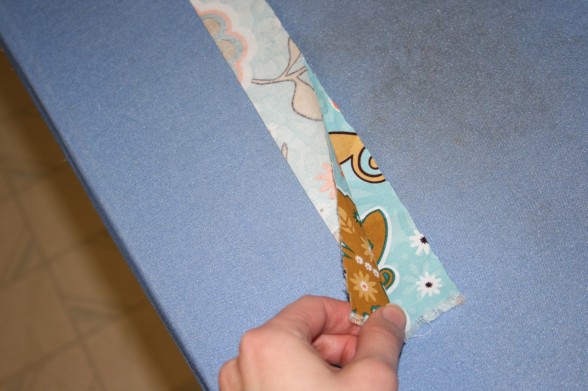
7. Once inverted to the right side, cut the neck strip into two sections, one equally 8 inches in length (as seen below) and the other the remaining 34″ in length. The 8 inch portion will be for the D-rings and the 34 inch strip will be to tie through the rings to adjust the nursing cover to the right distance from your body. It provides a little window so you can peek in at baby during nursing.Once cut, insert the fabric through the d-rings on the shorter portion. 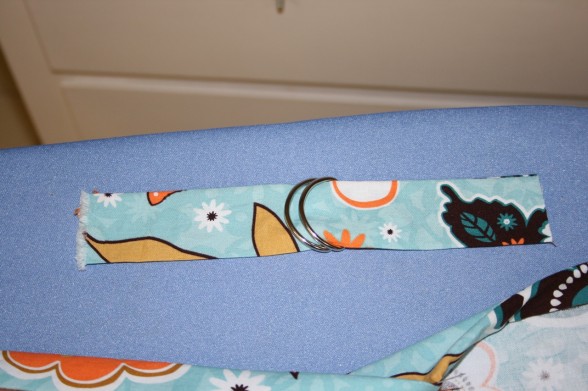
8. Add the boning: Now take the top edge of your nursing cover (the one that is not sewed over), and tuck your boning strip underneath the fold, directly in the middle. You will want to measure from each side to make sure the distance is equal. Pin in place. Do not sew yet!
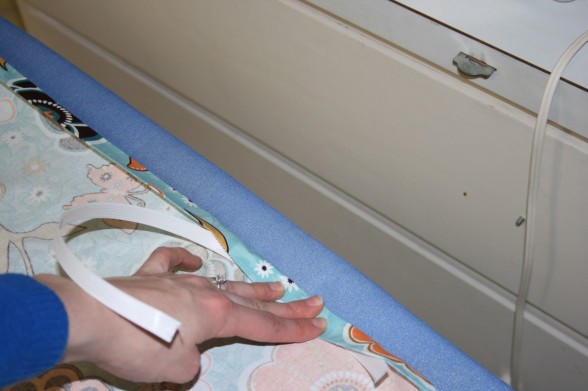 9. Add the neck straps: Now place the two neck strap pieces at opposite ends of the boning. I like to place them halfway over the edge of the boning to keep everything secure. I usually attach the long strap to the left side of the boning and the short strap with d-rings to the right side of the boning. Tuck the edge of your neck straps underneath the fold and pin everything in place.
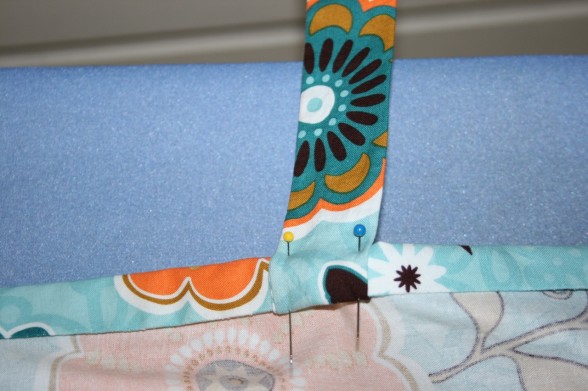
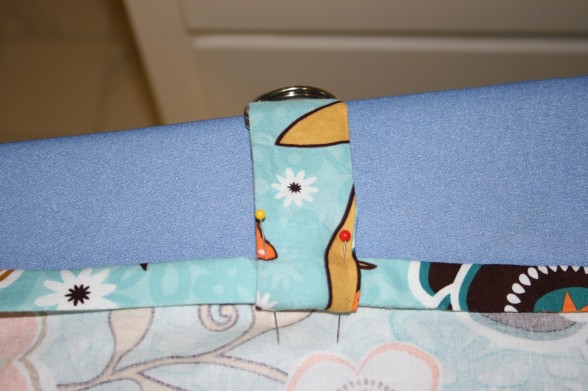
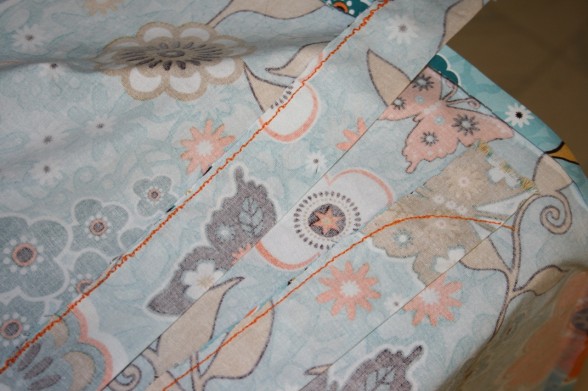
10. Sew all along the bottom edge of the fabric from side to side. Add a second seam at the top of each of the neck strap portions for extra security (as seen in the image below).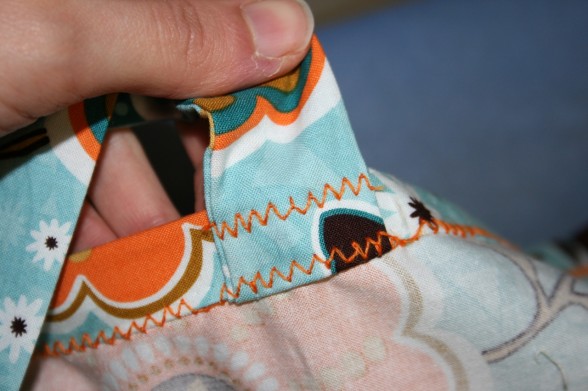
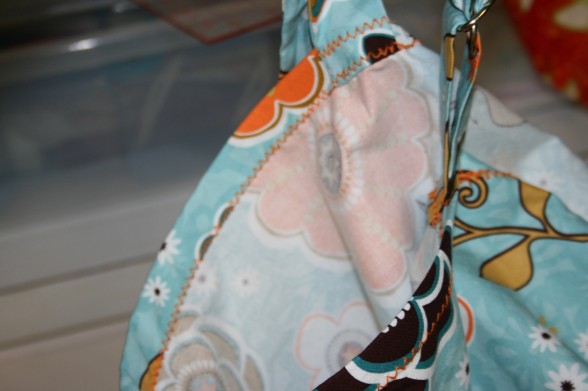 A photo of the completed neck line
11. Tie the long strap through the buckles and your nursing cover is complete!
Thank you Lindsay!
Just made mine out of a white eyelet cotton. I am so pleased with myself. It looks really nice. Just 3 more weeks (give or take) and I will get to try it out. Thanks for the brilliant tutorial.
Thank you, Lindsay. I had a pattern and have made several covers, but had lost the pattern. I just used bias tape for the neck strap so it could tie it in the back, since I didn’t have “D” rings. I had the fabric on hand and used the stuff that you can use to make belts in place of the boning. I hope it will wash okay…..In other words, everything I had was on hand. Pretty inexpensive nursing cover, huh? Thanks for the simple tutorial. Blessings to you!
NaNa
Just made a cover using your instructions. Great pictures and clear instructions. I paid big $$ for my first one and am thrilled to have saved $40-$9=$31 on this one. Thank you so much!!!!
Thanks for the tutorial! I do have a nursing cover made by someone else, but I want to try a different size. I am thinking of just using ribbon for the straps – even easier!
Thanks for posting this. I’ve seen other similar tutorials, but yours encouraged me to try it. I am an experienced sewist, but do more fashion sewing. This is a great project and the finished product turned out perfectly. I have worked with rigiline boning before and it’s a good idea to melt the ends under a candle flame to prevent the ribs from shiftin. Super tutorial!
BTW, boning is available at JoAnn’s and many online sources. I used basic quilting cotton for this project.
I will survive nursing school – Great Video!
http://www.mediafileshare.com/video/162
Thank you so much for this! I plan on making one this week(: As a soon to be mommy I went out and bought a couple nursing covers, they felt so small I found myself thinking “I’m gonna have to practice getting this thing on before I take it out in public!” hahaha
I am planning to try this larger size out for a friend. I have made a few based on a commercial one, but my kids got so restless as they got bigger, that it really was too small. This last time, I probably used the tail on my ring sling more than the nursing cover. I just bought this boning on Amazon: http://www.amazon.com/gp/product/B0048VCHF8 10 yds for $5.75 should make me a lot of nursing covers:)
Linsay, I love this! I’ve been fighting the blanket with the last three kids and made the cover as a weekend project beofre #4 is expected in the Fall. I don’t know what I like more … how simple the project is or how wonderfully large and accommodating the cover is. Either way, LOVE it! Thank you for posting! I put up some pictures of my finished product on my family blog: http://wp.me/p1wvBY-il
I bought a nursing cover like this with gift money I received after the birth of our daughter. I LOVE it!! I can nurse and visit and not have to worry about anything showing. The boning is great because I can peek down and see how she is doing. I’ve tried just using a blanket and it is so awkward compared to my cover.
Maybe I’ll try making a second one now that I have instructions!!
I have never made one with boning, but I think I might try it. I just leave that out, and I use ribbon and velcro for the strap. Your strap seems nicer.
One thing I love about what I’ve been doing is that I use linen and line it with muslin. It’s so very breathable and light, and folds up so small! And because I’ve found that you only need one nursing cover, I really enjoy embroidering them. I used mine for over a year and I plan to use the same one next time, too. (And I really dropped a lot of food on it…tomato soup! The linen washes up so nicely.)
I made one for baby #1 and it was so great and much cheaper than buying one. I cut a piece of the plastic off of a 4Litre ice cream bucket to use for the boning because I couldn’t find any to buy and it worked great!
Hi I was wondering if the plastic folded and unfolded as well? Boning is hard to find…
Thanks!
i think it is a bit more flimsy. however i would often fold my nursing cover and store it in my diaper bag. i was just careful to fold it nicely and not jsut stuff it into the bag and it held up fine.
Beautiful fabric! I loved my nursing cover, it made nursing any where very comfortable.
Great tutorial, thanks so much for sharing! That is a very cute print you chose. I will definitely be making a few of these.
Lindsay, thank you so much for this tutorial! I am expecting number 2 and am planning on making myself a few goodies. A nursing cover is a must for me. My hubby and I are helpers at a church, and modesty is definitely a must for us! This is great! Thank you again!
Good tutorial! I wanted to make my own with baby #5 but never got around to it. I ended up buying one and you’re right about the nursing covers on the market being a bit too small. I found it to be a hassle because I was tugging it back and forth trying to stay covered so I went back to using my muslin swaddling blanket as a cover.
Thank you for posting this! I will be making a couple for baby #3 on the way. I think I will add some terry cloth on the inside bottom portion for wiping up any messes. A commerically made cover had that and it came in handy.
thank you for this series on all things motherhood related!
it is a bit bittersweet for me… last week our four foster kids (whom we were hoping to adopt) were reunited with their birth mother. but i am also pregnant with our first biological child, who should be coming into the world in about 4 months.
motherhood is a blessing and a beautiful calling, thank you for affirming that!
I was given a nice big nursing cover like this one as a gift after my second baby — it works great but I needed a couple more as I always wished I had another…so I just sewed a 3/4 inch wide ribbon on the end of a large receiving blanket. Worked just as well and was SUPER quick with a new baby around (and a toddler!)
Yeah i just used a large blanket, no ribbon. Worked well, didn’t need a cover. Just wore a nursing cami, w/a t-shirt, or button down shirt when I was out of the house.
Still can’t see spending money on a cover when I can use a blanket. I did have one child who hated the blanket, but by the time I had her, I was a pro and wasn’t worried about anything showing.
Aha! Boning! I made a nursing cover for a friend recently and the only thing I could find to make the stiff part was interfacing tripled over. It still wasn’t nearly as stiff as I wanted. I’ll definitely be using this great tutorial for future covers.
Nice tutorial!
this is such a great gift… I just made one for a friend… it was so easy and she loved it. After I made it, I read somewhere that you could substitute part of a plastic milk jug for the boning. I might give that a try for my next one for an even cheaper gift!
Thanks for the great tutorial! Where do you buy boning? I am excited to try this project and what a great gift to give too.
You can find boning at any fabric store along with all the other supplies.
Lindsay,
I am having trouble finding 1/2″ boning. Plenty of 1/4″ covered, but no 1/2″. Is the half inch measurement the boning itself or does it include the covering? Thank you!
1/4” boning should work, it just might not be as strong around the neck line, but will still accomplish the goal.
Thanks
What kind of fabric did you use for this project? Is it duck cloth or some other kind of heavy cotton? I’d love to try this project but am not really sure what to use…
Just standard cotton fabric…nothing fancy.
Awesome! They are so expensive to buy for what they are! Thanks for the DIY!
Great post, very clear instructions and great pictures! Thanks, Lindsey. Question: how do you organize and store craft/sewing supplies?
I honestly don’t keep very much sewing supplies. I have one tupperware box of fabric scraps and one drawer by my sewing machine with thread and various other tools. As to craft supplies for the kids, I also just use two small tupperware boxes with their supplies.