Archive | March, 2010

Resources for a Purposeful Easter Celebration

Need some helpful purposeful tools for celebrating Easter this year?

Jesus, Keep Me Near the Cross: Experiencing the Passion and Power of Easter 
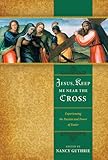
by Nancy Guthrie. It’s a collection of twenty-five short readings with contributors such as Martin Lloyd-Jones, J.C. Ryle, R.C. Sproul and more. A great tool for family devotions or reading together in the evening in preparation for Easter.

The Very First Easter 
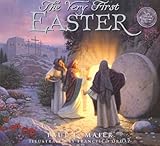
by Paul Maier. Have you been looking for a resource to help teach your children the importance of this holiday? Check out this wonderful story retold in simple and yet powerful language.

Family Bible Readings for Holy Week by Carri Garvey (a long time friend of our family) is a helpful devotional guide for the week prior to Easter Sunday. She shares: The media makes so much more of other holidays, yet to us as Christians, Easter should be THE MOST IMPORTANT. Here is a Holy Week Devotional for your family to help you make the week special and build up the anticipation of celebration on Resurrection Sunday.  Please feel free to print and use it however you like.We invite you to use this resource together with us this next week.

Make your own Resurrection Eggs or purchase a set of Resurrection Eggs- a fun way to retell the story of the Resurrection.

Hot Cross Buns recipe – Traditional bread for Good Friday, with the cross as a symbol of Christ and the resurrection, in a healthy fashion! Fun baking project with kids.

How to Naturally Dye Eggs – ideas for dying eggs naturally!

Easter Cookies – cookies for easter with a purpose!

Let us rejoice together in the wonders of Christ’s coming, death, and resurrection and the glorious grace that was purchased for us!

How do you seek to make your Easter celebrations purposeful?

Comments { 11 }

4 Items You Don’t Need In Your Bathroom

Photo credit

Here are four standard bathroom products that you can eliminate rather easily. Yes, the market tries to persuade you that you need this and that for the best look or feel. But are they truly all necessary? Here is your opportunity to fight back!

1. Shaving Cream

What is the purpose of shaving cream? Supposedly, it is to protect you from cutting yourself while shaving, correct? So I thought, until I really evaluated whether or not it served its purpose. Maybe 50% of the time. The other 50% of the time I would get cut, scratched, or hurt in some way. Both my husband and I shared this experience. Then I decided there had to be some way I could just live without it.

Alternative #1: Hair Conditioner. Conditioner is a perfectly useful alternative to shaving cream, and yet it clogs the razor and dulls the blade quicker. And as you will see in #2, we’ve eliminated this product, so its no longer an option at our home.

Alternative #2: Bar of Soap. Yes, the simplicity of a bar of soap does the trick! Scrub yourself down and shave in the process and you just eliminated another purchase for your bathroom. Guess what? My husband prefers this method too. We both agree that we cut ourselves far less, our skin remains soft and moistened, and we get a perfectly clean shave. My technique in order to avoid extra waste is to lather up one leg with soap, and before washing it off, I shave immediately, and then wash down. This works to help use the least amount of soap possible for both jobs of washing and shaving. We recommend a good natural bar of soap such as Dr Bronners.

Alternative #3: Nothing. Some would argue that you can use a little water and go for it (but I personally prefer the soap). :)

Save yourself a few dollars each month and take it off the list. It works.

2. Hair Conditioner

Hair conditioner is a nice product to have. It does help produce that silky smooth appearance. But is it necessary? We’ve lived without it for quite some time.

Alternative #1: Apple cider vinegar (Approximately 1-2 Tbls. cider to 1 cup water). If you don’t mind the fragrance, try a squirt of apple cider vinegar in your hair for its natural de-tangling ability. Or add a bit of essential oils to balance out the scent.

Alternative #2: Coconut oil. Applying coconut oil after showering as a leave in conditioner is very effective. It can be used as a curling gel for my hair, or a smooth gel for my husbands hair. Just remember…a little dab will do you. Too much and you can have a greasy look. It is wonderfully nourishing for the hair.

Save yourself a few dollars and use something you already have or skip it altogether.

3. Make-up Remover

Alternative #1: Soap and water. Yes, it works quite nicely.

Alternative #2: Coconut oil. Apply a little coconut oil to a cotton ball and apply to eyelashes to remove mascara and all other products on your face. Moisten your skin while removing make-up at the same time.

4. Aftershave

Alternative #1: Shea Butter / Coconut oil Combo. Check out our homemade aftershave recipe. (The hubby thinks this works the best!)

Alternative #2: Coconut oil (surprise!). While not as soothing as the combo above, coconut oil makes a great alternative in a pinch.

I could go on to share how you can also make your own shampoo or go the no-poo/baking soda route, how to make an effective homemade deodorant, and so on, but we’ve already been there before. Check out all the wonderful uses for coconut oil that we have compiled for further inspiration.

This post is part of Fight Back Fridays.

What items have you eliminated in your bathroom? What creative alternatives have you discovered?

Comments { 105 }

Guest Post: An Introduction to Sourdough

Today, I welcome Amber Eisler to share a with us about the benefits and how-to’s of sourdough.

Sourdough is often thought of as a mysterious, temperamental, or outdated ingredient.  However with a little information and experience anyone can bake using this traditional method of incorporating a live culture.

Sourdough is wild yeast and desirable bacteria living in a mixture of flour and water.  It likely originated in ancient Egypt around 1500 BC.  Sourdough will cause dough to leaven or rise, and can be used in place of commercial yeast. Sourdough is acidic, and contains various strains of lactobacilli that contribute to the development of flavor.

Baking with sourdough is a relatively slow process, as it does not leaven as fast as commercial yeast.  During this slow rise the lactobacilli goes to work fermenting the dough.  Through fermentation, the simple elements of flour, water, and salt are transformed into dough with wonderful, complex flavor.  The slow fermentation also allows more time for the flour to hydrate, or soak up water.  A higher hydration produces a moister, lighter crumb texture.  The acidic nature of sourdough also improves the keeping quality of the bread.

Using a sourdough can improve the nutritional value when baking with whole grains.  Whole wheat flour is more nutrient rich than white flour; however, bran (present in whole wheat flour) also contains phytic acid which binds minerals such as calcium, zinc, iron, and magnesium, making them difficult or impossible to assimilate by the body.  Fermenting the flour with a sourdough culture neutralizes the effect of phytic acid, so the body is able to absorb the nutrients that the whole grain contains.  Many people find sourdough breads more digestible whether or not they contain whole grains, a phenomenon usually attributed to the lactobacilli aiding the digestive process.

Keeping a sourdough culture lively and active is simple and easy once you establish a routine.  There are many resources available to learn how to keep a sourdough culture, which requires a minimal amount of time and effort.  For in-depth information on how to start and keep a sourdough culture check out informational videos on www.breadtopia.com, or refer to the sourdough primer on www.kingarthurflour.com (or check out the variety of sourdough starters available through Cultures for Health). Basically, the culture will need to be “fed” an equal portion (by weight) of flour and water.  Stir it up and let it rest at room temperature until it is bubbly and fragrant.  Use the amount needed for your recipe making sure to save some “seed” for your next batch.  If the culture is left at room temperature it should be fed about twice a day.  Otherwise, store it in refrigerator if you won’t be baking for a few days.  If the culture is kept properly, the flavor in the final dough is mild, pleasant, and not bracingly acidic.

One of the easiest ways to get your feet wet using sourdough is to make sourdough waffles.  Following is a simple, delicious, and nutritious recipe for whole wheat sourdough waffles:

Sourdough Waffles

2 cups Whole Wheat Flour
1 cup Sourdough culture (bubbly and active)
2 cups Milk or Buttermilk
1 tablespoon Maple Syrup
2 Eggs
¼ cup Butter, melted
½ teaspoon Salt
1 teaspoon Baking Soda

Combine the flour, sourdough, and milk.  Allow to rest at room temperature for 8-12 hours.  Whisk together the eggs and butter.  Add all remaining ingredients to the flour mixture.  Whisk until just combined.

Cook in a waffle iron.  Serve with maple syrup, yogurt, and fresh fruit.

Whole Wheat Sourdough Bread

Here is a recipe for basic 100% Whole Wheat Sourdough bread (pictured at the top of this post).  This recipe yields one large, hearty, versatile loaf.  We use it for toast, sandwiches, or just slathered with butter:

1 cup Sourdough, bubbly & active (about 8 hours after feeding)
1 ¼ – 1 ½ cups water
3 ½ cups Whole Wheat Flour
1 ½ teaspoons Salt

Mix all of the ingredients with a wooden spoon, dough whisk, or by hand until the dough comes together.  Add water as necessary to achieve a wet dough.  Turn out of the bowl and knead by hand for about 5 minutes, or until the dough becomes elastic.  It should be somewhat wet and tacky.  Resist the urge to add more flour!

Place the dough back in the bowl and cover loosely with a towel.  Let it rest for 3-4 hours, gently deflating and folding the dough every hour.  If your kitchen is cool (as mine always is in Vermont!) you may extend this resting period up to 6 hours.

Shape the dough into a tight round ball and place seam side up in a bowl lined with a floured linen or cotton tea towel.  Alternately you can shape it into a rectangle and place it in a greased loaf pan.

Let it rise in a warm place for about an hour.  Or place in the refrigerator for a very slow (overnight) final rise.

Pre-heat the oven with a pizza stone on the middle rack to 450.  When the oven is hot, place a square of parchment paper on a bakers peel or an inverted cookie sheet.  Turn the dough out onto the paper so the seam is now down.  Slash the top of the loaf with a serrated knife (to allow steam to escape and for further expansion in the oven).  Slide the dough onto the pizza stone.  Bake for 20 minutes at 450 then turn the oven down to 400 and bake an additional 30 minutes.  If baking in a loaf pan the pizza stone is optional.

A few tips when making whole- grain sourdough bread:

The wetter the better!  Remember that the flour will continue to absorb water during the fermentation (rising) process.  When the initial mix is complete, the dough should be slack.  Excess flour will yield a dry, crumbly, dense loaf.

Add steam.  Steam in the oven allows the bread to get maximum volume and good texture.  Place a small pan with a half cup of hot water in the bottom of the oven just after you load the bread in.

Practice often and have fun!

Amber Eisler is a Christian wife, mother, and part-time bread baker.  She lives in Vermont with her husband Doug and daughter Abigail (2).

Helpful Cookbooks:

Baking with Sourdough – a wonderful collection of 21 recipes
Classic Sourdoughs: A Home Baker’s Handbook
Wild Bread – Handbaked sourdough artisan breads in your own kitchen – one of the best sourdough cookbooks available

Further Resources:

Laura’s Guide to Building Your Own Sourdough Starter – a step by step tutorial on sourdough starters along with recipes

Comments { 32 }

Building a Home Planning Notebook

Maintaining a home is a full time job. There is no denying it. It takes time and energy to keep a home running peacefully and harmoniously. Whether you can be home full time or not, there is a need for organization to maintain this restful environment through which our husbands, children, and friends can find solace. Until recently, you could find many small to-do lists, schedules, menu plans, scattered random receipts, financial notes, papers, and the like spread out over my home. Some might be in the office, some in the kitchen, some in my purse. I had a haphazard cleaning schedule in the back of my mind. I had a homemaking notebook but it only had some random articles that I wanted to save and not much more. Do you experience this scattered feeling?

I suddenly got inspiration after viewing some of Stephanie’s planning pages to get organized in this area. I am so glad that I did. I collected everything into one home planning notebook. Ahh…so much more peaceful. I wanted to share with you what my homemaking planner looks like…but be sure that your notebook can take any shape or form. I pray this might provide you with some inspiration to get started. Organization is an important habit to cultivate, and I need it just as much as the next homemaker.

What Your Need?

1 3-ringed binder

Dividers

Sheet protectors, if desired

Planning sheets (check out the resources below)

Ideas for Your Home Planner/Organizer/Journal/Notebook

There is an endless supply of ideas that you could compile for your planner, but here are a few tabs that I have:

Goals - this section I put right at the front of my journal so I would be daily reminded to review my goals for the year including: personal goals, nutritional goals, handcraft goals, family/ministry goals, family mission statement and book reading list.


Weekly Plan – Monthly calendar and to do list for the week. I take time every Sunday for my weekly planning outing to plan for the upcoming week using these pages.

Schedule – morning and evening routines, weekly routines (day by day plans that don’t change) – (check out Simplifying Your Schedule and Developing a Morning Routine for further inspiration)


Menu Plan – monthly winter & spring menu plans, monthly errand list, shopping lists (visit Developing a Monthly Menu Plan for more details on developing a monthly menu plan)


Homeschooling – ideas for learning activities, planning pages


Hospitality – our family vision for hospitality, ongoing invite list, meal ideas for guests, emergency meal, meaningful questions for dialog


Holidays – family traditions, holiday recipes, holiday planner, gift ideas for family/friends, Christmas card list with addresses


Household Inventory – freezer inventory, pantry inventory, master household supplies list (including personal care, house maintenance, office, kitchen, cleaning, and health supplies – to review monthly before errand run to see if anything needs to be restocked), clothing inventory (keeping track of the kids clothes to stay ahead of the seasons)


Finances – Budget, bill schedule, cash envelope funds and purchases, receipts


Family Journal – includes by weekly evaluation notes, monthly journal on what God has done in our family over the previous month, birthday letters to our children


Household Maintenance – spring cleaning list, weekly, monthly, quarterly, and annual chores list, honey to do list (basic repairs that need to be done around the house)


Blog Ideas – this is where I keep track of blog post ideas, advertiser and affiliate information


Resources - this is for keeping articles, book titles, and misc resources that I might want to look back on in the future


Contacts – a central place to keep phone numbers, addresses, websites, etc.

Other ideas: coupon organizer, chore chart for kids, emergency preparedness info, etc.

Here’s a peak into my planning notebook:

httpvhd://www.youtube.com/watch?v=Oxiwgm6LTu8

My encouragement for you is to take one section at a time. One section per week if necessary to avoid getting overwhelmed in any way. Build your homemaking planner over time and see more peace establish in your home. Bless your efforts! Developing my home planning notebook has taken several weeks and it is always getting improvements made to it.

Pages from my Planner:

Here are pages I personally use and/or have assembled for my notebook planner:

Freezer Inventory
Pantry Inventory
Master Household Supplies List
Housecleaning Schedule
Weekly Evaluation Page
Monthly Menu List

Resources & Inspiration:

Tell Your Time: How to Manage Your Schedule to Live your Life Fulfilleda wonderful little ebook that helps you develop goals and a schedule

Intentional Planner by Sheri Graham – a wonderful resource including planning pages

Maximize Your Morning by Inspired to Action – a helpful free guide to developing a morning routine with several good planning pages.

List Plan It – a great site that offers a yearly subscription access to over 400 lists to help organize your home, business, and life.

Homemaking Organized – downloadable lists for organizing your home

Control Journal – Flylady’s guide and tips to building your home planner or control journal as she calls it.

Household Management 101 - easy steps to building your planner

Do you have any ideas or resources to share with us on becoming more organized with a home planner?

Comments { 89 }

Tuscan Style Potato Soup

It may be on the end of soup season, but this creation was too good to not share with you all. If you like rich, creamy, warm, and comforting soups, this is definitely one you should try. It is similar in style and contents to my Zuppa Tuscana, but has it’s own unique flavor and speciality! It is one of our top favorites!

5 medium russet potatoes
4 Tbsp unsalted butter
2 medium leeks (white and green parts), or 1 large onion, sliced and rinsed well
3 garlic cloves, minced
1 tsp sea salt
1/2 tsp white pepper
4 cups homemade or canned chicken broth
1/2 lb sliced bacon, cooked and crumbled (save bacon grease for sauteing, if desired)
1/2 cup milk
1/2 cup sour cream
1 cup grated cheddar cheese
4-5 kale leaves, chopped, more or less as desired

Directions:

  1. Heat the oven to 375 degrees. Scrub the potatoes, pat dry, and pierce several times with a fork. Set them directly on the oven rack and bake until tender, about 1 hours. Let cool completely on a cooling rack.
  2. Combine butter or reserved bacon grease, leeks/onion, garlic, salt, and pepper and cook, stirring occasionally, until softened.
  3. Add the chicken stock/broth to the leek/onion mixture.
  4. Cut the cooled potatoes in small 1/2 inch cubes. Remove peel on one or two of that potatoes. Set aside one cup of diced potatoes. Throw the remaining potatoes into the pot with the leeks/onions.
  5. Puree the contents of the pot in batches in a blender until very smooth. Return the soup to the pot and reheat over medium low.
  6. Whisk together the milk and sour cream and then whisk this into the soup, along with the reserved 1 cup potatoes, and cheese. Add chopped kale and allow to simmer for 10 minutes or so. Season more with salt and pepper as desired.
  7. Serve garnished with cheese, bacon bits, or green onions, as desired.

Yield: 6-8 servings

Comments { 38 }

How to Make Coconut Milk Kefir

Lately I have been exploring in the world of coconut milk kefir! Our family has been consuming regular raw milk kefir for a few years now, but recently, we lost our frugal milk source, and I was forced to rethink and consider some other nutritious options. Enter…coconut milk kefir!

Kefir is typically made from cow’s milk that is fermented with kefir cultures. It is similar in taste and texture to a drinkable plain yogurt with a bit of a tangy flavor to it. It is known for many health benefits including boosting the immune system, stimulating digestion, protecting against the spread of harmful yeast overgrowth, lowering cholesterol, and guarding against cancer. It is a powerful probiotic that helps beneficial bacteria to thrive in the body.

Coconut milk is naturally rich in medium chain fatty acids (MCFAs). Two of the primary MCFAs found in coconut milk, lauric and capric acid, are known for supporting the body’s immune system. Coconut products contains monolaurin, a fatty acid found in human mother’s milk, which has proven antiviral, antibacterial, and fungal properties that support natural immunity. It has a creamy taste and texture that’s similar to cream (with half the fat and calories) or milk (when diluted). It tastes on the flavor of what you mix it with, making it ideal for both sweet and savory recipes. It is completely dairy, gluten, and soy free, making it the most nutritious option and alternative for the dairy intolerant.

When I searched online for information to make coconut milk kefir, I was surprised to see the serious lack of information on this topic. There appears to be two different options. Coconut water kefir and coconut milk kefir. I wanted to make coconut kefir with coconut milk because it is cheaper and easier. I am all for simplicity. Most of my searching and emailing different companies (Weston A Price & Body Ecology) came up with no responses, so I had to venture out on my own with some help from Julie at Cultures for Health.

Coconut milk kefir works beautifully with milk kefir grains yielding a thick and creamy coconut cream topping for your coffee, ice cream, smoothies, or curries with all the healthy bacterial benefits! Check out Healthy Cooking Coaches recipes for Strawberry & Vanilla ice cream using coconut kefir. You can use it as whipped cream substitute on top of pancakes or waffles (sweetening as desired) or use it in replacement of buttermilk or water in many baked goods recipes. There are no end to the ideas for its usage.

For a tutorial on making coconut water kefir, visit The Nourishing Gourmet or Body Ecology Diet.

Coconut Milk Kefir

1 quart glass jar
2 Tbsp milk kefir grains (available through Cultures for Health)
2 cans unsweetened undiluted coconut milk  or 1 quart So Delicious Coconut Milk (It has been confirmed that Native Forest Coconut Milk is canned in a BPA-free can)

Directions:

  1. Place the milk kefir grains in the quart size glass jar and cover with coconut milk. Carefully mix together with a non-metal spoon (please forgive my forgetfulness on this point in the video!).
  2. Cover loosely with a towel or cloth napkin and allow the coconut kefir to culture on the countertop for 12-36 hours.
  3. After 12 hours, check the coconut kefir every few hours so you can remove the kefir grains as soon as it reaches the desired consistency. If you let it sit too long it will become more sour and very thick, making removal of the grains more difficult.
  4. Remove grains and store them covered with a small amount of milk in refrigerator between batches or follow up immediately with another batch.
  5. Place a lid over the remaining coconut milk kefir in the jar and store in the refrigerator. Note that it will get significantly thicker in the refrigerator as it cools, so it is a perfect consistency to use as whipping cream and such.

Cultures for Health suggests that it may take a batch or two for the milk kefir grains to adapt to coconut milk but if the milk doesn’t kefir properly during the adjustment period, it is still safe to cook with. They do recommend returning the grains to cow or goat milk periodically to refresh them (and they can adapt back to making raw cow/goat milk kefir).

Here’s my little video tutorial:

httpvhd://www.youtube.com/watch?v=nvOJsEKQlS8

httpvhd://www.youtube.com/watch?v=Hat5DV91fsU

Can I use kefir packets to make coconut milk kefir? What if I am dairy intolerant?

I originally thought that kefir packets would be a better alternative than grains for those with dairy allergies. I asked Julie at Cultures for Health about her opinion and this is what she shared: Powdered packets should work with coconut milk but since they are in a dairy carrier, they’re not really going to be an improvement on the grains and it’s questionable how well they will re-culture (using a small amount from the previous batch to make the next batch) making them potentially a costly option.  It might actually be less costly to occasionally buy more kefir grains than to buy lots of packets of kefir starter. We’ve taken to trying to steer the dairy intolerant to water kefir for their probiotics for this reason. Plus kefir packets aren’t really a natural culture and contain less than 10 probiotic strains compared to the 30 or so contained in kefir made with grains.

So there are options to try and experiment with, but the best option might be to stick with water kefir grains and the coconut juice method if you have dairy allergies. Packets can be used if you do not have allergies but the best results will come from using grains and rotating back and forth from culturing in coconut milk to cow/goat’s milk.

Can I dilute the coconut milk to make it stretch further?

Unfortunately you don’t want to dilute the coconut milk since that would leave less sugar for the kefir grains to eat and potentially damage the grains.

Can I make coconut milk kefir with water kefir grains?

Julie at Cultures for Health shares, Dom’s kefir site claims you can acclimate water kefir grains to milk (but I don’t believe he mentions anything about coconut milk) but I personally haven’t tried it and never heard from anyone who has.  If you happen to have a significant surplus of water kefir grains though, it might be worth trying.  It certainly would be great for people with dairy allergies—normally if someone has an allergy we just steer them to water kefir.”

Is there any benefit of making coconut water/juice kefir over coconut milk kefir?

Julie again shares, “Both coconut water kefir and coconut milk kefir would contain basically the same probiotic benefits so at that point I think it would just be a matter of the nutritional differences in the original liquids.  Coconut water is more of an electrolyte type beverage (I keep some around for when we get sick but beyond that we don’t drink very much) whereas coconut milk is a very concentrated source of healthy fats.  Both are perfectly healthy but I think they just ultimately have different purposes.”

Can I used powdered coconut milk?

A few readers suggested below that powdered coconut milk is a cheaper alternative. I understand that powdered milk products are best to be avoided. “It is manufactured through a spray drying process of raw unsweetened coconut cream. This is very different from the more widely available and coarser desiccated coconut which is made by grating machines that shred the white coconut flesh.

When coconut milk powder is spray dried, this has the effect of mixing oxygen (from the air) into the powder, under very hot drying conditions. As a consequence, coconut milk powder is “oxidized” and will go rancid quite quickly if not refrigerated and consumed within one or two days. This process also has the effect of increasing nitrate levels in powdered milk, whether it be dairy or coconut powdered milk. High levels of nitrates can increase the risk of cancer.” (The Incredible Coconut Book)

Coconut kefir does exist on the market now thanks to the efforts of So Delicious, but it cannot be compared with the homemade variety! Read more about that here. Making it yourself can always save you money and produce the highest nutrient content!

Comments { 136 }

February at Our Home

Welcome back for my monthly chronicle of life at the Edmonds. I am taking a picture of our family each month and record all that God is doing in our lives, plus my book reads for the month.

There has been one significant change taking place at our house this month. The Lord has been so good to us in more ways than one. After being self-employed for several years, the Lord opened up an amazing job opportunity for Aaron at Lacrosse Footwear (a local high quality boot manufacturer) as a web developer. It was totally and completely the Lord’s provision for us. We enjoyed the benefits of being self-employed but there were many challenges that we did not really possess the skills necessary to thrive in that self-directed environment. It is hard work! Now that he is working fulltime for this company, he is truly thriving like I have never seen him before. He loves his work, his co-workers, and the corporate environment.

In the meantime, I am learning to enjoy the limitations of only having one vehicle and staying at home more now. It was a struggle at first, but I am finding the limitations to be very beneficial. For one, I have to be real strategic about coordinating all my errands and grocery shopping for my once a month run. Previously, I would make short more frequent outings which usually leads to increased spending. ;) It has helped me get more organized in my homemaking/planning notebook which I look forward to sharing more with you all. I am able to focus more on my children and cultivating the relationships there. And lastly, it gives me opportunity to invite others into my home for visits. Tea anyone? Taking regular walks with the kids has been a great means of encouraging and strengthening my spirit when I become weary. It is doing a good work in my heart, and I am thankful for that.

Karis and Titus are continuing to grow and develop into two adorable loveable munckins! Titus will turn 1 year old this coming Thursday (March 4th), and it seems just yesterday when he was born. He started to do a full crawl this past week (after doing his own invented crawl, getting up on his hands and knees and then diving forward – we called it the “Ty dive”), matching Karis’ record in learning to crawl one week before their first birthdays. I found that truly hilarious.

Karis has become quite the mommy’s helper lately. She loves pulling up a chair and washing dishes, grating cheese, or stirring up ingredients in a bowl. It has been quite adorable to watch her blossom in this way. She is counting to ten, learning her alphabet and loving reading a wealth of library books together. One silly thing lately has been her confusion with the following two questions. When asked, “how are you?” she responds “2″, and to “how old are you?” she responds “good”. A little backwards but it has provided us with a good many laughs. We are working on it.

What was I reading this month?

One Million Arrows: Raising Your Children to Change the World is a new release by Julie Ferwerda and what a wonderful challenging call drawing our attention to this thought-provoking question: Will the world change our children…or will our children change the world? The truth is…time is short and lives are at stake. Right now, God is inviting our families to become part of a bigger story—a vision that will engage hearts to make a radical difference. One Million Arrows is an inspirational call to raise our kids to impact their culture, community, and world for Christ. One powerful quote that stood out to me was this thought:

I’ve realized that, in the grand scheme of life, more than just raising my kids to ‘keep the faith,’ I want to raise my kids to save lives. I want to raise firemen. Not necessarily the earthly fire-fighting kind, but the heavenly fire-fighting kind. Kids who are well-trained and ready to help save as many lives as possible. Kids who grow up, remembering at the forefront of everything they do, that time is short and lives are at state, and who will one day be seen as spiritual heroes for helping many lives to safety. I want to raise kids who love like Jesus.”

I found this book to be similar in message to Family Driven Faith by Voddie Bachum Jr, but it takes a more focused direction on stirring up the vision of preparing our children to be world-changers and cultivating a heart for orphans around the world. It did lack in the area of practical examples and steps from the author’s own personal experience (as her children are practically grown before she caught this vision), but she drew a lot of suggestions and tips from several real life families in our time, their stories which are shared throughout this book.

As Dennis Rainey of FamilyLife Ministries says, “This is not the time for peace, it’s time for war. Raise your kids to become arrows for war.” A must read for every Christian family! You can download the first chapter for free here.

Sacred Influence: How God Uses Wives to Shape the Souls of Their Husbands by Gary Thomas is definitely by far the best book for wives I have ever read! So many truths that I have been learning lately (i.e. letting go of unrealistic expectations) were so powerfully shared in this book in a fresh and beautiful approach. Yes, written by a man that understands men and what they need, every wife needs to read this book to transform their understanding of the purpose of marriage and how you can powerfully shape and influence your husband to be the man God wants him to be. I love how he began by showing the glory and beauty of a godly woman and how she can take an active powerful role in her marriage.

I cannot sing the praises of this book enough! This book has been challenging me to see that men need affirmation and I am the first to admit that I have lacked in giving my husband the admiration, love and respect that he deserves. Men rise to praise. That is where lasting change can take place. If we think negatively it will only increase dissatisfaction, but if we affirm his strengths we will likely “reinforce and build up those areas you cherish and motivate him to pursue excellence of character in others…To move a man, you have to learn to appreciate him for who he is and for what he has done…Rule number one for influencing your man is this: stop taking your husband for granted.”

“A good marriage doesn’t happen by accident, and a good marriage isn’t maintained by accident. This endeavor requires deliberate choices and much perseverance. When you start acting instead of merely wishing, when you begin taking initiative instead of simply feeling sorry for yourself, you become an active woman, and active women mirror the active God who made them.” – Quotes from Gary Thomas

I am only halfway through this book to date, but I have already grown in more ways than one. Read this book with a humble teachable spirit and God will use it mightily!

May God richly bless you all this month!

Comments { 30 }