Archive | bellies & babies RSS feed for this section

Homemade Creative Play Gifts for Kids

How about offering your children fun and creative play gift ideas this Christmas? By creative play I am referring to supplying items that will help spur on and encourage their imagination, giving them freedom to explore and develop their minds. Here is a list of items that you can make at home inexpensively that will entertain your children for hours. We all love those frugal gift ideas, and the special touch of handmade items is an extra bonus.

Playsilks

Screen shot 2009-12-03 at 3.23.42 PMPlaysilks are a simple creative play item made out of fabric and dyed various colors. These playsilks can be used to play peek-a-boo, doll blankets, forts, dressup clothes, head scarves, and numerous other ideas. There is no end to the ideas that little ones can come up with for their use. Playsilks can be a bit spendy to purchase, but you can make your own with white silk scarves sold through Dharma Trading Company. Include your little ones in a fun project of dying them with Kool-Aid. Yes, it’s that simple! For a easy tutorial, visit here. You can also buy playsilks through A Toy Garden or Let’s Explore.

Dress-Ups

There are numerous free patterns online for costume and dress-up ideas that you can make yourself. Here are some favorites I have seen:

Fairy Wings
Tulle Skirt
Sword
Wand
Ladybug Costume

Add old watches, old oversized clothing, jewelry, wigs, hats, gloves, handbags, etc. and you will have a fun dress-up box! You also might want to check out the fun dress-up outfits produced by Melissa and Doug. They are cute!

Play Dough

Screen shot 2009-12-03 at 3.46.51 PM

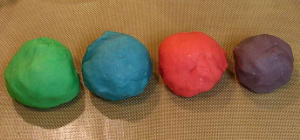
What kid doesn’t like play dough? Give them a batch with a knife, rolling pin, and a few cut outs, and they love it! Try your hand at making your own. It is safe for your family and easy! Make your own play dough with a few basic ingredients that you probably already have on hand: salt, flour, oil, cream of tarter and various food colorings. For this easy recipe, visit here. Make all different colors and store in little baby food jars to keep it fresh and soft. Or try yummy edible play dough made out of almond butter.

Building Blocks
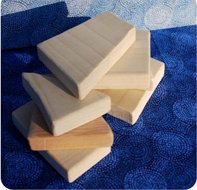
Screen shot 2009-12-03 at 3.21.55 PMWooden building blocks are a perfect gift for any little boy or girl. There is no end to ways you can assemble them in building castles, houses, and the like. Find scrap wood from your local lumberyard and Make your own wooden blocks with this tutorial.

Felt Toys – Kitchen Food Items

How about some fun homemade felt food? Kids love pretending like they are cooking. Why not encourage the creative chef in them? Check out these ideas for cute felt food to get you started:

Homemade Bread, Pan & Mitt kit
How to Make Felt Food – cheese, cookies, carrots, eggs, strawberries and other fruits
Food Sandwich

Waldorf Dolls
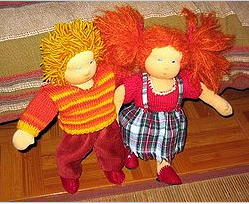
Screen shot 2009-12-03 at 3.18.48 PMA homespun doll made out of completely natural and cuddly wool and cotton materials? I love it! Waldorf dolls are intentionally simple in order to inspire creativity, improving and strengthening the imagination. Check out the simple waldorf doll making kits available through Wier Dolls & Crafts or Magin Cabin. Boy & Girl patterns are available. Simple instructions are included with the kit or for further help, visit this tutorial.

Doll House
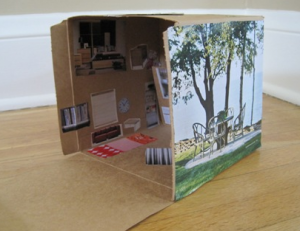
Screen shot 2009-12-03 at 2.55.19 PMI love this idea of making it yourself doll house with a simple cardboard box and cut out pictures from magazines. You don’t need delux dollhouses when it comes to little girls. Inspire creativity and simplicity with this homemade edition. How fun!

Making Make-Believe: Fun Props, Costumes, and Creative Play Ideas – a fun book offering children ideas for creating a life-sized igloo from empty milk jugs or putting on a puppet show in their very own Lighted Box Stage. This book is filled with wonderful storybook play ideas, games, cooking fun, making costumes, and so much more.

Do you have any homemade creative play gift ideas to add?
Comments { 27 }

Homemade Goat’s Milk Formula: Natural Supplementation for Baby

Do you need a good natural milk supplementation for your nursing baby? I have struggled with maintaining a sufficient milk supply for all three of my little munchkins and I have definitely tried my best at boosting my supply as well. The evenings have always been my struggle…meeting the demand when my body was weary and the breast empty. My babies have always wanted an extra portion to fill up the tummy to sleep through the night. I wanted to find a good natural milk alternative that I could give them in a bottle to top them off for the night. We wanted to avoid commercial formulas due to the soy contents. After doing a lot of research, we have found a great supplement. I also confirmed this recommendation with my naturopath and she affirmed my findings.

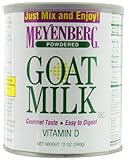
Enter…Meyenberg powdered goat’s milk. (Use the subscribe and save and its only $22.90 for 3 cartons).

Goat’s milk, I believe, is the best alternative because it most closely resembles the mother’s breastmilk. It is easy to digest, and completely natural. Goat’s milk contains around ten grams of fat per eight ounces compared to 8 to 9 grams in whole cow’s milk. According to Dr. Sears’, goat’s milk contains only trace amounts of an allergenic casein protein, alpa-S1, found in cow’s milk, making it less allergenic. He adds:

“Although the mineral content of goat’s milk and cow’s milk is generally similar, goat’s milk contains 13 percent more calcium, 25 percent more vitamin B-6, 47 percent more vitamin A, 134 percent more potassium, and three times more niacin. It is also four times higher in copper. Goat’s milk also contains 27 percent more of the antioxidant selenium than cow’s milk. Cow’s milk contains five times as much vitamin B-12 as goat’s milk and ten times as much folic acid (12 mcg. in cow’s milk versus 1 mcg. for goat’s milk per eight ounces with an RDA of 75-100 mcg. for children). The fact that goat’s milk contains less than ten percent of the amount of folic acid contained in cow’s milk means that it must be supplemented with folic acid in order to be adequate as a formula or milk substitute for infants and toddlers.”

Meyenberg goat’s milk is fortified with folic acid and vitamin D, free of pesticides, chemicals, or hormones. At my naturopath’s recommendation, we added cod liver oil (for omega-3′s and vitamin A & D) and a natural liquid multi-vitamin for the nutritional benefits. Amazon is definitely the best price I have found on this product, but is also available at your local Fred Meyer Nutrition or through Azure Standard.

My babies have always taken this goat’s milk just fine. Ideally, raw goat’s milk would be the best option, since the powdered version is pasteurized. But due to the fact that goat’s milk spoils quickly, powdered is a great option. Find raw goats milk sources through Local Harvest.

Goat’s Milk Formula:

Yield: 36 ounces

4 cups goats milk (or 8 scoops Meyenburg goats milk powder & 4 cups filtered water – dilute further with water when you first start supplementing with this recipe, watch stools, and gradually increase if baby is digesting just fine)
1/4 cup liquid whey from yogurt or kefir (contains probiotics, strain from yogurt, or kefir- we start feeding our babies yogurt when they are around 7-8 months, so I stop adding it after that point)
1 -2 tsp organic blackstrap molasses (This provides B-vitamins, iron, trace minerals, and helps relieve constipation. Decrease amount if stools are too loose.)
2 tsp organic maple syrup (for carbohydrates)
1/4 tsp of bifodobacterium infantis (we use Natren Life Start for priobiotics, calcium, and other nutrients)
1/2-1 teaspoon high-vitamin cod liver oil (we use Childlife Cod Liver Oil for nutrition and to support healthy brain function, 1/2 tsp is the recommended daily allowance, so adjust as necessary.)
1 tsp unrefined sunflower oil (for vitamin E)
1 tsp extra virgin olive oil 
2 tsp virgin coconut oil (contains lauric acid that is important for anti-viral, antifungal properties as found in breast milk)(B Vitamins & folic acid – 1 tsp per day is the recommended daily allowance for infants, so adjust as necessary. Since they are getting many vitamins through the other nutrients here, you could just use a b vitamin liquid supplement or use a smaller amount. You can use 2 tsp of nutritional yeast as the best option, but we always had stomach issues with this, so we have stayed with the multi-vitamin. We are currently using Nature’s Plus Baby Plex.)
1/4 teaspoon acerola powder (we use Now Acerola Powder for vitamin C)

Blend all ingredients together in a blender. Pour into individual glass bottles or one large. To warm, place in a pan of simmering water. Never use a microwave. This formula is best made daily for optimal nutritional retention. It is recommended that you only use 1 tsp multi-vitamin and 1/2 tsp cod liver oil daily for infants, so you may need to adjust the recipe as needed. This recipe lasts approximately two days for my current baby, Eden, who drinks a 4 oz bottle before every nap and an 8 oz bottle at bedtime.

Note: If you are just beginning to supplement with this, it is recommended to start with a smaller portion of goat’s milk to water (9 oz water to 1.5 scoops as described by Dr. Sears) and work up to the 1 scoop recommendation above.

See Dr. Sears’ Goat Milk Formula recipe here or Organic Thrifty has done a thorough recipe that I adapted from here.

We have used this recipe for all three of our little ones, and they usually took two to four 4-8 oz bottles per day, depending upon the child and age. We use it till they are about 1 year old before switching over to raw cow’s milk.

Lastly, we like to avoid plastic baby bottles and have found Evenflo’s glass bottles to be a wonderful alternative! They are very frugal as well.

Please note: I am not a medical professional. I am just a wife and mother who cares for the health of her family. Please use your careful discernment and double check with your naturopath before using this formula, especially if desiring to use it full time.

Comments { 126 }

Feeding Baby Naturally: What, When & How

IMG_2366Karis enjoying real food

Beginning a little one on solids can be overwhelming for some, especially when as a mother you really want to give your child the best start in the world. There are many different methods, plans and recommendations out there, but I am going to keep it real simple for you. Give your baby REAL food and let them have at it!

When to start solids?

For the first six months, breast milk is the only food required by most infants. It provides the essential antibodies that protect their immune function and nutrients that optimize growth. Until six months of age, a baby’s digestive tract is not able to adequately digest most foods. The introduction of foods too early may induce food allergies or food sensitives. Honestly, there have been no conclusive studies done to show that a baby should wait till after 6 months though. You can breast feed exclusively for a year if you want. Breastfeeding gives your baby a steady supply of complete nutrition during the messy but fun transition to real food. Overall, the six month recommendation seems reasonable to me.

Beyond the six months recommendation, you may want to wait until your baby can sit up by themselves. That is really the only other important thing. According to Nina Planck in Real Food for Mother and Baby, “When is your baby ready? She is ready when she can sit up on her own. This indicates a certain control of her trunk. Her mouth and throat are stronger and more coordinated. When you put food on her tongue, she does not immediately eject it.”

She may have teeth, she may not. Either way works just fine. Karis didn’t, Titus did. She may grab for your food, she may not. Karis didn’t, Titus did. Maybe it’s a girl/boy thing. ;) Nurse exclusively as long as you are able – it’s frugal, it’s healthy, and it’s simple! When you baby can sit up and starts really actively desiring food, then let them begin exploring with food. If they are not interested until 9 or 10 months (or later), don’t worry about it. Rushing it will not be fun for you or your baby. With my first daughter, Karis, we were able to hold off until 8 months of age before beginning solids. Titus started just a bit earlier around 7 months.

I knew she was ready for them when she began eagerly consuming little samples I gave her of my own food. Secondly,  if they start getting grumpy quicker after breastfeeding, or have a hard time going to sleep, I have found that adding solids normally has helped my babies sleep better and be more happy and satisfied throughout the day. Use your judgment! You are the mom and you know better than any one else. You really don’t need to get on any rigid schedule of eating either. We started with a little pear slice in a mesh feeder, and then forget about it for a few days, and then give him some carrots at dinner, etc. I have never gotten real consistent with three meals a day until they are around 1 year old. Overall, we continued to nurse regularly as long as the baby desires or as my supply allows. With Karis this was 15 months of age. We have yet to see with Titus.

Continue Reading →

Comments { 62 }

Feeding Baby Naturally Tools

Titus enjoying food!

Titus enjoying food!

Titus is eight months months old this next week. Boy, does time fly! He is a hungry little guy and I can hardly keep up with his demands for food. As we just begin to introduce solid foods into our little guy’s diet, I wanted to share with you a few of our favorite tools.

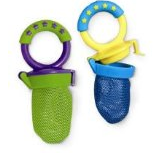
Screen shot 2009-09-29 at 3.04.17 PMMunchkin Fresh Food Feeder – This is one of my favorite feeding tools, especially at the beginning. It enables your baby to munch away independently. Fill it with a small slice of stemmed carrot, apple, pear, or various fruit/veggies and let them explore to their hearts content. We used this frequently when we are on the road and the baby needs a little something to hold him over. During our car trip to the beach, Titus was kept quite contented while munching on a nectarine slice in this feeder. Beware! It is messy! But that makes it all the funner to watch and enjoy their delight in food! They are a bit challenging to clean, but a scour pad and the dishwasher do a pretty good job for us.

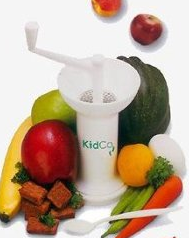
Screen shot 2009-09-29 at 3.08.23 PMKidco Baby Food Mill – There are lots of expensive equipment out there for making your own homemade baby food, but I have found this simple tool (along with a blender) to be all you need. This tool is great because it transports easily for a quick meal when you are out. I love it for grinding up bananas or other small portions of foods. If you chose the pureeing route of introducing solids with babies, this is a great way to go!

Bumbo Seat (as seen in picture)- We found this seat off of Craigslist and have found it to be a worthwhile purchase. IMG_6505It is perfect for Titus to sit in and enjoy his Munchkin feeder or for him to just sit and play. It gives him full support even before he was sitting up fully on his own.

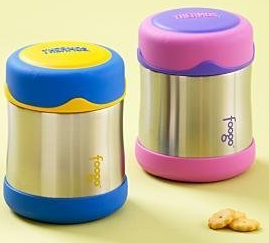
Foogos Leak Proof Thermos Food Jar - We just recently purchased this food thermos and absolutely love it! It is stainless Screen shot 2009-09-29 at 3.19.07 PMsteel and BPA-free thermos that will keep your baby food warm or cold for 6 hours. Insulation helps inhibits dangerous bacteria growth. You can use it to keep milk/formula warm or just throw some veggie chunks in the jar and away we go! We have used it numerous times in the last few weeks. Aaron has even used it a time or two for a coffee thermos. Most reviews on Amazon describe using it for children’s school lunch, so it is very multi-purpose!

Those are our favorite tools! What are yours?

Comments { 22 }

Homemade Natural Diaper Cream & Lotion

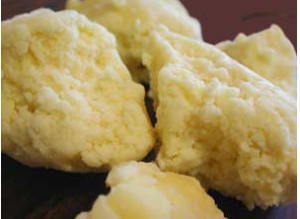
Raw shea butter - Photo courtesy of Mountain Rose Herbs

Raw shea butter - Photo courtesy of Mountain Rose Herbs

Coconut oil and raw shea butter are the perfect combination for a safe, natural and simple diaper cream or hand lotion. Shea butter is wonderful for its natural healing and moisturizing properties. It is rich in Vitamins A, E, and F, which help to soothe, hydrate, and balance the skin. Make sure to select raw shea butter, because many companies use bleaches, deodorizers, or chemicals to alter the scent and appearance of shea butter. These processings deplete the product of its healing and medicinal properties, and also destroy the vitamins and minerals present. You will know if it is raw by its distinguished nutty smell. Coconut oil is also very nourishing and moisturizing to the skin and has great anti-bacterial and anti-fungal properties.

This is definitely a powerhouse for defeating yeast infections as well. We love it now! I used to have to switch my babies over to disposables when a rash hit, but with this salve, it heals wonderfully even when wearing cloth diapers. I recommend using a thick doubler/liner when applying this salve if you use cloth diapers to protect their warranty. My dipes are out of warranty, so we use it directly on their bum with the diaper and it has not caused any repealing issues. It washes out beautifully. This recipes works for a awesome natural lotion as well, helping to sooth dry and cracked skin. You may want to add some lavender (or other) essential oil for fragrance for use as hand lotion because shea butter gives it a nutty smell and may not be preferred if you like a real fragrant lotion.

IMG_6459How to make your own?

1/8 cup coconut oil (extra virgin is preferred)
1/4 cup raw shea butter
3-4 Tablespoons talc-free cornstarch or arrowroot power (optional, to thicken) -Learn more about avoiding talc here.

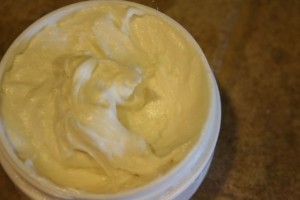
Combine coconut oil and shea butter in a small bowl with a hand mixer or stick blender. You may have to soften the shea butter just slightly over very low heat in order to incorporate them well together, but it should combine well with a mixer. Add cornstarch or arrowroot a tablespoon at a time until you achieve the desired thickness. It will look similar to a whipped icing.That’s it! Transfer to a small covered container and place at your changing station. Keep a small portion in the diaper bag as well. Apply liberally with each diaper change as a preventative and rash salve. There are many more complicated homemade varieties out there, but this simple recipe has done the trick for us! Makes about 1 cup.

We buy our extra virgin coconut oil and raw shea butter from Mountain Rose Herbs. You can use refined coconut oil on the skin as it is a cheaper variety. Unrefined is preferred for eating.

This post is a part of Fight Back Fridays.

Passionate Homemaking is an affiliate of Mountain Rose Herbs and will receive a small percentage of sales purchased through our links. Thank you for your support!
Comments { 129 }

Basic Cloth Diapering Supplies

What supplies do you need for cloth diapering? Here are my recommendations.

Cloth Diapers - I recommend anywhere between 18-24 diapers in a rotation. I believe we have 24 diapers and that has worked for diapering two little ones at a time (with diaper changes every 3 hours unless we have a poopy – pockets hold it all in!).  This will enable you to wash every 2-3 days.  We already shared how we love the one size pocket diapers.

Detergent – There are many different recommendations for natural detergents, but make sure you choice one free of any additives, softeners, whiteners, brighteners, and the like. We use Charlies Soap for our diapers. Other popular brands include Allen’s Naturally & Country Save. Check out a recommended list here.

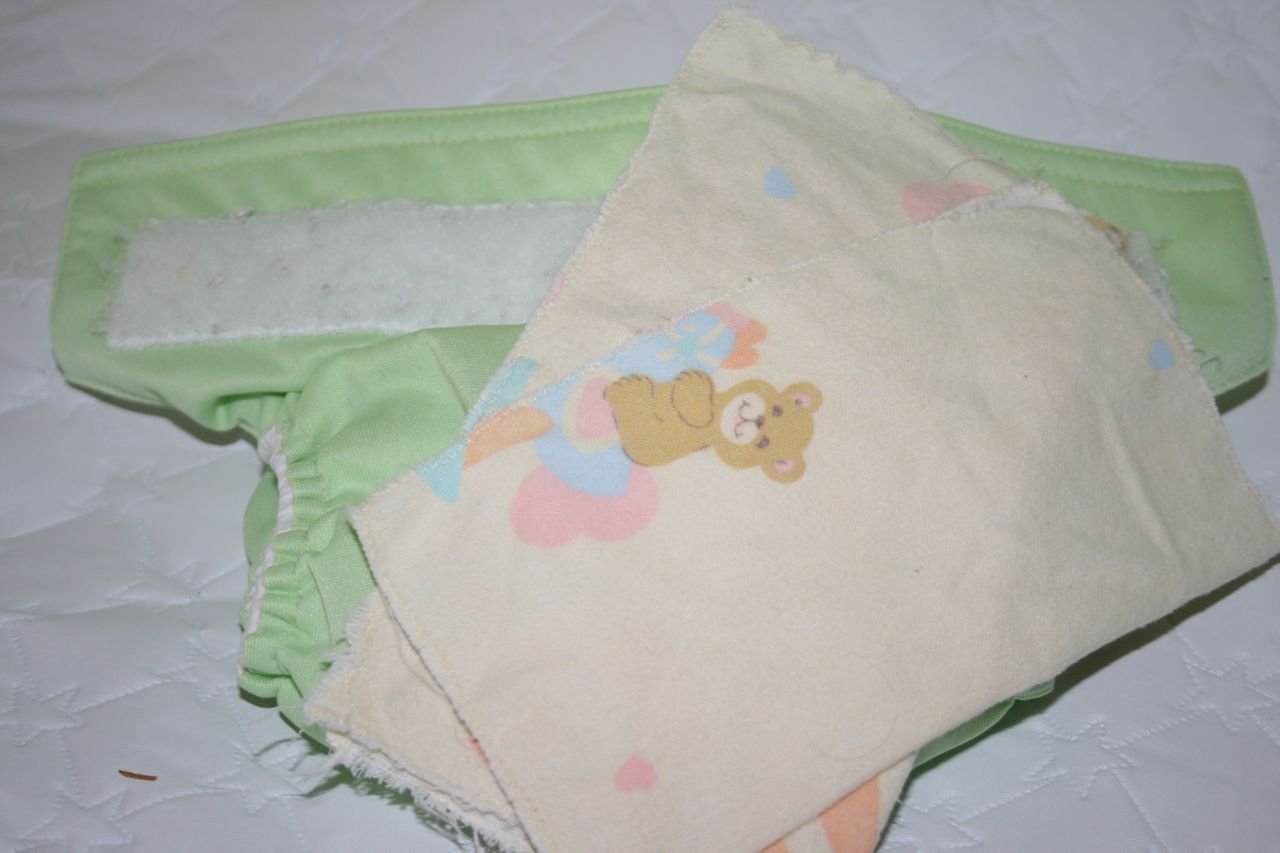
Cloth Wipes – 2-3 dozen wipes. I recommend flannel wipes, but don’t go for the cheap ones because they wear out quickly. Try making your own.

Screen shot 2009-09-10 at 2.40.20 AM

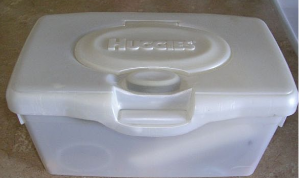
Wipe container at the changing table

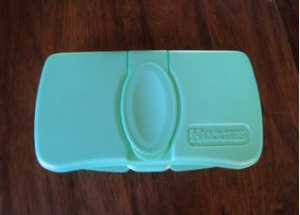
Old Wipes containers – We use a large plastic wipes container at the changing station and a small one in the diaper bag.

Wipe container for the diaper bag

Wipe container for the diaper bag

Diaper pail & liner – A basic large plastic trash can will do. You don’t need anything fancy. Just makes sure it has a lid! Two washable liners are very useful for keeping the smell in the pail and you can dump all the contents into the washer at once with the bag. For small places, another excellent option is the Doorknob Diaper Pail.

Doublers - These are nice to have on hand for overnight use. Just stuff the diaper with an extra insert. We love the hemp/fleece doublers or BabyKicks Hemparoo because they help keep the moisture away from the bum, are super absorbent, and are rash resistant (when you put the hemp side directly against their bum). We also like to stuff the inside of our diapers with an extra infant prefold diapers or micro terry inserts for doubling at night.

1-2 Washable Wet bags – This are wonderful to keep in the diaper bag for diapering when you are out and about. We have a Planet Wise wet bags or you can make your own (Michele made me a wet bag as pictured and we love it!). It’s nice to have two to rotate when one is in the wash.

That’s all that is in my diapering collection. Simple and basic!

Additional tool (convenient but not necessary)…Diaper Sprayer. If you don’t like the thought of dunking your diapers, check out the diaper sprayer. I have not used it myself, but it looks useful. I personally leave the infant stools on the diaper and they are sufficiently cleaned out in the washer. When they begin solids, I do a bit of dunking or let the stools roll off into the toilet. Another alternative is Flusable Liners. We have used them on occasion ourselves and liked the convenience but not the extra cost. These tools make cloth diapering a breeze! No more excuses. ;)

For an excellent selection of diapering supplies, including all the recommended items above, I highly recommend Kelly’s Closet. Excellent customer service and they reward you with points from each purchase you make towards future gift cards!

What diapering supplies do you have or recommend?

Comments { 40 }

One Size Pocket Diapers Reviews

My two little ones all dressed in cloth

My two little ones all dressed in cloth

Pocket diapers? Prefolds? AIO’s? There are many diapering options on the market today and it can be a bit confusing to decide which method to choose. I have been using cloth diapers for over two years now and have experimented with all of the different systems of cloth diapering. I am hoping to save you some time and effort by giving a little review on my findings.

I absolutely love one size pocket diapers! The one size pocket diaper is an easy means of maintaining a simple cloth diapering system. They are easy to use and adjust to different sizes for growth. You simply stuff an insert inside the diaper and away you go. They rarely if ever leak! I would consider it also to be one of the most frugal systems of cloth diapering, because you only need one diaper to carry you through to potty training (See cost comparisons below). If you have two in diapers, you don’t have to fumble around for different sizes because one diaper works for both of them. They are easy to use and are very similar to disposables. Most one size brands can be worn from 8 lbs-35 lbs.

Continue Reading →

Comments { 93 }

Homemade Cloth Wipes

IMG_6359This week we are doing a little mini series on some of my favorite recommendations for cloth diapering! Stay tuned for my extensive review on various diapers we have tried over the last two years of our cloth diapering adventures. If you are new to cloth diapering, or want to hear more of the pro’s and con’s, check out our previous series on Cloth Diapering 101 here & here.

Let’s begin with simple cloth wipes! Did you know that it is just as easy to use cloth wipes when you are cloth diapering? In fact, it reduces your waste and costs significantly. Simply toss that little cloth wipe in the cloth diaper pail and wash with your diapers. I have found cloth wipes to clean baby’s bottom far more effectively versus their disposable friends. You can find cloth wipes online through many cloth diapering sites, such as Nicki’s Diapers (my recommended supplier), but it is easy to make your own. I chose to use an old receiving flannel blanket because it is very soft, durable, and frugal. It is thicker than many of the cloth wipes on the market and thus lasts longer. These wipes are also very handy in the kitchen to clean up dirty little hands and faces. We keep a stash at all times with the kitchen towels for this purpose.

Supplies:

Flannel fabric (take an old flannel receiving blanket and you are set! One receiving blanket will make you around a dozen wipes.)
Thread

Start by cutting your choice fabric into 8 x 8 inch squares. Sew a zig-zag pattern around the edge. Congratulations! You have a cloth wipe. It is that simple. It will fray just a tad but its just a cloth wipe and nobody cares! Store your wipes in an old wipes container. I like to run my diapers under water and ring them out to keep them damp in the container. You can also make a simple wipes solution by mixing some castile liquid soap and water and pouring over your wipes. I keep a soapy mixture in a foaming container to apply directly on the cloth for those difficult jobs.

How many wipes should you make? I would recommend having about 2-3 dozen wipes. Evaluate how often you change diapers and wash to figure out your needs.

Comments { 31 }

Frugal & Fun Makeshift Kiddy Pool

IMG_6272

We decided to be creative while trying to bear the heat of the summer this year by making our own kiddy pool. We took a under the bed plastic storage bin which had been storing random pieces of clothing and filled it with water for our own makeshift pool. Karis loves it and has a blast in it for most of the day during a few heat waves we have had this summer. Works great for small spaces as well as we are limited on our condo patio. We replace the lid when not in use to prevent the water from getting dirty, but also to save the water! In the winter, I want to transform it into a sand box. We will probably keep it on the deck but may also experiment with bringing it into the kitchen for some winter fun.

Have you been keeping cool? How are you enjoying the summer?

Comments { 18 }

Scriptural Encouragement for Preparing & Giving Birth

Our son Titus shortly after his birth

Our son Titus shortly after his birth

Although my newest addition is already five months old, I know there are plenty of new babies in the oven ready to be welcomed into the world. I wanted to share the passages of Scripture, quotes and encouragement that sustained me through my natural delivery. It is not an easy task to give birth to a child, nor is it something we can do on our own strength. I believe the Word supplies us with much needed sustaining grace to enable a mother to proceed through labor and delivery. My encouragement for all you mom-to-be’s is to take a few hours or a day off in preparation for your new arrival to prepare your heart for labor. I have done this prior to both my deliveries and it has been amazingly beneficial. Just go to a coffee shop, sit by a river, lake or stream, and meditate upon the Word. Write out your fears and pray through each one. Ask the Lord to prepare your heart. He is so faithful to do so! I pray these truths would be an encouragement and blessing to all you expectant mothers!

Continue Reading →

Comments { 75 }