Archive | bellies & babies RSS feed for this section

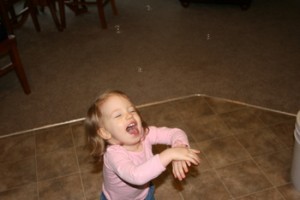
Potty Training Tips & Tricks

I received several requests for any tips I might have to share on potty training. As we have successfully completed our first two weeks at potty training, I have definitely learned a lot! I read several books in the process of preparing to do this, but the best tips I found were from those who had gone before me – my mom especially. I remember the days when she trained my two younger twin siblings. She allowed them to run around on the deck and grass for several days half naked and then would just spray them off with the hose when they missed the potty chair. It worked splendidly.

Expose them well - Start by purchasing a potty chair a few months before you are ready to start training and simply begin talking about it. Allow them to sit down on it and talk about going potty and making the sounds “pss”. We found the books on potty training for kids to be fun and helpful, such as The Potty Book for Girls & Big Girls Use the Potty (of course they have companion ones for boys). We started reading these awhile back. If you can get them around others that are learning to use the potty as well that is very helpful.

Supplies:
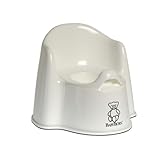
Child’s potty - having her own special potty definitely was far less intimidating for my daughter than sitting on the toilet. Maybe it’s just a girl thing, but she was afraid of the toilet but didn’t mind using her potty chair. We chose the Bjorn Potty Chair because it seemed like it would be effective and comfortable for both girls and boys.
Panties/underwear – Big girl/boy underwear seems to be most effective in training as they can really experience the wetness. Cloth training pants or pull-ups are just like a diaper so it is hard to distinguish a difference. This was my mom’s advice which I am glad I followed – saved me money too! We do use cloth diapers or pull-ups for bedtime, naps and when we are out and about to prevent accidents, until they got the basics down.
Small treats- M&Ms, gummy bears, etc
Small stool – Karis loved being a big girl and having a special stool with which she could turn the bathroom light on and off and wash her hands. She can do it all with this cute little stool as it is light and easy for her to move around.
Transitional potty seat - this is helpful but not essential. Good to keep in the car when you are out. The Primo 4 in 1 seems like a nice option here to help you simplify.
Juice, milk or special drinks – these are useful when you are trying to just get them going frequently. Keep them drinking a lot and you have more opportunities to practice on the potty.

Tips:

- Start by selecting a time when you can just take a good week and focus on training. Don’t try to squeeze it in within other big events. Pull back and enjoy your little one. It really can be a fun time to build your relationship as your read lots of stories and praise and encourage them alot!

- Allow your little one to run around naked from the waist down for the first few weeks. If you can keep them outside then it is even better (thus I recommend training in the summer). We had a little kiddy pool set up on our back deck and we just spend a few days hanging out there playing in the water. For the first day, we just sat on the potty the entire day (for the most part) and read stories or let her play with my i-pod. It helped her just get the feeling of going.

- I found that she normally needed to go every 45 minutes to an hour, so I would just regularly in this time frame say it was “time to use the potty”, and most of the time she would go. If she went, we would cheer her on and reward her with a little treat. This definitely encouraged her to keep it up.

- Stay close to home for the first week or so. My first mistake was to leave the house for the day just 3 days into training. She did not want anything to do with the potty when she was distracted with playing with others. She also was scared of the toilet and did not want to try it.

- Bring your potty chair or transitional trainer with you when you go out – for the first while it is definitely very helpful to carry the tools with you. This would have helpful in that previous example if we had brought the seat she was most comfortable with at this stage.

Those are my thoughts!

UPDATE: Karis was completely potty trained (including nights!) in five weeks time. I was blown away. I definitely think that it is extremely helpful to potty train in the summer when she was able to go naked outside on our deck. Also, avoiding any form of training pants was also key. She wore big girl panties from the start. I cannot emphasize enough how this really worked for us! I also think waiting till she was 26 months also was a huge plus. I read one study that showed a higher success rate at the 26 month age and it worked for us. As far as night time training goes, after we got fully trained during the day, we just let her go to bed with her panties at night. We made sure to use the potty before bed. She wet the bed one or two nights and then she got the idea to get up if she needed to go. It worked!

Titus (6/2011): Titus is now 27 months and my goal was to get him fully potty trained before baby #3 arrives in August! We started with a full day of outside play on a sunny day with the potty while being naked, drinking lots of fluids, playing in the pool, reading books together, and giving a special treat every time he went on the potty. Again, we used real big boy underwear and not pull-ups (Thomas the Train underwear have been a huge hit!) He freaked out at first when he went on himself and was very hesitant towards the idea of sitting on the potty. I thought for sure he wasn’t ready yet, but really felt I needed to persevere for a few more days before making the final call.

My husband starting encouraging me to give him a little more space and stop nagging him so much about sitting on the potty (as I was asking him every 30 minutes if not sooner). I stepped back a bit and didn’t ask so frequently (maybe once an hour), but rather encouraged him to sit down when sister, myself, or daddy sat down on the toilet. He seemed to really like the idea of going together. Imagine my surprise, after a few days into it, he really started getting independent. He wanted to do it on his own. Everything from sitting on the potty, to dumping into the toilet. He started going on his own without even telling me. There has been a lot of laughter and fun in the process! I just have been amazed that by giving him a little space, gentle reminders, rewards, and going together, has really inspired him to take it on. He is only wearing diapers at night time now (after a week into it). It seems the age factor of 26-27 months has been hugely beneficial for both my kids in making this an easy transition. And boys are not harder than girls in my experience. If anything, Titus has been easier!

Obviously every child is different, so give yourself grace for the journey, but these tips have been successful with both my little ones, so I thought I’d pass it on!

Do you have any additional tips or recommendations to share?

Further Resources:

Toilet Training in Less Than A Day – this book explains the process of the intentional focusing on toilet training for a day by drinking plenty of liquids and offering a reward. I found two or three days of this was hugely helpful in launching well into potty training. Very helpful!

Potty Train Your Child in One DayAnother book very similar to the above!
Comments { 54 }

Increasing Milk Supply: Homemade Mother’s Milk Tea

IMG_6143-1I have personally struggled with keeping up a healthy and rich milk production for my babies. I have battled with discouragement and failure when not able to satisfy my child’s need. The Lord has done a good work in my heart, calling me to trust Him that He will provide my child with the nourishment required to grow healthy and strong. My responsibility is to do my best in eating nutritionally, nursing as frequently as my son needs it to increase my supply, but ultimately God is in control, to which I am thankful.

Here are a few resources and recipes I have found helpful in the journey of nourishing my babies…

Continue Reading →

Comments { 103 }

Homemade Bubbles for Littles

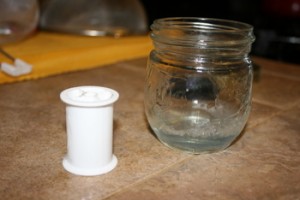
IMG_5238What fun we have playing with bubbles around our house! You can make your own bubble fun play with a simple empty spool of thread and your favorite castile liquid soap. Can’t get much better than this for frugal fun!

Supplies:
Empty spool of thread
Castile liquid soap (Dawn’s dishwashing soap, Dr. Bronner’s or Trader Joe’s castile soap all work well! I prefer the natural castile soap as my little girl likes to eat the bubbles!)
Water

Combine about 1 Tablespoon soap with 1/4 cup water in a small container. Dip one end of the empty spool into your soap and blow out the other end! I store the spool in the container with a lid until future use. An 8 oz jam jar works perfect. Have fun!
IMG_5234IMG_5230IMG_5229IMG_5226

Comments { 12 }

Moby Wrap Review

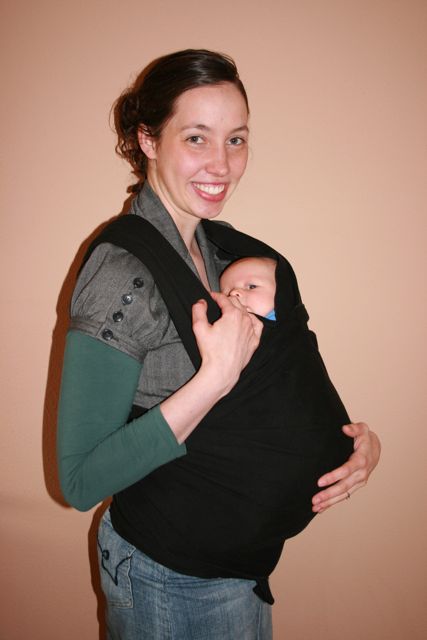
img_5706I love to be able to snuggle up with my newborn babies and see them fade out into oblivion as they cuddle on my chest; thus, I greatly love the Moby Wrap Baby Carrier!

With my first baby, I dreaded the thought of a crazy wrap or sling! But as I have grown in my mothering and learning to enjoy the simple things of life, baby wearing became more appealing. It’s so easy to get things done while soothing a fussy baby, that’s for sure!

I love the full support this carrier provides for my little one while keeping them perfectly snug and secure against my body. It’s just like I am pregnant again! My hands are completely free to do the tasks necessary around my home. This carrier has been particularly handy while juggling a teething little guy (yes, Titus has been teething away this past week – alas!).

Continue Reading →

Comments { 54 }

Having Multiples Without Breaking the Bank

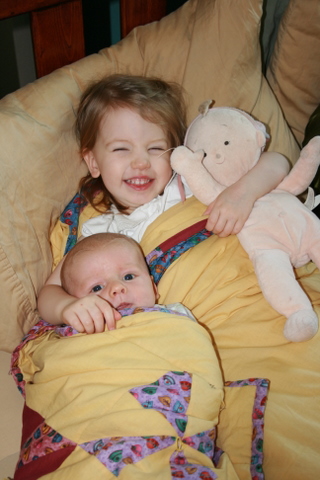
img_5693I have enjoyed reading from Crystal at Money Saving Mom in the past about how to have a baby without breaking the bank. Now is it possible to have multiple children and still maintain a budget with the cost of clothing, diapers, and other supplies? Children are such a blessing from the Lord and should not cause us to fret over making ends meet. God will supply all our needs. But how can we be wise in preparing and caring for multiples? When a boy and a girl join the family we are bombarded with all the blue and pink colors for every item imaginable! Do I really need all this? Aren’t they just too cute? I can’t help but post pictures of them!

The key: Choose gender neutral items!

That pink bouncer is cute but will the hubby want his little guy sitting in it with the next one? That would certainly not fly with my hubby! By purchasing a pink and blue version of everything you double your expenses. Save hundreds of dollars by doing a little advanced preparation. By following this idea, we only purchased a double stroller (craigslist wins once again!) beyond clothing for our little man. Side note: the buggy board is another frugal alternative to a double stroller that you need to check out if your single stroller is compatible.

Continue Reading →

Comments { 52 }

Homemade Nursing Pads

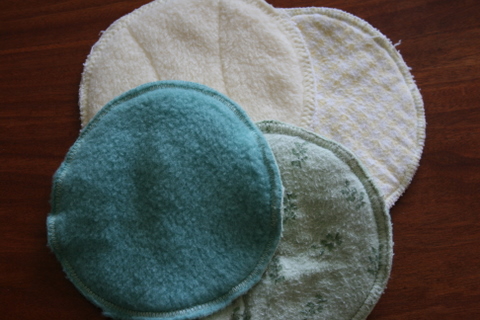
img_5632-1 I had been at my wits end trying to find a good absorbent nursing pad that would not leak through the night. I hate waking up to a nice wet spot on my sheets. I admit…I have problems, but my son is sure happy with all that good milk! I tried three different styles to no avail. I was just about ready to go find another one when the thought crossed my mind to try to make my own! I wish I had started here in the first place. I made these wonderfully absorbent flannel and fleece nursing pads in just a short time with fabric I had on hand and did not have to spend another penny. Flannel is soft and comfortable and fleece is waterproof and will keep the moisture away from your clothes. Horrah!

Making your own nursing pads is simple, frugal and fun! Choosing cloth reusable pads is an excellent way to avoid the waste of disposables and another way to be a good steward of our environment. Cloth is so much more comfortable overall!

This was a fun and easy project and a great gift for an expectant mother as well. I made a few sets for a friend at the same time. Too fun!

Continue Reading →

Comments { 88 }

Product Review: Swaddling Blanket

Swaddling is a huge blessing! Titus sleeps so much better in this manner! I call my swaddled babies my little burritos. They look so cute I could just eat them up. ;) We found the miracle blanket very helpful for this (thanks to a $10 craigslist find!). I tried experimenting with using various receiving blankets for this purpose and he would just squirm his arms right out of it and then disturb himself with his flinging arms. This blanket keeps him snuggly and warm, safe and secure without any fear of getting covered by blankets, but it is also thin enough that he doesn’t get too hot. We used this same blanket for Karis and had a very similar experience. I believe it assisted in helping them sleep longer and more peacefully as it mimics the womb. Unlike other swaddling blankets we have tried with velcro that wear out, this blanket has a pouch for the legs and feet, additional fabric inside to secure their arms by their sides, and simply wraps around them several times to keep them secure. It lasted for the first several months with my daughter. My only con: I wish I had more than one! He will burp up all over it and I have to get it washed quickly for the next sleeping time!

Have you tried swaddling your baby? What was your experience?

It works for me!

Comments { 35 }

Adjusting to Life with Two

img_5458A typical morning lately at our house resembles something like this…a little potty training, lots of cloth diaper changes, dealing with a difficult stage in child training a toddler, and all!

The clock chimes seven o-clock and the baby awakes (if we are lucky). Titus is fed while we have our morning devotions. Karis awakens and needs a diaper change and dressed for the day (and do that hair so we can see her little face!). Mommy needs to get dressed. Karis is extremely hungry and makes it known. Mommy prepares breakfast while trying to figure out what should be pulled out for dinner. Titus begins to scream with tiredness and ready for a morning nap. Mommy prepares to get Titus ready for a nap while delivering breakfast to Karis and Daddy, only to discover that Titus has burped up everywhere and needs a new outfit (yes, he is a burper!). Change Titus and lay him down for a nap.

Mommy finally sits down for her breakfast only to last for a minute or two before Karis has completed her breakfast and wants to get down and read stories with Mommy. Mommy engulfs her breakfast while reading stories and trying to clean up the kitchen (or at least throwing it all in the sink!). She looks into the mirror and decides it would be nice to do her hair but only after Karis sits down on the potty chair and Titus has been nursed and changed once again. It is 11:30 am and time for lunchtime. Wow! Life is busy and I only have two!

Continue Reading →

Comments { 56 }

Guest Post: Cloth Diapering 101 – Part 2

cloth-diapers1

Welcome back for part 2 from Lauren discussing all the different options available for cloth diapering! To read part 1, visit here. Lauren blogs over at Cloth Diaper Diaries.

Now that we’ve covered some of the main reasons for using cloth, I’d like to break down the methods of cloth diapering.  I know that when I first began my research I was incredibly intimidated by the whole idea of everything about it: from making the initial purchase, to actually using and washing cloth diapers.  In fact, I was so intimidated and overwhelmed that I researched…and researched…and researched!  My husband finally said, “If you’re going to do this, please just do it and stop spending so much time on the internet reading about it!”  I really hope that by the end of this post I’ve helped to simplify some of what’s mystifying, and supplied you with the information and encouragement you need to make the switch yourself!

What is meant by “cloth diapering”?

To me, there are four ways to diaper a child in cloth: prefolds and covers, fitteds and covers, pockets, and all-in-ones.  I’m going to try to give a complete explanation of each style, but it won’t be as thorough as the information you can find on my cloth blog or many other places online.  If you find you still have more questions after this post, please visit my blog and look in the “Quick-Click Table of Contents” on the right-hand side of the page.  If you don’t see a tab for your question, just leave a comment or send me an email and ask – I’m always happy to help when I can!

Continue Reading →

Comments { 59 }

Guest Post: Cloth Diapering 101 – Part 1

cloth-diapers

Guest post by Lauren, mother of two, who has tried practically every form of cloth diapering method on the market and offers her advice, reviews and recommendations through her blog, Cloth Diaper Diaries. Lauren has already been a huge resource for me in figuring out some diapering issues with our little people! Thanks for sharing Lauren!

When I was about three months pregnant with my daughter and my son was 16 months old, I suddenly began to think about the overwhelming cost of keeping two children in disposable diapers.  “How will we ever be able to afford that on our budget??” I frantically wondered.   So I turned back to something I had briefly mused on while pregnant with our son: cloth diapering.  I was amazed to learn how many more reasons to cloth diaper there are than just concerns for your budget!   Then, of course, I was a little stunned by all the different diapering styles and brands – it’s just so much information to absorb!  (Whoops, no pun intended!)  Today I hope to share some information with you on the why and how of cloth diapering.

There are three main reasons that people choose to cloth diaper: environmental concerns about the abundant waste caused by disposable diapers, the potential for adverse effects on a child’s health (including excessive or perpetual diaper rash) from using disposable diapers, and the tremendous expense of disposable diapers.

Continue Reading →

Comments { 29 }