Archive | July, 2012

True Woman 101: Week 3: Sugar & Spice

Welcome back for Week 3: Sugar & Spice in our discussion through the 8 week Bible Study in True Woman 101: Divine Design by Nancy Leigh Demoss & Mary Kassian. If you’ve missed out on previous weeks, you can find them here. We had a smaller group this week in our live discussion, but we enjoyed such sweet fellowship and encouragement, so feel free to tune in through our live audio recording.

Follow this link: True Woman 101: Week 3 Audio.

Here is the panel discussion for Week 3:

If you cannot view the video, click here.

Since my notes were covered thoroughly in the live discussion which you can listen to above, I will just copy a few notes and thoughts below.

Continue Reading →

Comments { 9 }

Summer Reading at Our Home

One of my goals this summer was and is to simply take more time in my day to just simply read. To cut back on all the outside activities we could participate in and spend a lot of quality and personal time reading books. We’ve been cutting back on many things lately amidst the challenges of launching a business, so we can have more intentional family time together. Thus my absence from the blog recently (which will continue through the remainder of the summer). I love cuddling up during our daily rest time routine and read a quality novel or inspirational book. My goal…1 hour per day for my own personal reading and 1 hour with the kiddos reading classic chapter books. Bring it on!

Here’s our list:

Chapter Books With the Kiddos

Here’s A Penny & Penny and Peter by Carolyn Haywood

The Ralph Mouse Collection (The Mouse & The Motorcycle, Runaway Ralph & Ralph S. Mouse) by Beverly Cleary

My Personal List:

Crime & Punishment by Fyodor Dostoyevsky – This is an amazing classic and story of redemption that was simply fabulous. I want to keep a good mix of old and new books on my list to stretch my mind at all times. It has been my favorite classic yet!

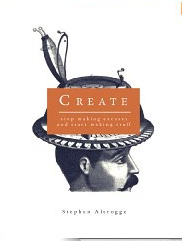
Create: Stop Making Excuses and Start Making Stuff by Stephen Altrogge – We are all creative and we need to start living like we are. We each have unique gifts entrusted to our care. This ebook is a short and quick read that will get you motivated to create beauty in your sphere for your Creator.

Redeeming Love by Francine Rivers – a retelling of the story of Hosea in California gold rush days, communicating the powerful love of God. Never read anything of Rivers so I am intrigued to read this one.

Knowing God by J. I. Packer – a rich theological book that beautifully describes the nature and attributes of God. Reading together with my hubby before bedtime and my heart is being renewed and strengthened while being enraptured into the splendor of our Creator.

On Writing Well by William Zinsser – Do you want to learn to write well? Well, I do. Thus this book is on my list. I want to take more consistent steps towards growing and improving my writing skills. Always learning, always writing…that’s my goal.

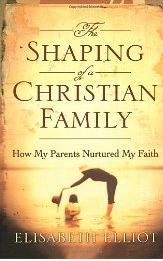
Shaping of A Christian Family by Elisabeth Elliot – This book gives you a close up look into the way that Elisabeth Elliot was raised and how her parents took faithful and intentional steps towards raising their children to be godly and intelligent adults who desire to serve the Lord. Simple, Biblical wisdom.

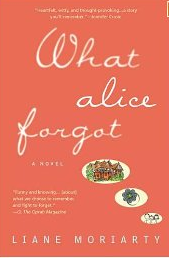
What Alice Forgot by Liane Moriarty – Loved this novel! I am always cautious when it comes to novels as they can be quite intoxicating and ultimately time-wasting if I get caught up in them at the sacrifice of my other priorities, but the occasional novel can be very refreshing break. What Alice Forgot tells the story of how Alice falls and forgets ten years of her life and was a fresh reminder to me of the preciousness of life. I have been inspired again to be intentional, to appreciate my husband, and to treasure the fact that the Lord has given me three special gifts of life in my children.

True Woman 101: Divine Design by Nancy Leigh Demoss & Mary Kassian – so far this Bible study has been A+! My mind is being challenged to truly know and hold fast to God’s beautiful design for me as a women. His design is at the core of the work of redemption because it is designed to image the glorious relationship of Christ to His church. I’m posting the audio for our discussion here on the blog each week.

Anything: The Prayer that Unlocked My God and My Soul by Jennie Allen -thanks to Simple Mom‘s recommendation of this one, I was excited to pick up a book that would continue to challenge me to live intentionally for the Lord whatever the cost. We need these reminders on a regular basis in our culture when it is so easy to become consumed in ourself and our material accumulation.

That’s all for now! Can she read them all before the end of August? Well…I admit I did have a head start.

What’s on your summer reading list? Any good recommendations you want to offer?

Comments { 42 }

True Woman 101: Week 2: God’s Design in Manhood

Wow…we finished Week 2 of our Bible study on True Woman: Divine Design this past week and it has been fantastic and so refreshing to renew and challenge our view of biblical womanhood and what it means to live it out according to God’s design. We were able to record our week 2 discussion for you all…it took us awhile to figure out how to get it uploaded and all, but here it is at last.

Here’s the link to our live discussion from my home to yours: True Woman: Week 2 Audio Discussion. It is about an hour in length. With babies and lovely pauses, it is the real deal.

Here is the panel discussion on Week 2. These weekly panels are so fun to watch and add a great additional resource to the study! You can view all the panels at True Woman 101.


If you cannot view the video, click here.

REVIEW: In Week 2, the focus of our study turns briefly to the intentionality through which God created manhood. God created men to image the relationship of Christ to the church. At the core of manhood, we see that taking initiative, working to provide for others, being a protector and provider, as well as exercising godly leadership are at the core of what it means to be a man. Man’s role is not about exalting man. Authority is not about rights; it’s about responsibility.

Continue Reading →

Comments { 5 }

Homemade Summer Fun with Children

Guest post by Jaimi Erickson at The Stay-at-Home-Mom Survival Guide

Playing outdoors is one way for my children to explore God in their lives. Children in concrete stages of development love to explore by doing and outdoor time allows for so much exploration and learning. My children are ‘outdoor kids’, large motor machines. They need to get outside in order to keep their spirits in balance-I need that too. Thankfully summer provides a multitude of outdoor time for fun-and learning.

Having a 4-year old and a 15-month old allows me to bridge activities for two different skill levels, but two always-eager participants in any homemade ‘game’!  Some summer climates limit how many hours can be spent outside in a day. When we experience temps reaching 100+degrees, or afternoon downpours, we need to adapt our outdoor plan to work inside. This list of activities can be taken outdoors, but will work inside as well.  These are quick to create, low-to-no-cost (my mantra), and although are written with a preschooler in mind, I have noted how they can be adapted for younger ones.

1. Homemade Hopscotch Fun

On a rainy day, I used duct tape to create a hopscotch pattern on the back of a yoga mat. In about 10 minutes we had a new game to play that allowed us to burn some energy! We used homemade bean bags to toss. This game reinforced number recognition, exercised eye-hand coordination, and allowed for some gross motor movement to burn energy and work on balance.

[Adaptation:  I encouraged my toddler to step on the numbers and then I named them, or she tossed a beanbag and I identified on which number the bag landed.]

2. Homemade Bean Bags and Games

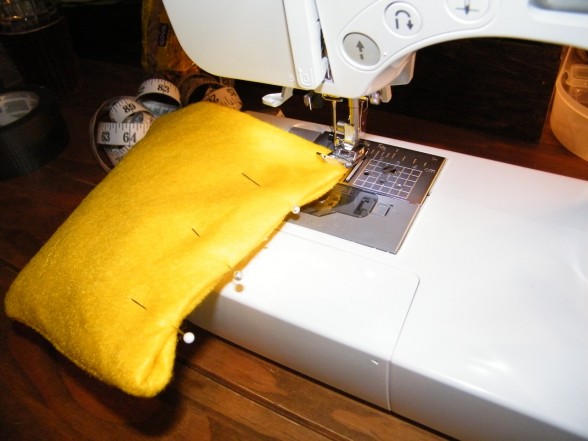
I made bean bags with scrap fabric, dry beans, and some quick stitches on the sewing machine.  They provided so much indoor (or outdoor) fun. We played “Simon Says”. (i.e. “Simon Says” put the bean bag on your head.”) We sang “Head, Shoulders, Knees and Toes” and placed the bean bag on each part.  We tossed them into a laundry basket from different distances (marked by masking tape on the floor). We each took turns hiding one bag in order to let each other seek it out. We worked on teamwork, large motor movement and vocabulary.

[Adaptation: I made bean bags in primary colors, so they could be used for color recognition. My young toddler LOVES learning to identify new body parts, so I placed the bean bag on her head, shoulder, arm, etc. while I said the name of each part to help reinforce this learning.]

3. Drop Cloth Painting Canvas

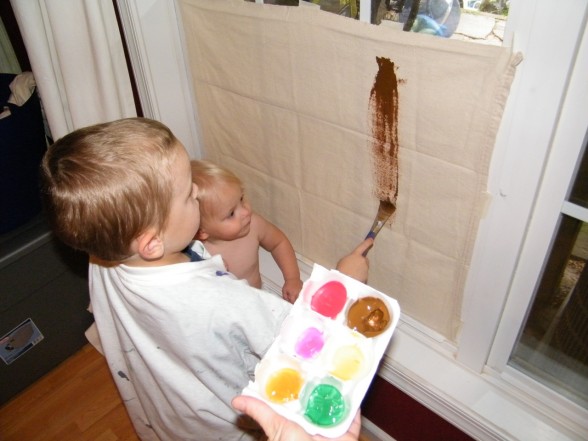
My children love art and creating artwork to send to the grandparents, so I am always looking for new materials to explore within our budget. I found an inexpensive drop cloth and cut it in quarters. This can be pinned to a wall, lightly nailed or clamped to a fence outdoors, or taped to a window inside to allow for a large painting surface. (I wanted to do this outside, but it rained so we improvised indoors!) Increasing the surface area where they could paint, and pinning the canvas up, involved more gross motor movement and added interest.

[Adaptation: My toddler painted on the lower half while my preschooler painted near the top so they were separate by working together.]

4. Packing Peanut Snow

We live in a hot climate in the southeast. Recently our electricity was out for 48 hours during high temperatures. We needed to do anything to feel cooler. Foam packing peanuts as pretend snow were a hit in our home! My daughter and son enjoyed scooping them, piling them up, and making snow angels while laying in them on the dining room rug. What a great pretend play scenario on a hot day-play like it is cold! Just ‘thinking cold’ and ‘playing in the snow’ of the packing peanuts helped ease our cabin fever. We dropped them from above our heads and tried to catch the ‘snow flakes’ as they fell. They can even be thrown and caught allowing for more muscle movement and exercise.

All of the activities I create are based on observations of my children combined with what they need to learn as they grow to be godly individuals. There are so many ways we can add interest to our time in God’s creation outdoors-or spend our time together while playing inside depending on what the weather will allow. My first ministry mission is to my family. My children want my attention more than anything.  When I combine teaching skills with activities that feed their interests in an intentional way, we have fun whether during a rainy ‘indoor day’ or an outside day in the sun.

Jaimi Erickson is a woman living in service to God’s mission. She ministers daily to her husband and two children as a stay-at-home mom and homemaker. She formerly served as a teacher in the Early Childhood field.  Jaimi shares motivation for stay-at-home-moms, household tips, and developmentally appropriate make-at-home activities for infants and up on her blog The Stay-At-Home-Mom Survival Guide.

Comments { 8 }

Soaked Whole Wheat Bread in the Bread Machine

Guest post by Emily Benhase

For my first birthday after we were married, my husband gave me a bread machine. I had wanted one for months and loved it! But just a few months later, I was introduced to the “real food”/Nourishing Traditions way of cooking and eating. As I learned more about the benefits of soaking grains before consumption, the bread machine was used less and less. I assumed a soaked bread recipe and the bread machine were incompatible.

I started making Lindsay’s recipe for soaked whole wheat bread, by hand, on a bi-weekly basis, making two loaves at a time (we ate one fresh and froze the other for the following week). Although I did enjoy the process of bread making–especially kneading–I soon realized there had to be a more efficient way to make healthy, homemade bread for my family. I determined to adapt this delicious recipe to use in my bread machine. It didn’t take long before I was successful!

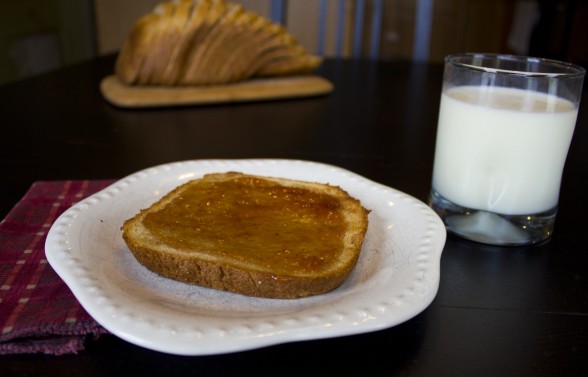
We love this bread. It is our standard bread that we use for toast, sandwiches and simply enjoying warm with butter and a drizzle of honey; we also think it makes wonderful grilled cheese! Especially now that we have added two little ones to our family, I love not only the healthfulness of this bread, but the convenience of my bread machine doing the work for me.

Tips Before You Begin:

  • Make sure the flour/water mixture you’ll be soaking is plenty moist. You don’t want it to dry out, plus this will make it easier on your bread machine to mix in the remaining ingredients the next day.
  • In order to maximize the effectiveness of the soaking, you should make sure you are using warm to hot water.
  • You do need to activate the yeast for this recipe.
  • Any combination of white/whole wheat flour can be used (I use 2 cups white whole wheat flour and 3/4 cup unbleached all-purpose flour).
  • I prefer white whole wheat flour as it provides a lighter end product. This type of flour can be found in most supermarkets these days.
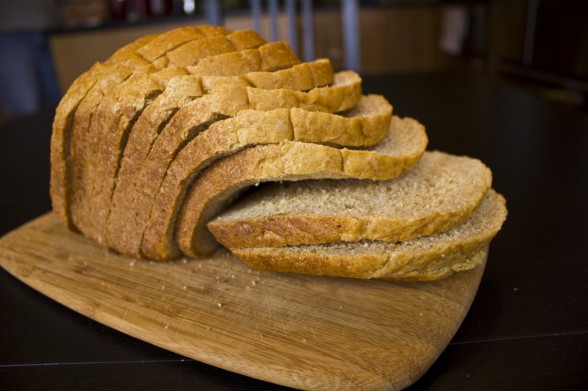
  • To achieve the most even slices, let your bread sit out overnight. Do not attempt to cut it right after baking (I know it’s tempting, it smells so good!). Letting it sit will help it firm up and will result in nice, even slices. Using a quality bread knife is also very helpful!

I’ve also included instructions at the bottom on how to make the dough in your bread machine and bake it in the oven, if you prefer that method. I have done this many times with great results. If desired, you can double the recipe and make two loaves worth of dough in the bread machine.

Soaked Whole Wheat Bread in the Bread Machine

1 Tbsp apple cider vinegar (or lemon juice), plus enough water to make 1 cup
1/4 cup honey (I’ve also used raw cane sugar and maple syrup with success)
3 Tbsp oil or melted butter
1/2 cup oats
2 cups whole wheat flour (I use white whole wheat)
1-2 Tbsp add-ins (ie, ground flax seed, millet, wheat germ, etc.), optional
2 Tbsp warm water
1/4 tsp honey or sugar
2 tsp yeast
1 1/8 tsp salt
1 Tbsp vital wheat gluten
3/4 cup unbleached all-purpose flour

Directions:

1. Add vinegar, water, honey and oil to the pan of your bread machine. Then add the flour, oats and add-ins, if desired. Start the bread machine on the dough setting and allow to run for about five minutes, just until the ingredients are well-mixed. Turn off or unplug the machine, scrape down any dough stuck on the sides of the pan and allow mixture to soak for 12-24 hours.

2. After the soaking period, in a small bowl, combine the 2 Tbsp warm water, honey and yeast. Allow to activate for 5-10 minutes, until mixture is foamy. Add yeast mixture, salt, vital wheat gluten and additional flour to the bread machine pan.

3. Select the whole wheat setting and desired crust darkness (I use medium) and press start. Keep an eye on the dough for the first few minutes to see if any extra water or flour is needed. You want the dough to be slightly tacky but not too wet.

Allow the loaf of bread to cool for 10 minutes in the pan, then cool on a wire rack overnight. Slice and enjoy!

To bake bread in the oven:

Follow steps 1 & 2. Select the dough cycle on your bread machine and press start.

When the dough is finished, remove it from the pan. Punch down and on a lightly floured surface, roll the dough into a large rectangle, then roll it up and tuck the ends under so it fits in your bread pan. Place the dough in a greased bread pan, cover with a towel and allow to rise in a warm place (I turn my oven on the lowest setting: 170 degrees) until doubled, 30-45 minutes.

Once the dough has risen, preheat your oven to 350. Bake the bread for 30-45 minutes, until the sides and top are lightly browned and the bottom sounds hollow when tapped. Allow the loaf to cool in the pan for 10 minutes, then remove to a wire rack to cool completely (see notes above for slicing).

Enjoy!

To learn more about soaking, visit The Value of Soaking Your Whole Grains.

Emily is a homemaker who lives in Cincinnati, OH with her husband Ryan and their two children: Jericho (2) and Anna (4 months). Their family is passionate about urban living, good food and, most of all, living their life in a way that honors and serves God. 

Comments { 40 }

Frugal & Nutritious Barbecue Condiments

Guest post by Kresha Faber at Nourishing Joy

Summertime has arrived and with it comes outdoor meals. It is such a blessing to gather with friends and family on a warm summer evening to linger over good food and drink and be nourished by each others’ company!

Now, I don’t know about you, but in my family, these gatherings are standard grill fare only: hot dogs and hamburgers with all the fixin’s. But the “fixin’s” tend to be rather expensive to keep in stock for our large extended family and I prefer to feed my kiddos whole, natural foods whenever possible, so I started tinkering with recipes to create homemade versions of all our staples that actually taste like the store-bought alternatives.

Thus, today, I offer our take on four of the classics: ketchup, mustard, mayonnaise, and sweet pickle relish.

(As a side note, I had so much fun developing these recipes that I ended up writing an entire cookbook about condiments, which is due out sometime this month. Stay tuned at NourishingJoy.com for details!)

Easy Peasy Ketchup

Makes approximately 3 cups

1 1/2 cups tomato paste
3/4 cup raw honey
1/2 teaspoon blackstrap molasses (optional)
½ cup water
½ teaspoon onion powder
1 clove of garlic, finely grated
1 cup apple cider vinegar
1 1/2 tsp unrefined sea salt (more to taste)

Place all ingredients in a large saucepan and stir together with a whisk until smooth. Heat over medium heat and bring to a boil, then reduce to medium-low and simmer for 20 minutes, stirring often.

Remove the pan from the heat and let cool. You may certainly serve the ketchup immediately, but the flavor improves after 2-3 days.

French’s-Style Mustard

Makes 1/2 cup

1/2 cup dry mustard powder
1/2 cup water
1/3 cup white distilled vinegar
1/2 teaspoon sea salt
1/2 teaspoon ground turmeric
1/2 clove of garlic, finely grated
1 pinch smoked paprika
1 teaspoon cornstarch or arrowroot powder

Whisk everything except the cornstarch together in a small saucepan until smooth. Place over medium heat and bring to a boil, then reduce heat and simmer for 5-10 minutes, stirring often.

About 1 minute before you want to remove the mustard from the heat, stir the cornstarch together with 1 teaspoon of cold water. Then, while whisking, pour the cornstarch into the simmering mustard. Let cook for 1 minute to thicken.

Remove from heat and let stand 1 minute to set. Pour into the serving container to cool. The mustard may definitely be served immediately, but the flavor will mellow after 3-4 days.

Everyday Mayonnaise

Makes approximately 1 ½ cups

The combination of olive, coconut, and sesame may sound strange, but the three blend unexpectedly well. This mayonnaise is scrumptious on burgers and sandwiches, although I prefer a blander mayo for making salad dressings and dips.

2 egg yolks
3 tablespoons lemon juice or white wine vinegar
½ teaspoon sea salt
½ teaspoon Dijon-style mustard (optional)
2/3 cup olive oil or sunflower oil
1/4 cup coconut oil
2 tablespoons toasted sesame oil

Combine your oils in a measuring cup with a spout or in a squeeze bottle. Set aside.

Place the egg yolks, lemon juice, sea salt, and mustard in a food processor or blender and pulse until everything is combined. (Or follow Lindsay’s directions for 10-Second Mayonnaise.) Then, with the motor running, pour in the oils as slowly as possible, preferably taking 3-4 minutes to add the entire cup of oil.

Sweet Pickle Relish

Makes approximately 1 quart

1 1/4 lbs fresh pickling cucumbers, scrubbed
1 onion
3 tablespoons pickling salt or coarse Kosher salt (do not use regular salt, as the additives will change the color of the relish)
Ice cubes or ice chips
2/3 cup white distilled vinegar
1/2 cup apple cider vinegar
1 cup evaporated cane juice
2 teaspoons mustard seeds
1/3 teaspoon celery seeds
1 inch cinnamon stick
1 pinch ground allspice
1 pinch ground cloves
1/4 teaspoon turmeric

Coarsely chop the cucumbers and onion in a food processor or food grinder and place in a large bowl. Sprinkle in the pickling salt and stir so that the salt is well distributed. Place a tea towel directly on the surface of the cucumber and onions, then cover the towel with ice and let sit for 2-3 hours. Discard the ice and rinse the cucumber and onion mixture thoroughly.

In a large saucepan, bring the vinegar, sugar, and spices to a boil. Reduce heat and simmer for 5-10 minutes until the mixture has reduced slightly, then stir in the cucumber-onion mixture. Stir well, spoon into jars, and let cool. The relish can be served immediately, but it achieves the best flavor after 2-3 days. Store in the refrigerator for 1-2 months.

Kresha Faber is the chief writer and blog editor at NourishingJoy.com, a website dedicated to real food, sustainable living, natural homemaking, and joyful parenting. She is the mother of three young children, the wife of an incredibly good man, an opera singer, a cloth diapering instructor, and an avid researcher. She and her husband share a passion for living life thoughtfully and intentionally in response to God’s grace in their lives and she loves to share good meals around a very large table.

Comments { 5 }

Summer Vacationing with Kids

Guest post by Dawn Fong at My Daily Road Trip

I arrived home exhausted and disappointed. I was impatient with my kids, my husband, and quite frankly, I didn’t even like being around myself because of my own crabbiness. Where had I been, you ask? Actually, our family (me, my husband, our 1 1/2 year-old daughter and our 3 year-old son) had just returned from our summer “vacation!” Sound familiar? Have you ever embarked on what you thought would be a restful and fun time of meaningful connection for your family only to come home and wonder what happened? It’s possible that you may have gone at your vacation with wrong attitudes and/or wrong expectations.

When I discussed the aforementioned vacation with a friend, she said, “Actually, if your kids are with, it’s not really a “vacation.” It’s a family “trip.”‘ Ah, yes! Now it all made sense. I realize that people vacation in very different ways. Some pack their days full with activities and events, while others (like myself) prefer to choose a few activities for the entire vacation, while also taking time just to sleep, read, head to a coffee shop, or enjoy deep conversation with others.

However, no matter your vacationing preference, the fact is that things look different when children are involved. Now that you know my vacationing preference, is it any surprise that I returned home from our “family vacation” disappointed, exhausted, and frustrated? Since then, I’ve come up with a few tips that help me and will hopefully help you enjoy that trip your family may be taking this summer.

1. Examine Your Expectations

Before you leave, examine your expectations for the trip. Be realistic. If your entire family is sleeping in one hotel room or tent and your expectation is to get full, restful nights of sleep, you are bound to be frustrated.

If you are packing 7 days full of activities and expect angelic behavior of your kids even though they are exhausted, you are not being realistic. Because your kids are with, your responsibilities as a mom do not get to go on vacation. Accept that and move on.

Try to get a bit of meaningful time with your husband during the trip, but accept that this may happen during travel time in the car. Be ok if your children are not on their all-time best behavior (because how can you really plan that for your trip?!) and your time away isn’t as “special” or “meaningful” as you had hoped. Just enjoy being together, whatever that may bring.

2. Simplify Your Trip

Depending on the ages of your kids, simplifying your trip may allow you to keep your sanity. This may involve being gone for shorter periods of time. Our family took 2 main family trips last summer, each of which lasted about 4 days total. We also chose to stay within 4-5 hours of our home as to minimize the car time for our small ones.

Choose several activities to do and then be content doing the simple, everyday things together. For example, one of our long weekend trips was our “urban trip.” in which we stayed in a motel a few nights, went to the city’s aquarium, and enjoyed one meal out. Beyond that, we went to a local park, enjoyed swimming in the motel pool, and just hung out.

During our weekend trip (our “mountain get-away”), we set up camp at a beautiful campground and didn’t leave for 2-3 days. However, we had a grand time as we went on hikes, explored the campground, and enjoyed time around the campfire. Those times were still special because we were away from home doing things we don’t usually get to do together.

3. Seek to Bless Your Family Members

Seek to bless the others in your family and don’t just think about what YOU would like to get out of the trip. Pack a few special new toys you know will especially bless your kids. After you begin your driving shift, stop at a nearby coffee-shop and grab your husband his favorite coffee drink. Seek to serve others rather than demand to be served just because you are away on a family trip.

4. Enjoy the Journey!

Enjoy the journey and not just the destination – even in the literal sense! Thankfully (because it does not come easily to me), my husband lives out the attitude that life is more about the process and journey of life than the destination, no matter how messy it gets.

Embrace this attitude on your trip, even during the car or plane time you have. Instead of viewing it as the necessary evil to reaching your end destination, view it as part of the trip. And overall, try to go with the flow despite things possibly not going how you were hoping.

Yes, I realize the above things are difficult to carry out, but your adventure will go more smoothly if they are. Now, go and enjoy making memories during that family trip, whatever it may bring!

What tips can you share for cultivating peaceful family vacations with little ones?

Dawn Fong resides in beautiful Colorado where she lives out the adventure of loving her husband, 2 kiddos, and those around her. She enjoys creative communication, deep conversation, iced coffee, hiking, and being part of the process in which other people become more fully who God created them to be. You can find more of her thoughts on life at My Daily Road Trip.
Comments { 19 }

7 Ideas for a Stay At Home Summer Mission Trip

Guest post by Erin Odom from The Humbled Homemaker

Some of my most memorable summer experiences as a teenager involved going on both domestic and international mission trips. Whereas many of my peers looked forward to tanning on the beach or taking a trip to Disney World during our summer breaks, I spent the school year raising money for my next mission trip adventure–whether it be to the inner city of Philadelphia, Pennsylvania, the rugged coastlines of Scotland, or the poverty-stricken villages of Peru.

I couldn’t deny God’s calling to go and serve–and proclaim His gospel to the nations. I met my husband while serving a year-long term in Costa Rica after college. After we married, we spent summer “vacations” in China and Africa. And after our first daughter was born, we spent a semester ministering to refugees in Vancouver, British Columbia, Canada.

When we returned to the States and continued to grow our family, I struggled with how we’d apply our call to missions while living full-time in the United States.

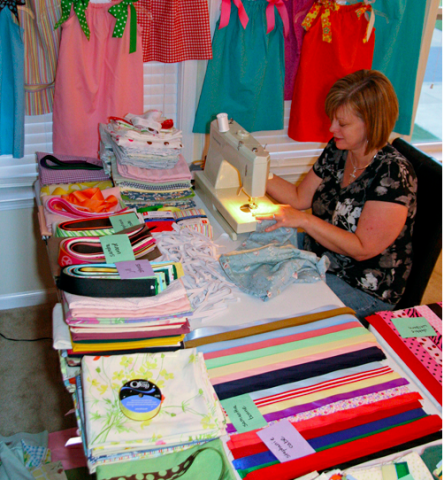
I soon learned that families can minister both internationally and locally from home! Here are 7 ideas for an at-home summer mission “trip”:1. Sew pillowcase dresses together for Dress a Girl Around the World. This ministry collects handmade pillowcase dresses and distributes them to impoverished girls. Even the most novice of seamstresses can sew a pillowcase dress, and your daughters will enjoy learning how to sew for others. Pray over each dress before sending them off, asking the Lord to use the physical need you are meeting as an open door to share the gospel.

2. Host an orphan in your home. New Horizons for Children is a Christian-based, non-profit organization which brings school-aged, orphaned children from Eastern Europe to the United States to share the love of God and a family. You can host a child in your home for 6 weeks for a fraction of the cost of what it would take for your entire family to travel to another country for a week-long mission trip. Several families in my church have participated in this program–and many of the have children come to know Christ during their stay!

3. Collect baby formula for orphans. But isn’t breast best? Well, yes, I’m a huge breastfeeding advocate and even nurse my own babies until they self-wean, but the raw facts are that millions of orphaned babies around the world have no mother to nurse them. There is often a shortage of donated milk for these babies, and without formula, they will die. Brighton Their World is an organization that collects and delivers both infant formula and handmade blankets to these needy orphans around the world.

4. Minister to nursing home residents together. Whether your children are young and can do nothing more than make cards, or if they are old enough to play games with the elderly, a visit to your local nursing home can prove a blessing to the sick and often-forgotten of your community.

5. Minister to a widow–while raising money for an adoption. James 1:27 says that “pure and faultless religion” is to look after widows and orphans. I love how Both Hands is a ministry that combines these. Instead of raising funds via running a 5K, etc., this ministry asks participants to solicit sponsors who will donate money, so they can help a widow with home repairs, painting, etc. The money then goes to a couple who is adopting an orphan. Older children can participate alongside their parents in the home repairs.

6. Send a care package and/or set up a Skype chat with international missionaries. Although it was only for a short time, my husband and I know the loneliness that international missionaries can experience while away from friends and family. Receiving a care package can be a huge encouragement and help renew weary missionaries. The gifts need not be big; most missionaries would be delighted to receive even the smallest of treats from their home countries. Is postage too much? Why not set up a virtual chat via Skype, where you can invite these missionaries “into your home.

7. Host a neighborhood Vacation Bible School. Some unbelieving families wouldn’t dare drop their children off at a church VBS, but they may be more open to leaving them at a neighbor’s home to play games, sing songs, make crafts…and learn about Jesus. Is your house too small? You can always host a one-day event at a neighborhood park. Check out some wonderful VBS materials through Children’s Desiring God.

What are your ideas for a stay-at-home summer mission trip?

Erin is a believer in Jesus Christ and stay-at-home wife and mom of two little redheaded girls (with a third on the way!). She is passionate about Jesus, mission work, her family and researching how to live a healthier lifestyle. She writes for several print and online publications, blogs about natural living and homemaking at The Humbled Homemaker and also edits eBooks.

Comments { 19 }

Ground Beef Gyros

Gyros have been my favorite food of choice when it comes to exploring the various food carts around Portland…since we live in a city that is famous for these small little restaurants on wheels. One of my goals this summer was to prepare our own homemade gyros with quality natural ingredients, and with some experimenting and fun, I have compiled a recipe that is scrumptious and frugal! We all have been enjoying this recipe multiple times over the last month and it is mouth watering yumminess. Dont skimp on the feta!

GYRO PATTIES:

1 pound ground beef (preferably grass fed) - It is also fabulous with thinly sliced sirloin steak or roast marinated (see below), but ground beef it more frugal so a great alternative!
1 1/2 teaspoons dried oregano
1 teaspoon garlic powder
1 teaspoon onion powder
1 teaspoon salt
1 teaspoon pepper

CUCUMBER SAUCE:

1/2 medium cucumber, peeled, cut into chunks
1 cup plain greek yogurt, or sour cream
2 Tablespoons onion
2-3 garlic clove, minced (start with two and add more to your tastes)
1/4 teaspoon sea salt
1/4 cup apple cider vinegar

TOPPINGS:

Feta cheese, crumbled
1 cup Lettuce, shredded
1-2 Tomatoes, chopped
1 small onion, sliced or chopped
4-5 Mediterranean flat or pita bread (I prefer the soft pliable texture of flat bread over pita bread as it makes a huge difference to the taste – It is available at Trader Joes or in the fresh baked goods section at your local store. Often labeled mediterranean greek flat bread.)

Directions:

1. Combine in a bowl the ground beef, oregano, garlic powder, onion powder, salt, and pepper. Shape into 4-5 patties and cook in a skillet until fully cooked. Cut patties into thin slices.
2. To make cucumber sauce: combine cucumber, yogurt/sour cream, garlic, salt, and vinegar in the blender, and pulse until smooth and slightly chunky. (This sauce makes enough for two batches of this recipe, so store the remainder in the fridge until next time! It lasts for a good month).
4. Layer on your pita or flat bread, sliced beef patties, cucumber sauce, feta cheese, onion, tomato, and lettuce. Enjoy!

I recommend that you layer ingredients directly on a flat pita bread rather than trying to open it up. It falls apart too easily if you try to open the pita bread up. Flat bread is my favorite choice as it is more moist than pita bread and more substantial and less likely to fall apart while consuming.

Yield: 4 servings.

Alternative Recipe: If using sirloin steak/roast or lamb steak, marinade in the following blended mixture for best results. A fabulous step up to the recipe!

1/2 onion, cut into chunks
1 garlic clove
3/4 Tablespoon raw honey, xylitol or other natural sweetener (I used honey and it was delicious!)
1 1/2 teaspoon ground mustard
1/4 teaspoon ground ginger
3/4 teaspoon pepper
1/4 cup soy sauce
1 pound sirloin steak, cut into thin strips

Marinade for 1-2 hours before frying in a saute pan, and proceeding with the rest of the recipe above.

Comments { 17 }