Archive | May, 2010

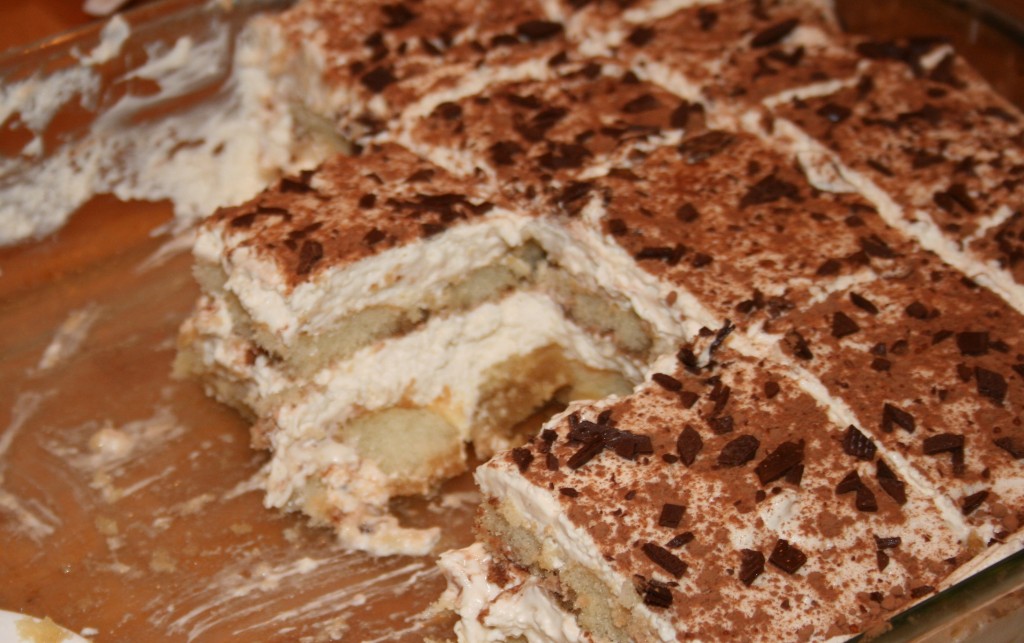
Tiramisu

I am sneaking in a delicious and yet unhealthy dessert today! ;) I was inspired to learn how to make Tiramisu due to my Italian roots. This is an all-time favorite dessert for those special occasions. Life is too short not to enjoy such delicacies every once in a while, and we enjoy these splurges immensely. It is amazingly scrumptious, light, and yet not overly sweet. Perfect balance of sweetness, rich coffee and smooth brandy flavor soaked in ladyfingers. I made this recently for my brother-in-law’s engagement party and it received rave reviews!

1 1/2 cup confectioners’ sugar (organic, if possible)
4 cups whipping cream (raw, if possible)
2 (8 oz) containers cream cheese, softened
1/2 cup sour cream
4 Tbsp whipping cream
2 tablespoon vanilla extract
pinch of salt
3 packages ladyfingers (I find this in the bakery section at my local Fred Meyer’s)
1/2 cup cold strong coffee or espresso
1/2 cup marsala wine, brandy, amaretto or white rum (I use brandy with great success)
Cocoa powder, or grated chocolate

Directions:

1. In a large bowl, lightly beat the cream cheese, sour cream and 4 Tablespoons whipping cream to smooth it out.
2. Add the confectioners’ sugar, 4 cups whipping cream, vanilla, and salt and using an electric beater, beat this mixture until it is smooth and thickened like fluffy cream.
3. Using one 15 x 11 inch glass pan or two 8 x 8 baking pans, line the bottom with ladyfingers, flat side down.
4. Combine the cold, strong coffee and the liquor in a cup.
5. Using a pastry brush, lightly brush half of the coffee/liquor mixture over the ladyfingers.
6. Cover with half of the mascarpone mixture. Sprinkle liberally with powdered cocoa.
7. Add another layer of ladyfingers, and repeat as above. Sprinkle top liberally with the cocoa.
8. Cover tightly with plastic wrap and refrigerate at least 24 hours. This is important, as it blends the flavors and the ladyfingers soak up the liquid. A perfect tiramisu should slice easily, but can be a little soft and perhaps even a little runny when served, rather than holding its shape perfectly.

Makes 12-15 slices.

Comments { 23 }

Heathly Packed Lunches for Work or School

Katie asked:  I remember you mentioning a while back that you would be packing your husband’s lunch for work as he is no longer working from home. Have you found and nourishing, frugal lunchtime menus that pack well and that your husband enjoys? If so, I would love to see a post on that subject and I’m sure there are others who will as well!

Since my husband did switch to a full time job outside of the home, we have been learning to be creative in supplying him with nutritious lunches and snacks to sustain him throughout the day. I admit to being rather plain in my lunch preparations, and am so thankful for a gracious and flexible husband who willingly accepts any simple lunch I send with him. He’s just thankful to have food – so peanut butter and jelly (homemade freezer jam honey sweetened) actually suit him quite well.

Our all time standby recommendation is leftovers for the easiest lunches. I try to double most of our dinners in order to have sufficient leftovers for all of us for lunch. This way, I only have to prepare two meals a day – breakfast and dinner! In this case I store the leftovers in a glass container so Aaron can easily reheat in the microwave or toaster oven at work. Plastic containers are best to be avoided due to the risk of leaching toxins when reheating, and stainless steel container cannot be placed in the microwave or toaster oven. Casseroles, pasta dishes, and soups work best in this manner. This of course does not always work, so we have some favorite stand-by recipes.

I do prefer to serve him an array of lunches to insure proper balance of nutrition. Here are some of the meal ideas we use regularly:

Ham & Cheese – A basic sandwich of ham and cheese can be jazzed up with some delicious dijon mustard, avacados, lettuce, and pickles to make a hearty and filling sandwich. Served on sprouted or soaked whole grain bread is your best option (watch out for the HFCS and enriched flours that they are sneaking into “whole grain” bread). Chose nitrate free lunch meat from pastured beef or pork, if possible. Raw cheddar cheese is another healthy option if available. We also roast a whole chicken on a monthly basis and the leftovers make excellent base for a hearty sandwich. You can also serve these filler items in a whole wheat tortilla for a fun variety.

Chicken Caesar Salad Wraps - Assemble a basic chicken Caesar salad in a whole wheat tortilla or pita. Store dressing separately. Makes a delicious lunch!

Egg Salad Sandwich – the nutritious protein value of eggs is undeniable. Egg salad packs extremely well. Hard boiled eggs alone are easy to pack and make a yummy snack or quick lunch.

Hummus & Pita Platter – Fill a small container with hummus, feta, sliced olives and tomatoes topped on pita or flat bread for a quick and scrumptious Mediterranean lunch.

Salmon Melts - Assemble the salmon in advance and either serve cold or have them toast it at work topped with a little cheese (in a toaster oven or microwave). For best results, this is preferred served warm.

Pesto Bacon Sandwiches - 5 simple ingredients make the most delicious sandwiches rich with pesto flavoring!

3 slices bacon, chopped and chopped (less or more as desired)
1 ripe avocado, thinly sliced
dash of lemon juice
1 tomato, thinly sliced
1 Tbsp pesto

Spread a thin layer of pesto on each side of your bread. Sprinkle with a small amount of bacon, avocado slices, tomato slice, and a dash of lemon juice. Makes 2 sandwiches.

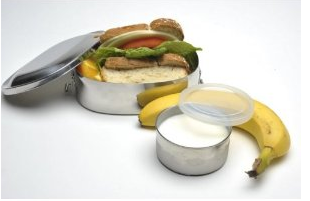
With all our lunches, I assemble them the night before and store in a reusable stainless steel lunchbox or glass container. Another option is the To-Go 2-Tier Lunch Box. Preparing in advance helps save time in the morning. We  haven’t had issues with sogginess. Carrot sticks, cherry tomatoes, cucumber sticks, and an assortment of fruit make excellent side dishes for any lunch. I often send homemade soups to work with Aaron in an insulated thermos, such as the Foogo Food Thermos. Works very well.

Our favorite snacks to pack for daddy include nourishing protein bars or trail mix (combination of raw nuts, dried fruit, and chocolate chips, if desired). Popcorn is another wonderful high fiber snack that can be a great filler. Coconut brownies have been a big hit to throw in for a special healthy treat and the co-workers love them too! He takes it all to work in a small insulated cooler. No need for paper bags, Ziplocs or saran wrap here!

Further Ideas:

Packing A Lunch: Healthy Food to Go by Kitchen Stewardship
School Lunches: Healthy Alternatives by Kitchen Kop
Healthy Lunch, Happy Child by Mindful Momma

Do you have any yummy healthy lunch ideas to share that pack well for work or school? Please feel free to share a link to your favorite recipe below!

Comments { 17 }

Nourish Your Marriage: 20 Fun Date Ideas On The Cheap

This post is brought to you my Passionate Homemaking’s monthly contributor, Vina Barham.

Going out on “traditional” dates with your hubby can be a challenge if you have small children. There’s having to find a babysitter, paying the babysitter, and then having to shell out money for a pricey dinner. And because you’ve spent so much money on all of that, there’s an added pressure to make a spectacular date night out of it.

Maybe it’s just me, but I prefer a much more laid-back (and frugal) approach to date nights. Not having to worry about the expense opens me up to more creative ways to hang out with my hubby. And I know it makes me a better mommy when I do. Many of the ideas below are mostly for afternoon dates, when other fellow moms, trusted friends or other family are able to watch your kids.  Enjoy!

1. Pack your favorite sandwich, drinks and snacks and go for a day hike.

2. Go out for a drive to a nearby scenic view, bring some chocolates (fair-trade of course) and sweets, and kiss!

3. Play your favorite board game at home after the kids have gone to bed.

4. Trade a happy-hour early dinner date with another couple.

5. Have a cheese-wine picnic in your backyard while the kids are asleep.

6. Go to your local bookstore, pick a book and read to each other.

7. Pour yourself a cup of cocoa, grab a big blanket and do some serious stargazing in your lawn.

8. Pick a sport your husband likes and play with him. Or vice versa. Winner gets to step in the shower first, and the loser shortly thereafter. :)

9. Eat your favorite ice cream on the patio together. Of course, feed each other!

10. Head out to your hubby’s work and bring him lunch.

11. Watch a movie together. Make homemade popcorn, or something healthier if you’d like, dim the lights and give it a go.

12. Go for a swim at the local community center.

13. Look into local coffeeshops hosting free live music. Dress up and go.

14. Take a bubble bath together.

15. Make smores in the backyard.

16. Go somewhere scenic, bring a camera and take pictures of each other.

17. Give each other the gift of massage.

18. Make a fancy dinner at home after the kids have gone to bed, light up some candles and pretend you are on your first date.

19. Or reminisce.

20. Go for a long walk on the beach.

What about you? Do you have any ideas to add to the list? Or share something you’ve done on this list and how it turned out.

Comments { 39 }

Frugal & Natural Pest Control: Fruit Flies & Ants Be Gone!

IMG_6140This post was originally published July 24, 2009. We have recently been attacked again with large ants around our house, so I knew it was time to bring out our successful ant trap and share with you all our success again!

We have been attacked by an abundance of fruit flies lately in my kitchen. AHH! Don’t you love those little flying insects that seem to find every bit of food in your kitchen and around your trash can? Here is our simple, frugal, and effective solution!

Fruit Fly Trap

1 quart jar
1 piece of paper, rolled up into a funnel
tape
apple cider vinegar
small slice of banana

Fill a quart jar with a 1/2 inch of apple cider vinegar and a small piece of banana. Roll up your paper into a funnel shape (larger at the top) and tape it in place. Place the funnel into your jar and make sure all the edges are secured shut with tape. You may have to adjust the size of your funnel to make sure it fits nicely into your jar. Place the jar where the fruit flies are flying around and let it go to work. You will be amazed at how well this trap works. The fruit flies will smell the fruit and climb inside, but for some odd reason they don’t fly back up the funnel to get out. When you have caught a good supply, place the entire jar in the freezer. After a short time that flies with die and you can remove the jar from the freezer and use it again without even removing the old contents. Use repeatedly until your fruit flies are eliminated.

As you can see in my picture, this easy trap is amazingly effective!

Ant Trap

We are often plagued with ants in the summer time as well around here. We have various sorts of carpenter and sugar ants. This little concoction does the trick! Last year we had huge carpenter ants all around our kitchen. Many were coming out of our electrical saukets in our kitchen. We were blown away by how quickly they were eradicated with this recipe.

1 tsp. borax (borax is an natural laundry boosting powder available in the laundry section of the store, normally on the top shelf)
2 cups hot water
6 Tbsp sugar
folded paper towel
small shallow cup (like a creme burlee dish)

Disolve borax in hot water. Stir in sugar. Dip the folded paper towel, using tongs, in the solution till completely saturated with solution. Cram the paper towel in the dish. Place in location where you have seen the ants. This solution will be eaten by the ants and taken back to the nest to share with the other ants and thus eradicate the entire nest. Keep away from children by placing on a countertop or cupboard, if possible.

Comments { 35 }

Living in SUB-mission, as a Mom

This post is written by Passionate Homemaking’s monthly contributor, Ann Dunagan.

As contemporary Christian women, there’s a deep or perhaps quiet desire inside of us that longs to fulfill a noble purpose. Somehow, we want our simple lives to make a godly difference in our hurting world. We know there are many international needs; and as women of compassion and love, we hope and pray that God’s mission and plan for our lives will somehow make an impact.

Yet at the same time . . . many of us are moms.

With little ones, or bigger ones, continually needing our motherly attention, we sometimes wonder about our world-impacting ideas. How do we stay in submission to God’s calling on our lives as mothers, and as wives, and as homemakers . . . while at the same time, never forgetting that there’s a lost and dying world out there?

As a longtime homeschooling mother of seven, with a huge heart for world missions, this has been my constant prayer; and over the years, He has shown me a word that has helped.

Have you ever stopped to realize that the only difference between “submission” and “mission” is that little prefix, “SUB.”

SUB: This simple little prefix means “under, beneath, or below,” but the ramifications of these three humble letters are huge.

As mothers, our daily submission to God, and our willingness to surrender to what He desires to accomplish “under the surface” directly corresponds to how (and to what extent) we will eventually fulfill God’s overall purpose for our lives.

In his classic devotional, The Practice of the Presence of God, Brother Lawrence states, “Trust in God and surrender totally to Him. He will not deceive us. Never tire of doing even the smallest things for Him because He isn’t impressed with the dimension of our work as with the love in which it is done.”

It may sound more important to dream about boarding an internationally-bound 747, or to imagine doing something benevolent or “big” in some prestigious foreign city; but right now, that might not be the most strategic decision for God’s long-term plan for your family, or for the world. As Christians, we’re all called to participate in God’s global and eternal purposes (through our continual giving and praying for world missions); yet God’s specific call for your family to fully obey and to completely surrender, at this moment in time, could be far-simpler than your “big” idea, yet possibly more-challenging to follow.

God’s mission-for-the-moment could be to get everybody together after dinner to read a chapter in the Bible; or maybe it’s to collectively tackle that horrible-looking laundry pile; or perhaps it’s for a slightly-stressed mommy to put a “pause” on a far-too-busy afternoon, just to snuggle on the couch with our precious kiddos and a fun storybook.

Imagine a naval submarine advancing silently beneath the ocean’s surface. Without sonar or satellite detection, its underwater movement is practically unseen and unheard; yet all the while, this battle-ready vessel is moving toward its future destination and assignment. In the same way, our families can focus on submitting our hearts toward God, and moving steadily and progressively toward His purposes. Even if no one else notices the little things we do as mommies, and the little changes in our development and character, God sees. And He knows exactly where we are.

God has not forgotten you, and He will not forget your family, or the dreams He has given to you, not only as a mother, but as a woman, and as a servant of God.

SUB-mission to God’s purposes involves every area of our family life: the individual development of each family member (spiritually, mentally, physically, and financially), our marriage and our unity as a husband and wife, our callings as moms and dads and sons and daughters, our daily disciplines in home-management, as well as our growth in church ministries and servanthood, and our co-operative “mission” and eternal purposes as a family.

As we allow God to refine those secret and hidden places in our hearts, we can trust that He will fulfill all of His promises to us as family, and to each of us as individuals . . . in His timing.

A Prayer for SUB-mission:

Dear Heavenly Father, help me to surrender to the plans that you have for my life today, and the purposes that you have for our family. Forgive me for those times when I’ve tried to impress others, by having our family “look good” or to be noticed (for my sake). Lord, deep in my heart, I know that glorifying You is all that matters. By your grace, I want to be willing to do anything, and willing to go anywhere; but help me to keep a joyful heart when all you desire is simple obedience in the little things. In Jesus’ Name, Amen.

“For God is not unjust to forget your work and your labor of love which you have sown towards His name . . .” (Hebrews 6:10).

Ann Dunagan is a longtime homeschooling mother of 7 (ages 9 to 23, with 3 graduates), an international speaker with Harvest Ministry, co-founder of two orphanages in East Africa (caring for over 700 children), and author of several books including The Mission-Minded Family. With a passion for the Lord and the lost, Ann motivates families for world missions.
Comments { 35 }

Homemade Crackers

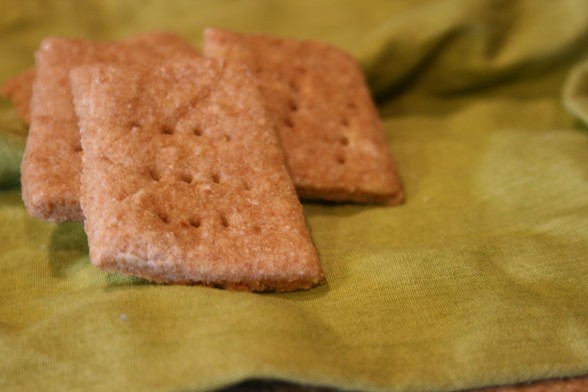
My kiddos love having homemade crackers to munch on during snack time or as an excellent clean food option for traveling. We have greatly enjoyed Kimi’s cracker recipe with some variation. This recipe is light, soft, and easy to munch for little teeth, as a teething biscuit alternative, and for a simple lunch with cheese and meat. You can add spices, such as rosemary, and various seeds, as desired. We make one batch weekly and it is quickly consumed! Sprouted wheat flour can be substituted if you desire to avoid soaking.

3 1/2 cups whole wheat flour (or combination of grains – we substitute 1 cup of millet flour)
1/4-1/2 cup coconut oil or butter, melted (we prefer 1/2 cup because it makes a moist richer flavor. Less will give a dryer crunchier cracker. Butter will make it richer in flavor as well.)
1 cup kefir (watered down to the consistency of buttermilk), buttermilk, yogurt, or water and 1 Tbsp apple cider vinegar
1 tsp sea salt
1 tsp baking powder

Soaking Step: To achieve the benefits of soaking, combine whole wheat flour and kefir until well incorporated. Cover with towel and allow to sit at room temperature for 12-24 hours.

After soaking, add the melted coconut oil or butter, salt and baking powder. Kneed ingredients together till well combined. Divide dough into two portions. Roll each portion into a large rectangle (about 1/16 inch thick). Cut into desired squares and place on a cookie sheet. Pierce each cookie with a fork 2-3 times. Bake in a 425 degree oven for 10-12 minutes until lightly brown. Enjoy!

Comments { 42 }

Cultivating Learning in Everyday Activities: Outdoors

Photo Credit

How can you cultivate learning in the great outdoors? This is the final segment of our Cultivating Learning in Everyday Activities series. Check out Learning in the Kitchen, and Learning in the Laundry & Other Rooms for further inspiration.

Outdoors

1. Take a walk together and discuss seasons, the growth cycle of plants, recognize the different types of plants, leaves, flowers – all of which are beautiful means of exploring nature and science.

My cousin, Amy, adds: I count exercise as one of my daily to dos, and the kids learn a lot when we go on walks. We have fun talking about the seasons, if it’s winter or spring we look at buds on plants and talk about them, in fall we talk about how chlorophyll makes leaves green, and why they change color. We try to spot birds, etc. And of course we get books from the library on all these topics. They also like to collect nature items, which can be used to beautify the home, or can be used to make creative crafts!

Karis and I love to sit at the end of our driveway and count the cars that drive past. We count them by color, by vehicle type, and whatever other fun ways we can think of. I remember taking road trips growing up and playing games with my siblings of going through the alphabet by finding letters in license plates. We would also try to find every states license plate. These provided fun learning while on the road, but could also be done while sitting at the end of our driveway as Karis gets older.

2. Garage Sale - Autumn suggested: Give kids a table of things to sell (food items or small toys). Teach money recognition, counting, etc. Who can resist a cute little child selling some goodies?

3. Gardening
Michele shares: We enjoy gardening as a family to supply us with fresh produce, and this allows us to teach some interesting science concepts (such as decomposition, plant growth, and the water cycle/weather). As we start seeds, prepare the soil, and nurture our vermicomposting system, Gen does all these gardening tasks right alongside us. Here is a post about “educational” gardening with her when she was two-years-old.

4. Grocery store
Kat
shares: My 5 year old always goes with me to the grocery store and we do lots of stuff there. We discuss the different kinds of produce, where they come from, how much they weigh and cost and I let her press the numbers for the little produce price stickers (which, I guess, is more fun than educational now that she’s older). I also show her how to pick out good produce.

Michele shares: We also work on this (identifying numbers and letters) while at the grocery store, and have begun adding in the concept of money (recognizing coins). As I make out my grocery list, she often gets her own scrap of paper and pen to practice making “her own list” (writing out letters we’ve been learning or drawing pictures).

Further Reading

Many of the ideas shared in this series where inspired from these two volumes:

Mommy, Teach Me!: Preparing Your Preschooler for A Lifetime of Learning by Barbara Curtis – an excellent volume of ideas, games, and learning activities from a Montessori mommy of 11 children. Highly recommend it!

Montessori Play & Learn: A Parent’s Guide to Purposeful Play for Two to Six by Leslie Britton – This volume is a wonderful collection of ideas for incorporating learning into your normal routine and help supplement preschool learning for your child. For planning your home, introducing your child to the supermarket or the neighborhood, and helping him discover other people and cultures, this book provides valuable tips and insights that help parents and children grow and learn together.

I wish to take a moment and thank Kat, Michele, Autumn and Amy for contributing ideas for this post! Thank you!
Comments { 6 }

Cultivating Learning in Everyday Activities: Laundry & Other Rooms

Photo credit

My mission…to cultivate a learning environment in our home. My goal…to purposefully incorporate educational concepts in our various household tasks with my little ones. Thus we continue sharing learning ideas that can be purposefully practiced while completing various household activities. Don’t miss out on sharing ideas for learning in the kitchen.

In the Laundry Room

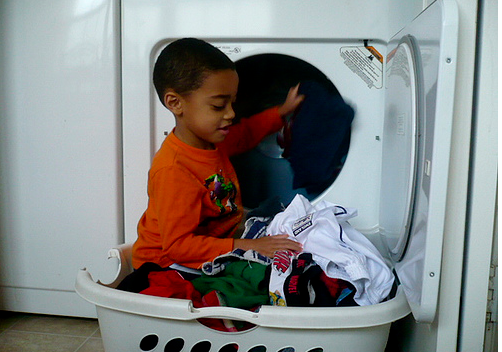
1. Sorting laundry – teach sorting laundry by colors and then by textures, enabling a child to strengthen color identification, matching, and strengthening the sensory skills. Follow this by teaching the basics of washing laundry specifying the different temperatures needed to wash various articles of clothing, towels, etc. Clothing can be sorted by type of clothing as well (socks, underwear, shirts, pants, etc).

2. Organize clothing by owner - teaches recognition of possession by sorting the clothes by owner before folding. Karis and I discuss who each item belongs to as we sort our laundry into the piles of clothing for each person before carrying them carefully to the dressers.

3. Store a child’s clothes within their reach – from a young age, a child can learn to sort and put away their clothing as well as getting themselves dressed. Label the drawers with pictures of the different kinds of clothes kept in them, with the word was well.

4. Count the clothes - an older child could try to guess the number of items in each pile and then count them to see whether she/he was correct.

5. Matching socks – We like to set aside the socks till we have folded all the rest of the clothes and then make a game out of finding the match.

In the Bedroom

1. Make the bed – Before Karis turned three years old, we aimed to teach her organization and cleanliness by having her learn to make her own bed when she wakes up. We make a game out of it and shake the corners out together before laying the blanket out smooth on the bed.

2. Organize possessions at his/her level - We also organize all her toys at her level in a 9 cube shelving unit and rain gutter bookshelves so she can accessibly put each item away before getting out another. She still needs a gentle reminder, but I have been pleasantly surprised at how fully capable she is to accomplish these little chores.

In the Hallway

Place a hook at the kids level so she/he can hang up their own jacket after an outing. Designate a special place for his/her shoes as well. This makes the task of preparing to depart or return home much simpler, especially if you have other little ones in tow.

In the Living Room

1. Clean together – It is easy to include your children in various housecleaning tasks by providing them with their own dusting or wash cloth and some safe cleaning spray, if desired. They can learn to carefully lift up various options to dust underneath them while learning the feel of different textures – china, glass, wood, and so on. Discuss whether they are warm or cold, where they came from, how they are made, etc.

2. Answer the phone - A young child can learn to answer the phone. I believe my mom taught us this skill as early as 6 years old. We had a special phrase to say, “Hello, you’ve reached the ____(last name). This is ____(child’s name). How can I help you?” It was written next to the phone so we could remember. Now in a day of cellphones, this will not be so easy, but I want to give them the opportunity of learning basic social skills, improving communicating skills in this way from an early age.

Kat adds some additional ideas:

As we do our work, we like to talk to each other. Then when a new word comes up that they don’t know, I explain it’s meaning. Sometimes I will sound out words phonetically here and there, to get them used to the idea of how words are made up of different sounds. Teach them how words are made up of root words, etc. For example, if talking about an octopus, you can bring up that octo means eight, and an octagon is a shape with eight sides. The kids think that’s interesting info!

I try to answer their questions as we’re working together. My husband is better at this than me, I think I get tired of the incessant toddler questions! He will give answers, often that are somewhat beyond their understanding. But each time they understand a little bit more, and also it teaches them that Mom and Dad are eager to “learn” things together with them.

Including your children in your various household tasks may require more time and effort on your part to teach and instruct them, and there very well may be a bigger mess afterward…but what is more important? Investing in your relationship and teaching valuable skills in the process or sending them away and getting the job done quicker while losing out on this important opportunity?

Make these learning activities enjoyable for all by making little songs out of these tasks. For example, we came up with this little rhyme for folding laundry together:”Now we’re going to fold the clothes, fold the clothes, fold the clothes, now we’re going to fold the clothes, so early in the morning” (sung to Row, Row, Row Your Boat), with variations such as “match the socks”, etc. It definitely makes the task more fun when you can sing while you work – and the child will learn to love music and work at the same time!

Stay tuned for our final post with ideas for the great outdoors!

I wish to take a moment and thank Kat, Michele, Autumn and Amy for contributing ideas for this post! Thank you!
Comments { 14 }

Cultivating Learning In Everyday Activities – In the Kitchen

Photo credit

From a young age, children love to learn. They love to explore, imitate and absorb everything that takes place in the world around them. I have been fascinated to study and observe my daughter, Karis. She takes great delight in helping me throughout our daily activities. My passion has always been to cultivate a love for learning in my little ones from the earliest moments. I want them to cherish the joys of exploring, imaging, creating, and delighting in God’s creation and design of how things work and function.

Lately, I have been pondering how can I really cultivate a purposeful learning environment in our home? Yes, I can include her in these activities, but how can I turn these everyday tasks and activities into learning potential. While exploring this world of a child’s brain, I have found some wonderful ideas through friends and resources that I wanted to share with you today. All these activities are appropriate for 2 1/2 – 5 year olds. I have been amazed how young they can begin to learn to help and serve. What important life skills can be learned with plenty of praise and practice. I have learned that you should never underestimate the knowledge and ability of a two year old.

Thus we begin a series of posts sharing ideas for cultivating learning in everyday activities throughout your house.

In the Kitchen

There is much opportunity to teach mathematics and scientific skills in the kitchen while teaching your little ones how to cook and bake. Arrange your kitchen in such a way that the plates, bowls, silverware are at a reachable height for the little one. This will enable them to help uploading the dishwasher and setting the table.
1. Loading the dishwasher - teach sorting of silverware and dishes into categories, matching shapes. Teach how to handle sharp objects.

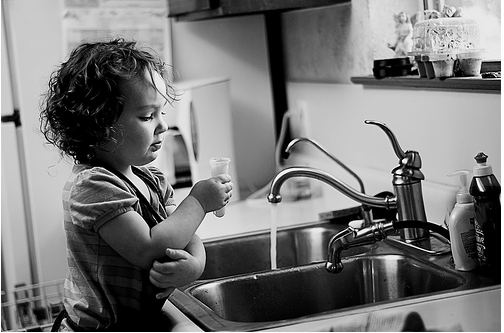
2. Washing dishes - having a small stool handy will enable your child to help wash dishes. Encourage learning how to carefully handle breakable items which strengthens their concentration. Kids love using soap and wash clothes to clean dishes. Place a towel next to the sink for the child to lay their washed dishes on or guide them in loading immediately.

3. Setting the table - Karis finds great delight in setting the table and learning how to carefully handle carrying plates from the cupboard to the table. Table setting is a opportunity to teach the concepts of left and right and will also appeal to her sensitivity to order. Make a sample placemat with drawings of plate, cup, silverware for a child to use as a model.

4. Cooking & baking together - Karis can pull a chair over to the stove top or counter top and learn how to mix and stir items carefully. Measuring items is a great scientific experiment. With supervision, we stir ingredients on the stove top and observe the different results of hot versus cold, what happens to ingredients when they are heated.

Use glass measuring cups where the calibrations are viewable so a child can learn to measure ingredients themselves. At a older age, we can teach subtraction, by putting too much in and asking them to remove enough to correct it.

Talk about the step by step process of following a recipe. Having a child’s apron and hot pad helps encourage them that they can be involved and a valuable asset to our food preparations.

Michele shares some further ideas:
We have encouraged our daughter Gen (now age three) to help with our regular household tasks since she was very young. Before she was two-years-old, she began helping in the kitchen. It became a great way of teaching her concepts such as “in,” “out,” “in front of,” “behind,” “on top,” and “under.” She also practiced stacking (and making items fit), by learning to recognize size differences. (She owns a set of toy stacking cups, but “helping mama” with the measuring cups was much more fun!) As she has gotten older, we have started identifying numbers and letters. She enjoys looking on the cookbook pages to find letters and numbers that she recognizes.

Including your children in your various household tasks may require more time and effort on your part to teach and instruct them, and there very well may be a bigger mess afterward…but what is more important? Investing in your relationship and teaching valuable skills in the process or sending them away and getting the job done quicker while losing out on this important opportunity?

What ideas can you share for including your children and purposeful learning in the kitchen?

Stay tuned as we discuss learning ideas in the laundry room, bedroom, living room and the great outdoors!

Comments { 20 }

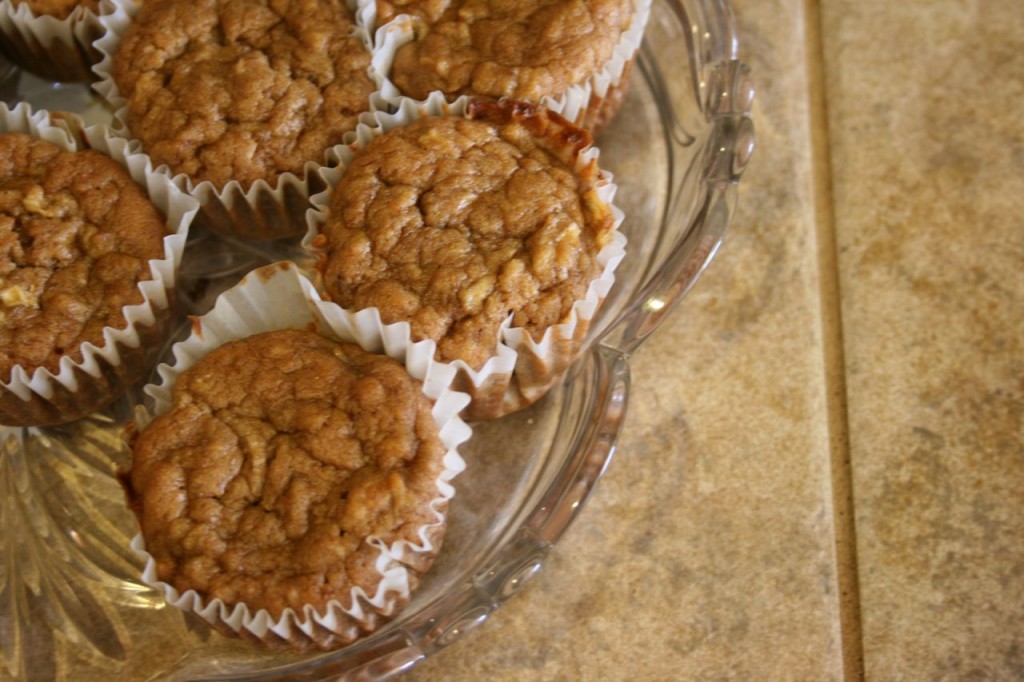
Apple Banana Muffins/Cupcakes

Rich flavor and pleasant sweetness with apple and banana together! This recipe works equally well as a delicious muffin or dressed with a frosting for a yummy cupcake. We made this recipe for both our little ones’ birthdays this year in cupcake form and found it incredibly scrumptious! I have adapted the recipe to be soaked as well (in incorporate the benefits of breaking down the phytates), if you desire. I have no doubts this could be easily be used as a soaked cake baked in a 13×9 inch pan, so that is the next experiment!

  • 2 cups whole wheat flour (or 2 cups sprouted flour and skip the soaking!)
  • 1 teaspoon baking soda
  • 1/2 teaspoon baking powder
  • 1 teaspoon salt
  • 1/2 teaspoon ground cinnamon
  • 1/2 teaspoon ground nutmeg
  • 2/3 cup coconut oil, melted
  • 1 cup sucanat or rapadura
  • 2 eggs (or flaxseed binder – this works perfectly well if you don’t have eggs! I would know since I didn’t have eggs the second time.)
  • 1 teaspoon vanilla extract
  • 1/4 cup cultured buttermilk, kefir, yogurt, or acid medium of your choice
  • 1 cup ripe bananas, mashed
  • 2 apples – peeled, cored and shredded

Directions

  1. Preheat oven to 375 degrees F (190 degrees C). Grease and flour muffin cups, or use paper liners. Sift together the flour, baking soda, salt, cinnamon, and nutmeg. Set aside.
  2. In a large bowl, cream together the coconut oil and sucanat/rapadura. Beat in the eggs one at a time, then stir in the vanilla and buttermilk/yogurt/kefir. Beat in the flour mixture, mixing just until incorporated. Fold in the mashed bananas and shredded apples. Fill each muffin cup full.
  3. Bake in the preheated oven for 20 to 25 minutes, or until a toothpick inserted into the center comes out clean. Allow to cool.

Soaking Adaption: Combine flour, coconut oil, acid medium (buttermilk, yogurt, etc), and an additional 1/4 cup warm filtered water. Mix thoroughly and then cover and leave at room temperature for 12-24 hours. After soaking, add the sucanat/rapadura, eggs, and vanilla. Mix thoroughly as there may be small clumps of soaked dough that needs to be broken down. Fold in the mashed bananas and apples. Gently and quickly incorporate the salt, baking soda and baking power. Fill each muffin cup full. Bake as described above.

Frosting: For a yummy but rather unhealthy frosting, I used 3/4 cup powdered sugar, 3/4 package cream cheese (softened), and 1 Tbsp milk. Fabulous!

Makes 14-15 cupcakes.

Adapted from Allrecipes.com
Comments { 35 }