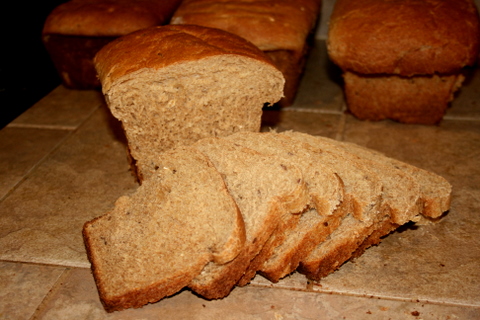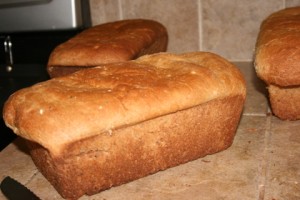
The smell of homemade bread is intoxicating for me! A fresh slice from the oven with a little butter on the top is like a taste of heaven! Especially when this bread comes from your very own oven and is made from quality ingredients, no additives, and soaked for the highest nutritional benefit! Who can ask for better? The question is not whether it will save you money to make your own bread (which I am sure it will all the same), but rather you will know exactly what is being put into your bread! It is all about quality and freshness! Making homemade bread was one of my jobs growing up where it was rather of a burden than a joy to complete, but now that I am married and raising a family, I have come to realize the real value of developing this art!
Read a few benefits here.
Helpful Hints on Successful Bread Making
- When possible, use fresh home-milled flour. This will have the highest nutritional content, and the best baking characteristics for higher rising loaves. If this is not possible, store good quality flour in your freezer, but bring it to room temperature before using for the best results.
- Use high quality yeast such as SAF Instant Dry Yeast. This is available in quantity at Costco for a good price. Store in the freezer. It will last 2 years or more. If your yeast does not proof, then it is too old!
- Remember to proof your yeast! Add your yeast to warm water (between 100-115 degrees) with 1 tsp of honey. This will prepare it for action!
- Remember that less flour is best! You should only add just enough flour until the beaters in your mixing bowl are scraping the sides of the bowl clean. If you add too much flour, your bread will be crumbly. Dough should still be slightly sticky before kneading.
- Develop the gluten thoroughly. When dough is properly kneaded it will be smooth and elastic. A quick test for sufficient kneading is to take a golfball-sized portion of dough; stretch it between the thumb and index finger of both hands to determine if the gluten is fully developed. The dough should stretch out thin and not tear readily.
- Make sure to give your dough two risings! The additional rising will develop flavor, gluten framework and make more fluffy loaves. It is optional, if you are in a hurry.
- Only let rise till doubled before baking! This is the mistake I make too often. 30 minutes is a good length of time. If they rise too long the structure of the loaf will become weak and it will sink or fall completely during baking.

Homemade Whole Grain Soaked Bread
Learn more about the benefits of soaking here.
11 cups of ground whole wheat flour (you can replace 1 or 2 cups with unbleached white flour for a lighter end result)
1 cup acid medium (kefir, cultured buttermilk, or whey; for dairy intolerant you can substitute with 1/4 cup apple cider vinegar or lemon juice and 3/4 cup water)
3 cups of warm filtered water
2 cups oats
1 cup honey
3/4 cup coconut oil, or butter melted
1/4 cup raw millet, optional
1/4 cup flax seed, optional
1/2 cup water
1 tsp honey
2 1/2 Tbsp active dry yeast
1 1/2 Tbsp sea salt
2-4 Tbsp dough enhancer (I highly recommend this dough enhancer, as it works very well, but you can also replace with any combination of the following: 3 table spoons vital wheat gluten, 1/2 tea spoon soy lecithin, a pinch of citric acid (use sparingly!), and a sprinkling of ginger)
1 cup unbleached white flour or sprouted flour, if necessary
Sunflower seeds, if desired
Directions:
- Combine the flour, acid medium, oats, honey, melted oil, millet and flax seeds, and 3 cups of filtered water. Cover and soak at room temperature for 12-24 hours.
- After soaking, in a separate small bowl, combine yeast, 1 tsp of honey, and 1/2 cup warm filtered water. Let sit for 5 minutes or so, until fully proofed.
- Combine the yeast mixture, soaked flour mixture, and all the rest of the ingredients in your mixer. You may need to add an additional 1-2 cups of flour. Dough should clean the sides of the mixer.
- Knead the dough for 10 minutes until the gluten is fully developed.
- Remove to a greased bowl and cover with a towel. Let sit until doubled, about 1 1/2 hours.
- Punch down, turn dough over, and allow to rise until doubled again, about 45 minutes. (OPTIONAL, but preferred for best results)
- Punch down dough and divide into 4 loaves. Roll out with a rolling pin into a rectangle and roll up into a loaf (this makes the perfectly shaped loaves).
- Place in greased bread bans and rise again until doubled, about 30-45 minutes minutes (the best place is the oven! Just turn it on low 150-170 degrees till heated and then turn it off, prior to putting the loaves in).
- Turn the oven on to 350 degrees and bake for 30-45 minutes. Bread is done when it is fully browned on all sides! Remove from oven, rest in pans for 10 minutes before removing from pans.
Yield: 4 loaves.
If you do not desire to soak your flour, follow these instructions:
You have the option of replacing the 1 cup acid medium with water in the recipe above, so you have a total of 4 1/2 cups of water, or you can use the acid medium and just skip the soaking and proceed as described here.
- Combine yeast, 1 tsp of honey, and 1/2 cup of the total water required. Let sit for 5 minutes or so, until fully proofed.
- Combine the yeast mixture, remaining 4 cups of water (or 1 cup acid medium & 3 cups water), and all the rest of the ingredients in your mixer. Only add as much flour until it cleans the sides of the bowl.
- Knead the dough for 10 minutes until the gluten is fully developed.
- Remove to a greased bowl and cover with a towel. Let sit until doubled, about 1 1/2 hours.
- Punch down and divide into 4 loaves. Roll out with a rolling pin into a rectangle and roll up into a loaf (this makes the perfectly shaped loaves).
- Place in greased bread bans and rise again until doubled, about 30-45 minutes minutes (the best place is the oven! Just turn it on low 150-170 degrees till heated and then turn it off, prior to putting the loaves in).
- Turn the oven on to 350 degrees and bake for 30-45 minutes. Bread is done when it is fully browned on all sides! Remove from oven, rest in pans for 10 minutes before removing from pans.
Further Resources
A few excellent articles and tips on making your own homemade bread! Urban Homemaker has an abundance of resources on this topic!
Bread Baking Problems & Solutions
Tips for the Best Bread


