Archive | recipes & kitchen tips RSS feed for this section

Homemade Soaked Bagels

img_1844.JPG

Here are the results from our bagel making today! My sister in laws, Autumn & Larissa, and cousin Amy joined me in the fun (along with all the little munckins)! We made cinnamon & raisin and plain sprinkled with poppy seeds & sesame seeds. This was incredibly easy to make! Well forth it! These were especially good right from the oven! You can use all or a portion of whole wheat flour as desired.

1 1/2 cups warm water (112-115 degrees F), divided
2 Tbsp acid medium (yogurt, kefir, apple cider vinegar, lemon juice, etc)
1/4 cup honey
2 tablespoons dry yeast
1 tablespoon salt
2 cups unbleached white flour PLUS 2 1/4 cups whole wheat flour (all whole wheat works as well!)
8 cups of water, for boiling
1 egg white, lightly beaten
1 tablespoon water
cinnamon & raisins, poppyseeds, sesame seeds, optional toppings

Directions:

  1. Combine 1 cup water, acid medium, flour and honey. Cover and soak at room temperature for 12-24 hours.
  2. After soaking, combine yeast, the remaining 1/2 cup for warm water with a dab of honey. Allow to puff up for about 5-10 minutes.
  3. Combine soaked flour, yeast, and salt and knead dough on a floured surface for 5 minutes, adding additional flour if necessary to prevent it from sticking. Dough should be fairly smooth and somewhat firm.
  4. Place dough in a greased bowl, cover, and let rise until doubled.  Punch dough down (if making cinnamon raisin bagels, add the cinnamon and raisins now — knead just enough to swirl the cinnamon through the dough).
  5. Divide and shape into 12 balls. (For larger bagels, make only 8 balls.) Allow to rest for 5 minutes.When soaked, the dough will expand more significantly than unsoaked flour, so be sure to keep them on the smaller side.
  6. Bring 2 quarts of water to boil.
  7. Make a hole in each ball of dough and pull open about 2 inches, making a bagel shape. Place the shaped dough onto a cookie sheet and cover for 10 minutes.
  8. Preheat oven to 350 degrees.
  9. Drop 2 or 3 bagels at a time into the boiling water for about 45 seconds to 2 minutes, turning each once. Drain cooked bagels on a wire rack.
  10. Mix egg white and water; brush tops with egg white mixture and top with optional toppings, if using.
  11. Place bagels on greased baking sheets.Bake at 350 degrees for 35 minutes, turning once half-way through baking. (If making plain bagels, you can flip the bagels; otherwise, just rotate.) Bagels will be lightly browned and shiny.
Enjoy!
Comments { 47 }

Kitchen Tip: Washing Dishes with Baking Soda

baking-soda2.JPGAfter a relaxing dinner, who feels like doing the dishes? Or how about staying on top of the dishes with little ones in tow? I love to clean up as I go, trying to put things away as I use them, but sometimes I am too exhausted from a busy day or taking care of a cranky baby (like today!) to have the energy to do the dishes completely. But if I let them lie in the sink overnight, it is often a huge extra effort to scrub them clean the next morning!

The simple solution: baking soda.

Continue Reading →

Comments { 23 }

Make it Yourself – Cultured Dairy Products

dairy.JPGMany dairy products are very easy to make yourself, nutritious and frugal. So why not give it a try? I completed my first batch of whey & cream cheese this week! Here are some recipes and benefits for your enjoyment.

Remember, it is best to just explore with one thing at a time. I have listed them in the order that is easiest to start including, and most beneficial.

Continue Reading →

Comments { 45 }

Kitchen Tip: Using Mason Jars for Blending

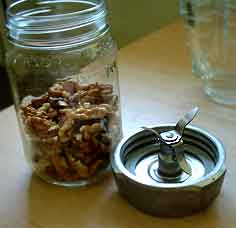
blender-jar-1.jpg Ever wished you had a grinder for those small jobs? I came across this wonderful idea of grinding seeds, nuts, coffee beans, whole spices, etc. with the simple use of a mason jar on your blender!
Continue Reading →

Comments { 21 }

Spicy Lentil Soup

Thanks to my SIL Autumn for sharing this recipe! We tried it last night and it is delicious! If you use split peas, it must be cooked all day, or else blend the full contents in the blender to break down harder peas. That has worked for me. I like how it combines some other vegi’s to give it excellent flavor. I increased the cumin and salt to my taste. This makes enough for 3-4 meals in our house. Nice for the freezer!

Spicy Lentil Soup

1 tablespoon coconut oil
2 cups chopped onion
1 large parsnip, or two carrots (I used carrots and rutabaga)
2 celery stalks
1 teaspoon ground cumin
1 teaspoon chili powder
1 teaspoon ground red pepper (UPDATE: this makes it extremely spicy in my book, I elliminate it)
1/4 teaspoon salt (increased to about 1 1/2 tsp)
1/4 teaspoon black pepper
2 garlic cloves, minced
3 1/3 cups water
2 1/3 cups dried lentils
1/3 cup chopped fresh cilantro
42 ounces chicken or potato broth
1 (28-ounce) can diced tomatoes, undrained
Sour Cream (you can also use kefir)
Cilantro sprig (optional)

Preparation: Soak lentils overnight in water. Drain and rinse lentils. Heat oil in a large pot oven over medium-high heat. Add the vegetables; sauté for 3 minutes. Add the cumin, chili powder, red pepper, salt, black pepper, and garlic; sauté for 1 minute. Add water, lentils, cilantro, broth, and diced tomatoes; bring to a boil. Reduce heat; simmer 1 hour. (I found it took more like two hours for my peas, so definitely start earlier than I did to make sure they are completed in time for dinner!)

Reserve 2 cups lentil mixture. Place half of remaining mixture in blender; process until smooth. Pour pureed soup into a large bowl. Repeat procedure with other half of remaining mixture. Stir in reserved 2 cups lentil mixture. Garnish with 1 tablespoon sour cream and a cilantro sprig, if desired.

11 servings. (serving size: 1 cup)

Comments { 19 }

Input Request: Cleaning Stainless Steel cookware

I love using stainless steel, and not having to worry about the aluminum in most cookware these days that can seep into your food, but I haven’t been able to solve the problem of getting them fully cleaned. I have used a hard scrubby numerous time, soaked them, put them in the dishwasher, boiled with baking soda, etc. but the black stains still remain. Any suggestions? I have only had my set for almost 2 years and they already look like they have endured 10!

Secondly, is it possible to cook omeletes/crepes in stainless steel? I have not found a solution to them sticking terribly to the pan and ending in a lovely mess no matter how much oil I put in. I would love to hear anyone’s alternative to this! Do you use cast iron? If so, how do you season these pans? This is new to me.

Thanks!

It’s backwards day at Works for me Wednesday!
Comments { 36 }

Buttermilk Coffee Cake

img_1822.jpg

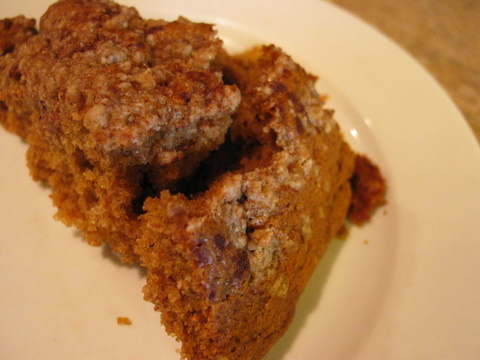
This is a light, yummy and healthy coffee cake to serve with a smoothie! I made it this morning with some more healthy changes and it was scrumptious.

Continue Reading →

Comments { 35 }

Sauerkraut update

For all of those who have been curious as to the current status of our homemade sauerkraut…I mark it a success! I tried it after 5 days or so, and it was quite flavorful. I let it sit another few days before putting it in the back of the fridge, until ready to use. For all of those who tried this recipe previously without success, may I suggest that you really must not like sauerkraut, because this is what it tastes like! I like it the most on a hot dog! Yum!

Comments { 3 }

Kitchen Tip: Save those peelings!

celery-leaves.JPG

Have you ever considered saving your carrot peels/tops, onion skins, leek tops, and celery leaves? I have found that these work splendidly in making stock lately! I simply have been saving these small items in a ziploc bag in the freezer until I am ready to make a batch of stock, and then I just throw them in, along with the chicken bones, water & vinegar (or whatever method you choose). I always hated throwing out the chopped carrots, onion, and celery in making stock (as most of the time recipes simply discard these), so why not save the peelings for a wonderful nutritious stock and not be wasting anything in the process. Save yourself time and money!

Other Resources:

Tips for Making Great Stock
Homemade Stock recipe and tips - by Stephanie @ Keeper of the Home
Broth is Beautiful – health benefits & helpful info by Weston Price Foundation

It’s Kitchen Tip Tuesday & Tipster Tuesday!
Comments { 15 }

Monthly Menu & Recipes

food.JPG

I have finally updated my monthly menu plan to include most of the recipes I use! Check it out here. I have not been sticking strictly to it though, as each day has it’s own surprises! I do like to stick to the dinner themes, but may rotate what soup I make for the week, etc. It is just so nice to know that I have all the ingredients on hand for any of the meals listed for the month, and can rotate them to whatever fancy I or my husband may like! I did discover that my husband prefers homemade pizza over stir fry this week (duh…Lindsay)! I have also been striving to limit my grocery run to once a month, but have only been successful with every three weeks as of yet. ;) We are on week 2 this week!

I would encourage you to consider making a monthly menu plan. Here are some of the benefits:

1. One time menu planning – or when you decide to change it (I like winter and summer menus)!
2. One time grocery list -After making your monthly plan, you just have to chart a simple shopping list with all the ingredients you will need for the recipes, and it doesn’t change! You can make copies or store this sheet on your computer, so you eliminate the need to write out a new list each week.
3. Keeps life simple! And I am all for that!

For more pointers, check out the Simple Menu Planning on A Budget post.

For more menu plans, visit Organizing Junkie.
Comments { 8 }