Guest post by Victoria Coombs from He Holds Everything.
If you’re anything like me there are many things in your home that are not being used but you are having a hard time just getting rid of it! Well, little did you know this is the perfect place to be! All you need is a little time – trust me, all I have is spurts of time with six kids running around. Here I will list 5 ways to up-cycle, or repurpose, things that are common to most homes.

Dry erase board from a picture frame
Supplies:
An old frame
Scrap paper or fabric
Dry erase marker to use with it
This one is super simple. Take the picture out of the frame, label desired scrap paper with list name –i.e. groceries- and put into the frame (or fabric pulled tight around the frames’ cardboard insert). Keep a dry erase marker nearby to add to your list. Dry erase marker can be erased using a paper towel or rag… honestly, I just use my finger.
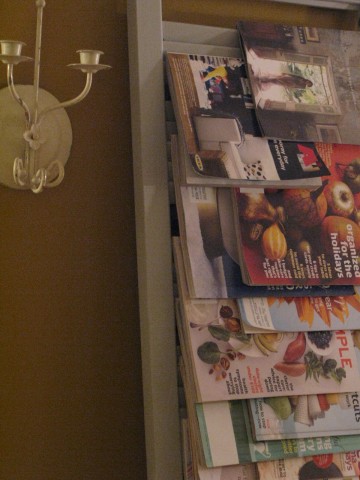
 Magazine Rack from a closet door
Supplies:
Plantation style bi-fold closet door (one section)
Paint
Magazines to hang on it
I got this idea from my amazingly creative sister-in-law. All you do is take one section of a plantation style bifold closet door, paint it whatever color you wish, and presto! You have a magazine rack to either lean against a wall or you can secure it to the wall to alleviate floor space. Either way, it’s a much welcome change from the days of having magazines piled high in a basket. Just slide half of the magazine through the slats and let it hang at the binding. This way, each cover is partially displayed for easy selecting.
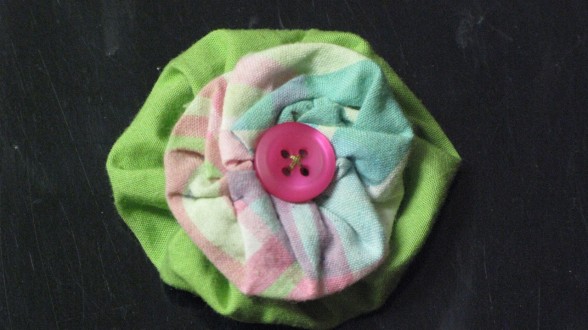
Yo-yo hair clips from old clothes
Supplies:
Old clothes (I used my daughters’ baby clothes that I adored the pattern of)
Buttons (from old clothes)
Scissors
Two sizes of circle templates – jar lid, CD, small plate, etc.
Sharpie marker
Needle
Thread
Contour hair clips – any clip will do, these are usually just lying around
Hot glue gun or fabric glue
There are definitely more details to these hair clips than to the other ideas, but once you make one you will see how easy it is and find yourself addicted to making them. Trace two circle templates (differing in size an inch or so) with your marker. Once you have cut out your circles, place them good side down. Start from the top of the fabric (bad side), insert your needle through to the underside, then back up to the topside. Do this all the way around the circle. When you get back to where you started pull your thread tight to synch the fabric. Then secure your thread by tying a knot and cutting. Repeat with next piece of fabric and layer them with synched side up. Place button over opening and sew button on through both fabric “flowers”. Secure contour hair clips to the flat side with glue at all corners and let dry.
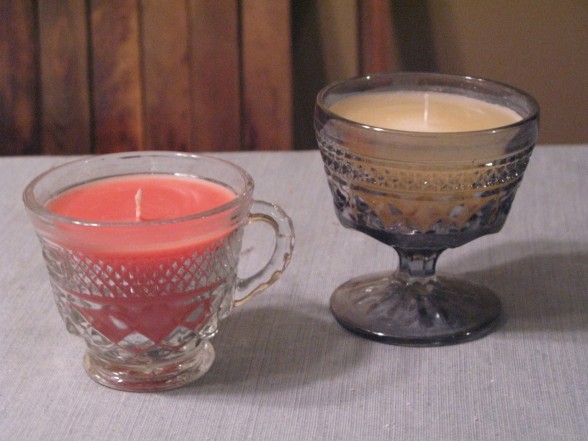
 Candles made from old candle remnants
Supplies:
Cute container – tea cup, jar, or any other cool hollow vessel
Old candle pieces
Tapered candles
Microwave safe container
Knife, or something equally sharp
Stir stick
Skewer
These are great for making your money stretch or as gifts. And you can personalize them to the receiver’s taste or décor! First cut the top part of the tapered candle a half inch smaller than the height of the container (the wick should still be taller than the container). Cut up the left over candles into chunks about an inch cubed. Place cubed wax pieces around the top of the tapered candle to hold it in place. Pack as tightly as possible. Put the remaining pieces of candle into a microwave safe container and place in microwave for thirty second intervals until completely melted. Tie wick of tapered candle around skewer, so that the skewer is resting across the top of your container (this holds the wick in place when the tapered candle begins to melt). Pour melted wax into the container until it reaches right about the top of the tapered candle. Let cool, and enjoy your new creation!

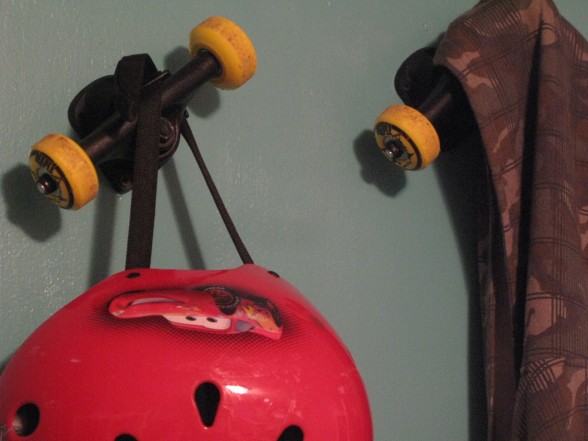
Wall hooks made from skateboard trucks and wheels
Supplies:
Trucks and wheels from a skate board
Screws
Screwdriver
This last one is a super simple idea for a boy’s room. Screw the trucks into the wall in whatever pattern you desire or just one by itself, and use it to hang jackets, backpacks, etc.
 Victoria Coombs is a wife to a wonderful husband. Mommy of six in a blended family. My passion is to learn something new every day about my Savior and the world around me. She blogs at He Holds Everything.

hi this is my first time to visit your blog and i like what you mention in the first paragraph. I can relate because I’m also like that.
I like what you do in the old door. You give me an idea to take care of my magazines that I keep on reading.
more power and keep it up!
I love these ideas! It took me a minute on the glass board also, but I’m so excited to try that one!
And this is a perfect post to share an idea I just saw recently. My aunt made a really neat cake stand out of my her mom’s old cup/dish set. It was so cute and was a way to see her set everyday out on her counter!
Here are some ideas: http://www.bing.com/search?q=make+a+cake++%22cake+stand%22+glue&go=&qs=n&sk=&form=QBRE
My own opinion, I like the clear ones best when making a single level stand – they show off the tier better. Aren’t they all so cute though?
Wow… I guess I haven’t had my coffee yet! I stared at the dry erase board for the longest time trying to figure out how you erase marker off of paper or fabric. After about 5 minutes I realized that the glass was there.
I LOVE the wall hooks! What a great idea. Thank you.
Very lovely ideas.
The cool magazine rack hooks me. Maybe I should give a try.
The Yo-Yo hair clip is exactly what I’ve done before. I used to do this a lot when I was younger.
Great ideas! Thanks for sharing
I’m already thinking of dozens of uses in our home school for the dry erase board: graphing practice, tracing letters, venn diagrams, number lines…and all I have to do is switch out the backing to a different template in the same board.
Thank you so much, Victoria! These are fabulous ideas. I would have never thought of these.
These are all great ideas. I especially like the erase board… Might just try it soon.
http://mamamiamcmasters.blogspot.com/2011/08/how-to-stop-on-line-flirter.html
Hi,
Love the frame idea.
Laura
Love the ideas! I made a picture frame wipe off board about a week and a half ago, and am loving it! 11×14 is a great size for me to put a 6 most important things to do list on and actually get it done. Off to find some skateboard parts.
Wonderful ideas! Love the magazine rack =]
I love your ideas! Would you like to link up to my blog hop about recycling/upcycling? I’d love to have you! http://www.woodwifesjournal.com I’ve kinda started a virtual group for those of us who can’t bring themselves to throw things away when there’s lots of use left in them.
Sharon – How do I link up?